Sometime last year, while browsing through the current Kickstarter campaigns, one page in particular caught my eye: a proposal for a better way to make fermented vegetables in small batches.
You may have run into this problem yourself: most recipes for sauerkraut, sour dill pickles and the like, are designed for huge batches, people with large kitchens or cellars, and certainly for people who consume fermented vegetables of a single type in far larger quantities than we do. Not to mention, for success, you either needed a special fermentation crock (beautiful, but I don’t have storage space for that in my city apartment) or you needed to rig up something a glass jar, shove the vegetables in, submerge them, and then attempt to keep the vegetables underneath the brine for the duration of the fermentation process (sometimes weeks), or you’d have mold and other spoilage issues. This meant filling plastic bags with water and tucking them in jar; placing plates carefully on top, held down by rocks or other heavy objects…
It was a mess.
And then along came Kraut Source. A beautiful, sleek solution using glass and stainless steel, and small enough to allow eager kitchen experimenters and fermenting veterans alike to experiment with small batches…even multiple small batches, of fermenting vegetables without filling out all available kitchen counter space.

Image courtesy of Kraut Source
I’ve had my Kraut Source since May, and have made multiple batches of sauerkraut and a few batches of sour dill pickles. I have been delighted each and every time by the ease of the whole process as well as the end result. I purchased just one jar during the campaign, and my only regret as that I didn’t buy multiples from the very beginning. They call it a “healthy addiction”, and it is! Fortunately, they have a lovely website where you can order the Kraut Source online.
Good thing – because mushroom season is here, and the same problem I’ve had with my fermented vegetables pops up if I want to preserve certain mushrooms. I can’t say how happy I am that this product exists.
I know this post sounds like a long marketing campaign for Kraut Source, but since I’m writing this voluntarily without compensation, please trust me when I say it’s a love story, instead. I can’t say enough good things about this kitchen tool. If you do any kind of fermenting, take a look at this product. You may just want a few for your kitchen as well!
About this recipe
Naturally fermented raw sauerkraut is an excellent source of important probiotics that help to maintain healthy gut bacteria. Raw sauerkraut contains lactic acid and living probiotic organisms that are created through the fermentation process, and which are heat sensitive and are killed if the sauerkraut is heat processed. Many of the store-bought sauerkraut options are canned or heat-processed in some way, so while they may still taste good, they are no longer a living food and do not provide the beneficial bacteria that raw sauerkraut does. For this reason, it is preferably to buy raw sauerkraut, or make your own in small batches for maximum benefit.
What does sauerkraut do for you, exactly?
Sauerkraut can be made of two simple ingredients: cabbage and salt. At the beginning of the fermentation process, the salt preserves the cabbage to prevent if from rotting, allowing the fermentation process to begin – a process that begins after only a couple of days. During the process of fermentation, starches and sugar in the vegetables are converted to lactic acid, or probiotic bacteria, a naturally occurring substance that prevents the formation of harmful bacteria and acts as a preservative.
These probiotic bacteria are extremely helpful in aiding human digestion and in helping our bodies detox. They have been used for centuries in traditional food cultures as a way of preserving the harvest and providing needed nutrients, and even by sailors to prevent scurvy.
A healthy body begins with a healthy gut, and probiotics are your gut’s best friend. Probiotics can also be found in yogurt, kefir, chocolates and probiotic tablets, all of which introduce important lactobacilli to our gut; however most of these contain dairy. For those people wishing to avoid dairy or with lactose sensitivities, raw sauerkraut is an excellent alternative.
Benefits of sauerkraut:
- important source of probiotics for gut health
- help the body detox
- excellent source of dietary fiber, vitamin C, vitamin A, and vitamin K
- good source of iron, manganese, magnesium, copper, sodium and calcium
- excellent for digestive, heart, eye and skin health
- anti-inflammatory
- boosts immune system (35% RDV of vitamin C)
source: www.organicfacts.net
About Turmeric
Turmeric is a root vegetable native to India and China, and has been long been used for its medicinal qualities. Bright yellow-orange in color, slightly peppery and bitter in flavor, it is most commonly seen in curry powder and as an ingredient in ball park mustard. But more important are the health benefits it provides.
Turmeric qualities:
- it is anti-inflammatory
- excellent source of iron and manganese
- good source of vitamin B6, dietary fiber and potassium
- has been used effectively in cancer treatments
- helps prevent gas when cooked together with legumes
- used in treatment of a variety of health issues including cardiovascular disease, rheumatoid arthritis, and high cholesterol
Source: whfoods.com
Are ready to make your own raw sauerkraut by now? You’re gonna love this stuff.
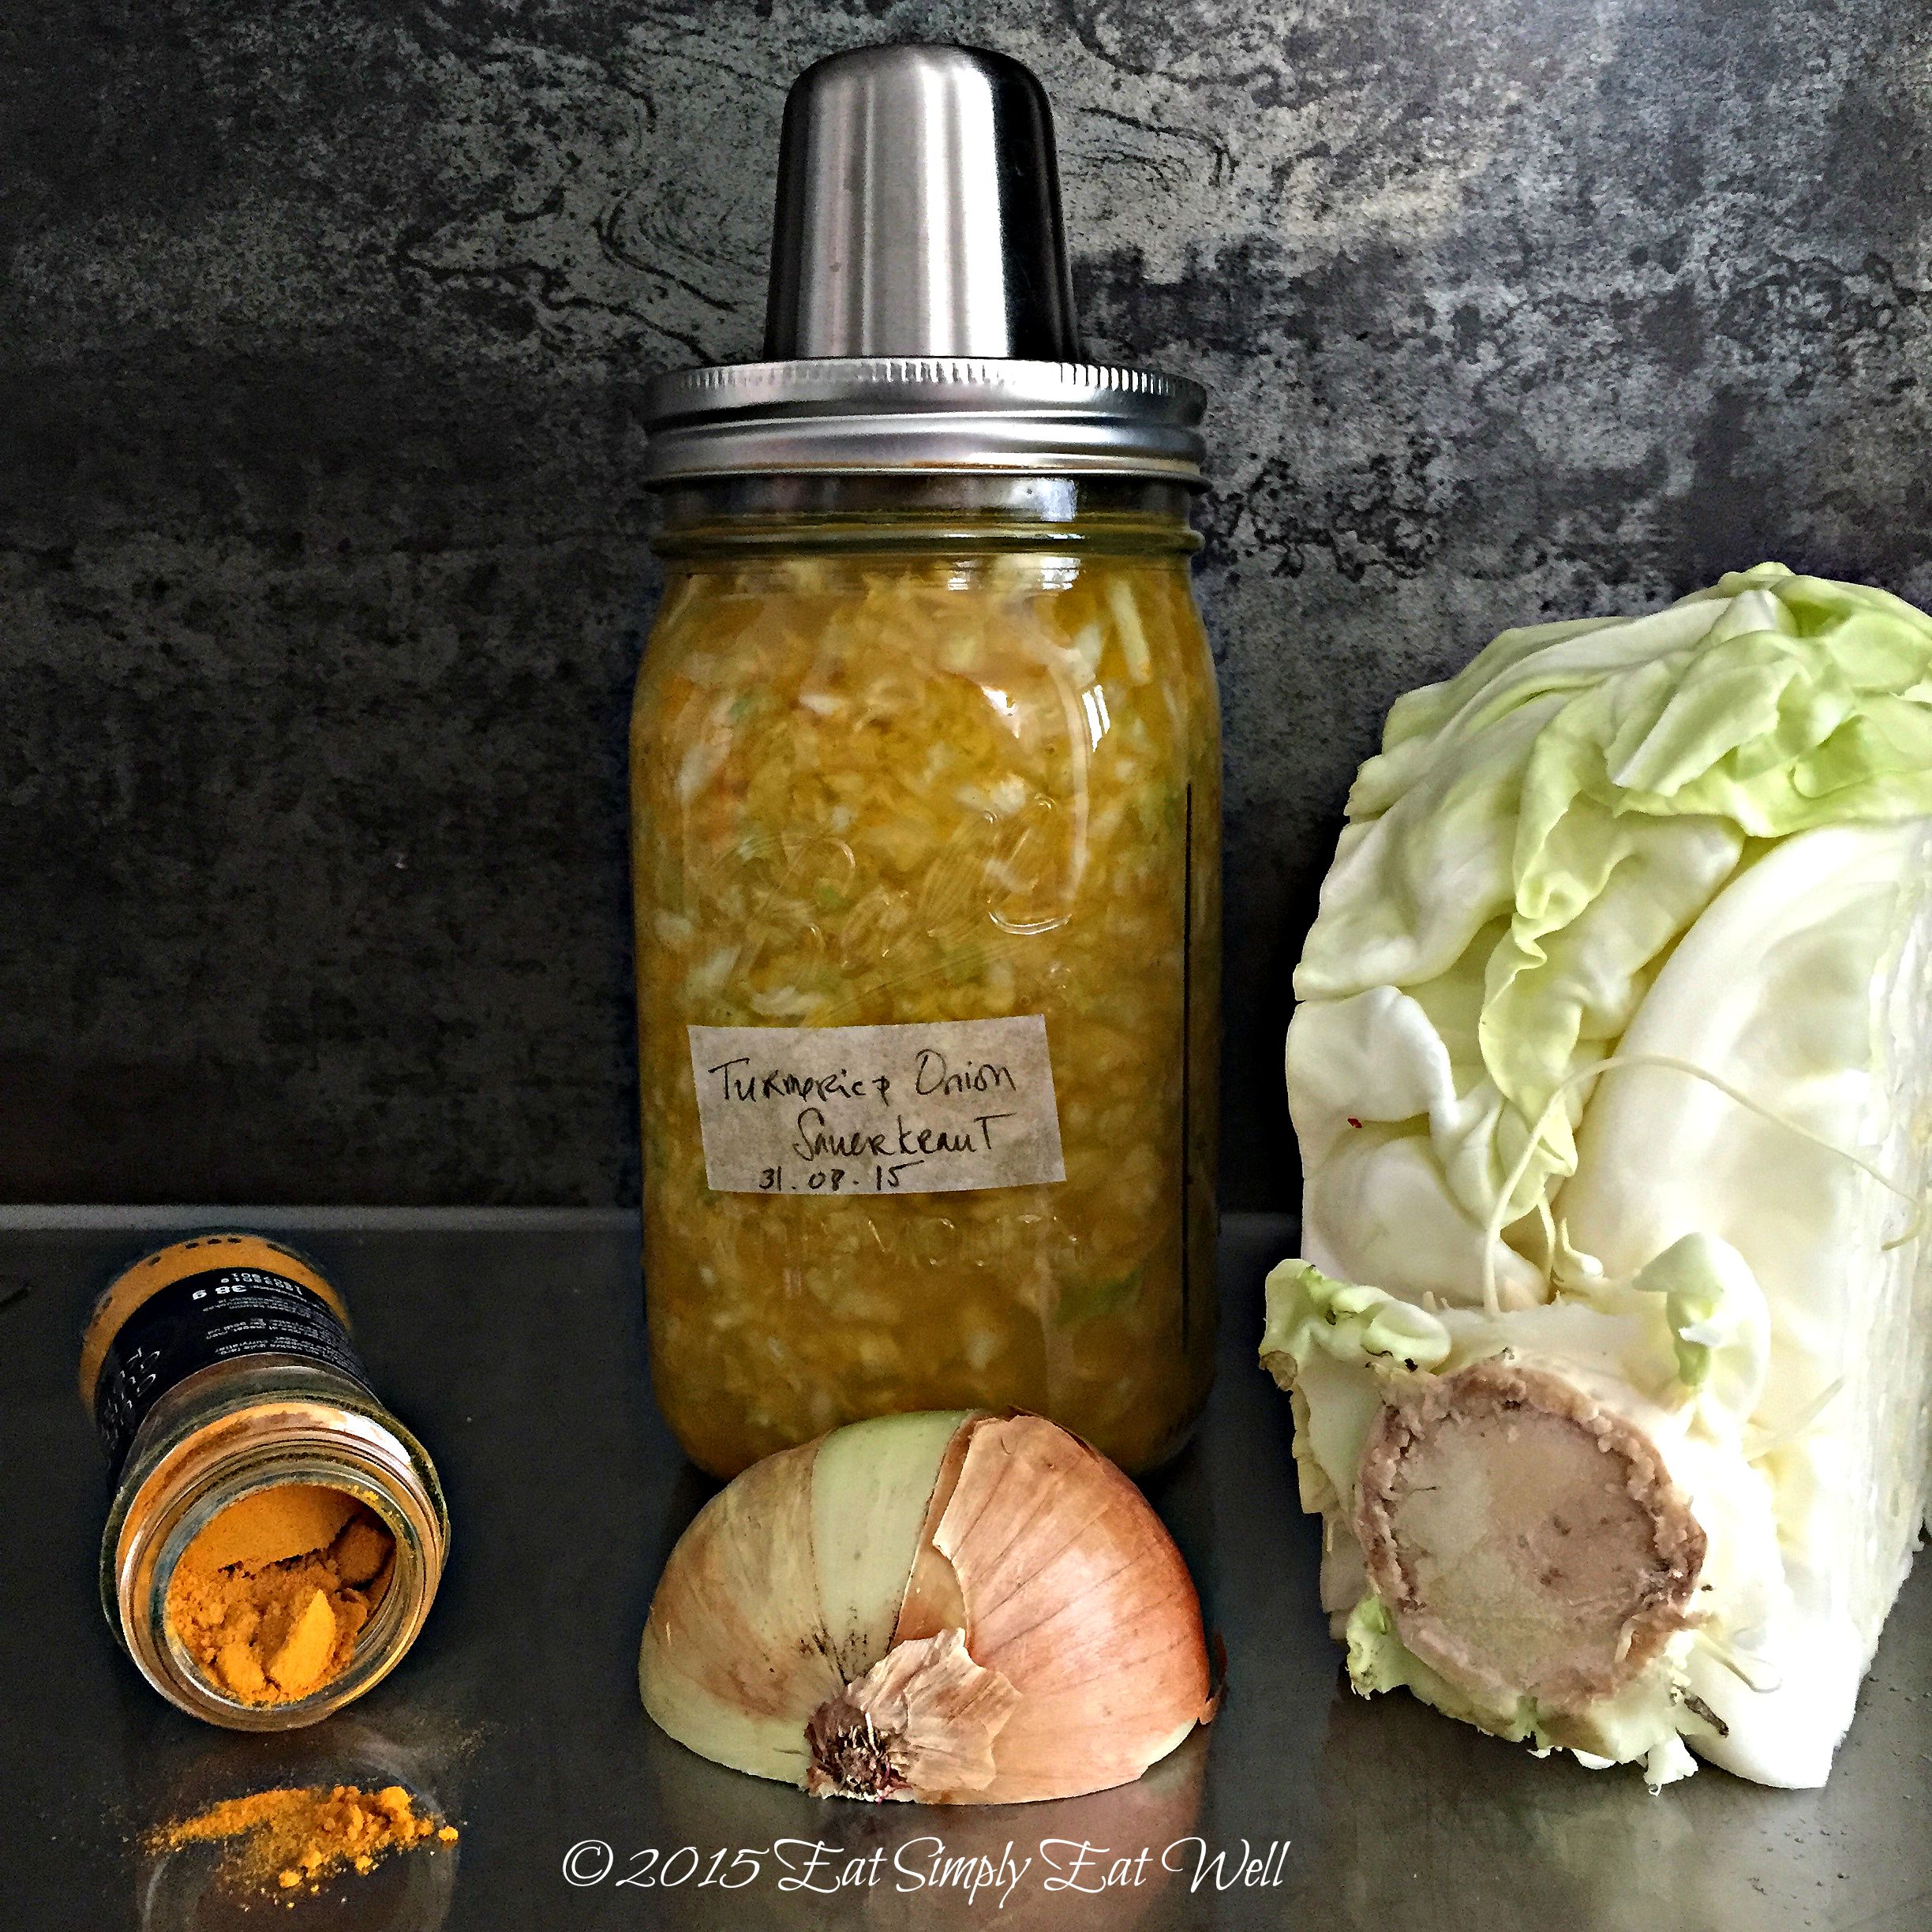
Turmeric Onion Sauerkraut
- 1.5 lbs/700g green cabbage, sliced thinly
- 1/2 yellow onion, diced small
- 1 tablespoon sea salt
- 1/2 tablespoon turmeric
Note: You may want to use kitchen gloves when handling this sauerkraut. Turmeric tends to stain everything it touches, so your hands will stay yellow for days.
Combine all ingredients in a large stainless steel mixing bowl. Using your hands, massage the cabbage for about 5 minutes to tenderize it. Allow the mixture to rest for 30 minutes in order to let the salt draw the water out of the cabbage. Pack it into your Kraut Source jar or crock, pushing the cabbage down so that the liquid covers the vegetables. Secure the lid per the Kraut Source instructions; or if using a fermentation vessel, follow those instructions; or alternatively, check these instructions here.
Set the jar out of your way and out of direct sunlight to ferment for 3 weeks. You may want to place the jar in a shallow bowl or on a plate for the first week as it tends to bubble and sometimes spills over. After 3 weeks, taste the sauerkraut. If it tastes just the way you want it, transfer it to another glass jar with a lid and store in your refrigerator for up to several months. If you’d like it to be more sour, replace the lid and continue to ferment for several more days/week.
Makes 1 quart / 1 liter.
For additional recipes, try these:
- Kraut Source Recipes
- Wild Fermentation web site by Sandor Katz
- The Punk Domestics website and community
Did you like this recipe? What are you fermenting in your kitchen right now? Let us know in the comments below! We’d love to hear from you.