Eat Simply, Eat Well

Healthy recipes & tips to help you live the good life. by Ann Plough

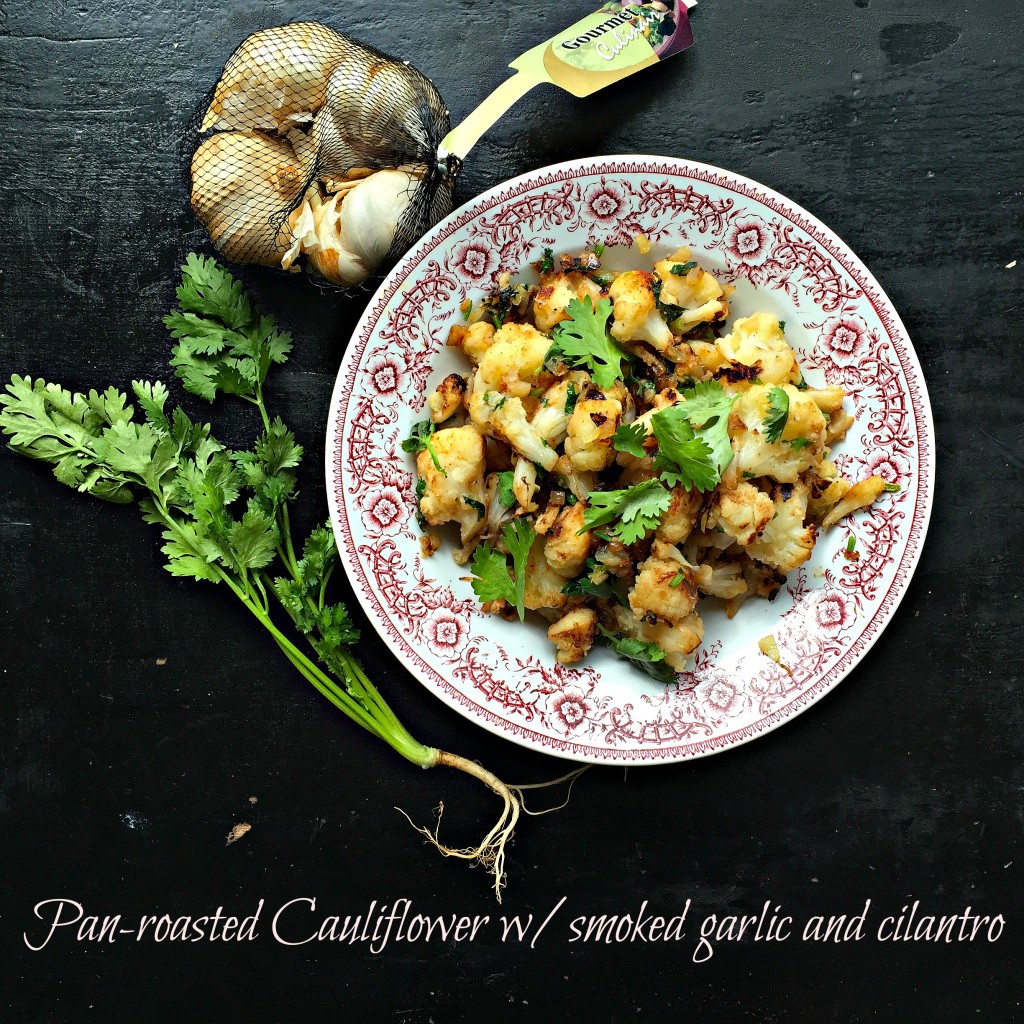
Pan-roasted Cauliflower with Roasted Smoked Garlic and Cilantro

May 21, 2015 by aplough

pan-roasted-cauliflower-garlic-cilantro

Here is a dish loaded with flavor that can be made ahead and refrigerated or served immediately. This pan-roasted cauliflower can be made as easily with frozen cauliflower as it can with fresh, with no compromise in flavor whatsoever. Serve it hot, straight from the pan, or cold; or reheat it as suits you. It makes a great side dish for any meat dish or alongside flavorful lentils or beans; it pairs well with a meat burger or a veggie burger; and really shines on a plate full of a variety of vegetables and salads – so make a huge pan and bring it to your next potluck.

If you don’t have smoked garlic, no stress. Just use fresh garlic as noted in the recipe, but less of it, and serve this dish up with pride. Or if you’re like me, you’ll dip your fork in again over and over until suddenly there is none to share but you are feeling inexplicably satiated and happy, and considering how soon you can make it again.

Pan-roasted Cauliflower with Smoked Garlic and Cilantro

  • 1/2 head fresh cauliflower cut into florets or 500g frozen cauliflower
  • 1 yellow onion, diced
  • 1 head smoked garlic, roasted (see note) or 6 cloves fresh garlic, minced
  • 1/4 cup fresh cilantro, leaves and stems chopped
  • 1/2 teaspoon salt
  • 1/4 teaspoon freshly ground black pepper
  • 1/8 teaspoon ground Cayenne pepper
  • 2 teaspoons lemon juice

Heat 1 teaspoon of oil in a pan over medium-high heat.  Add the onions and cook until the onions are soft and translucent. Add the cauliflower.  If using fresh cauliflower, add 2 tablespoons of water.  If using frozen cauliflower, no water is needed. Cover the pan with a lid and cook for 5 minutes. Remove lid and allow the cauliflower to continue to cook and the liquid to evaporate.  Use a spatula to flip the cauliflower occasionally as it begins to brown and crisp.

Once the cauliflower is nice and crisp, 5-7 minutes, remove from heat and stir in salt, roasted, smoked garlic and cilantro. Sprinkle with lemon juice and serve.

Serves 2-4 as a side dish.

Note: To roast the garlic, preheat oven to 200°C/400°F. Wrap an entire head of smoked garlic (or use normal garlic if you can’t find smoked) in aluminum foil. Place in the oven and bake for 40 minutes. Remove; allow to cool; then squeeze each of the garlic cloves out of their paper shell onto a plate. Roughly chop the garlic. If you are in a rush, you can simply chop the garlic and add it to the pan once most of the liquid has evaporated from the cauliflower. You won’t get the same depth of flavor, but it will be delicious nevertheless. You can also use regular garlic if you can’t find the smoked version for a slightly different flavor profile.
Filed Under: Appetizers, Sides Tagged With: cauliflower, cilantro, vegan

Asparagus Mozzarella Bruschetta w/ Fried Eggs

May 12, 2015 by aplough

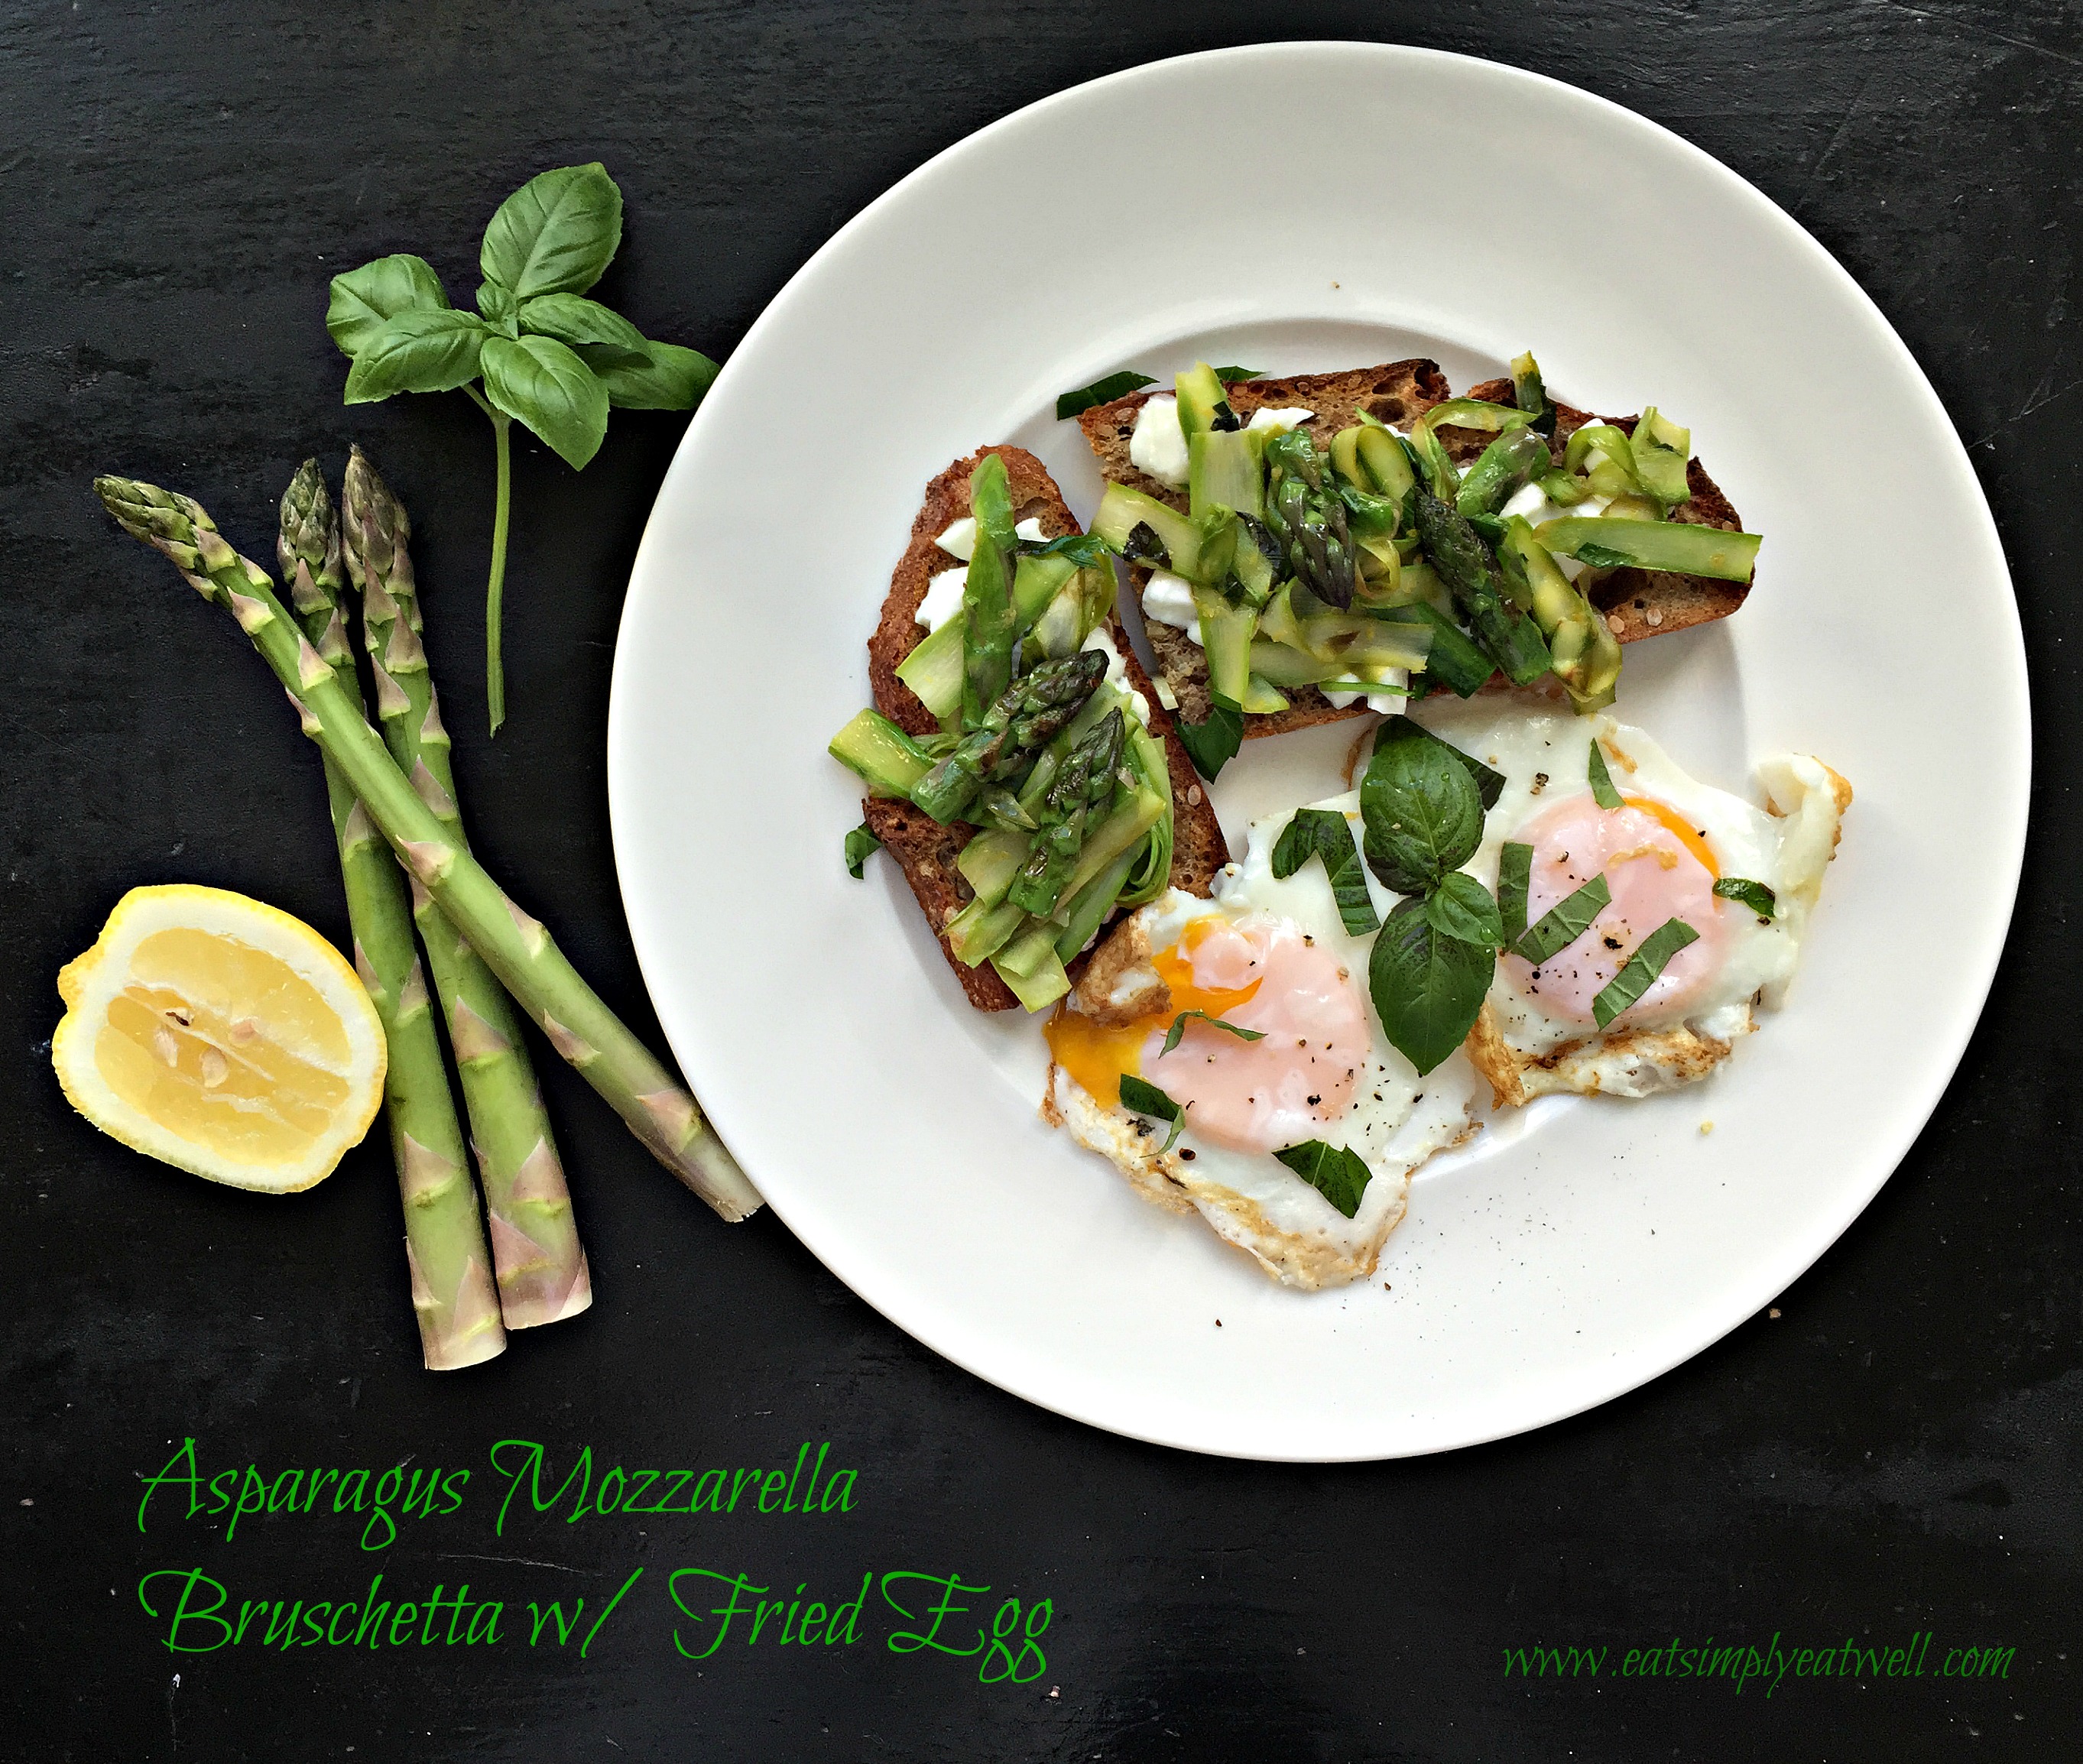
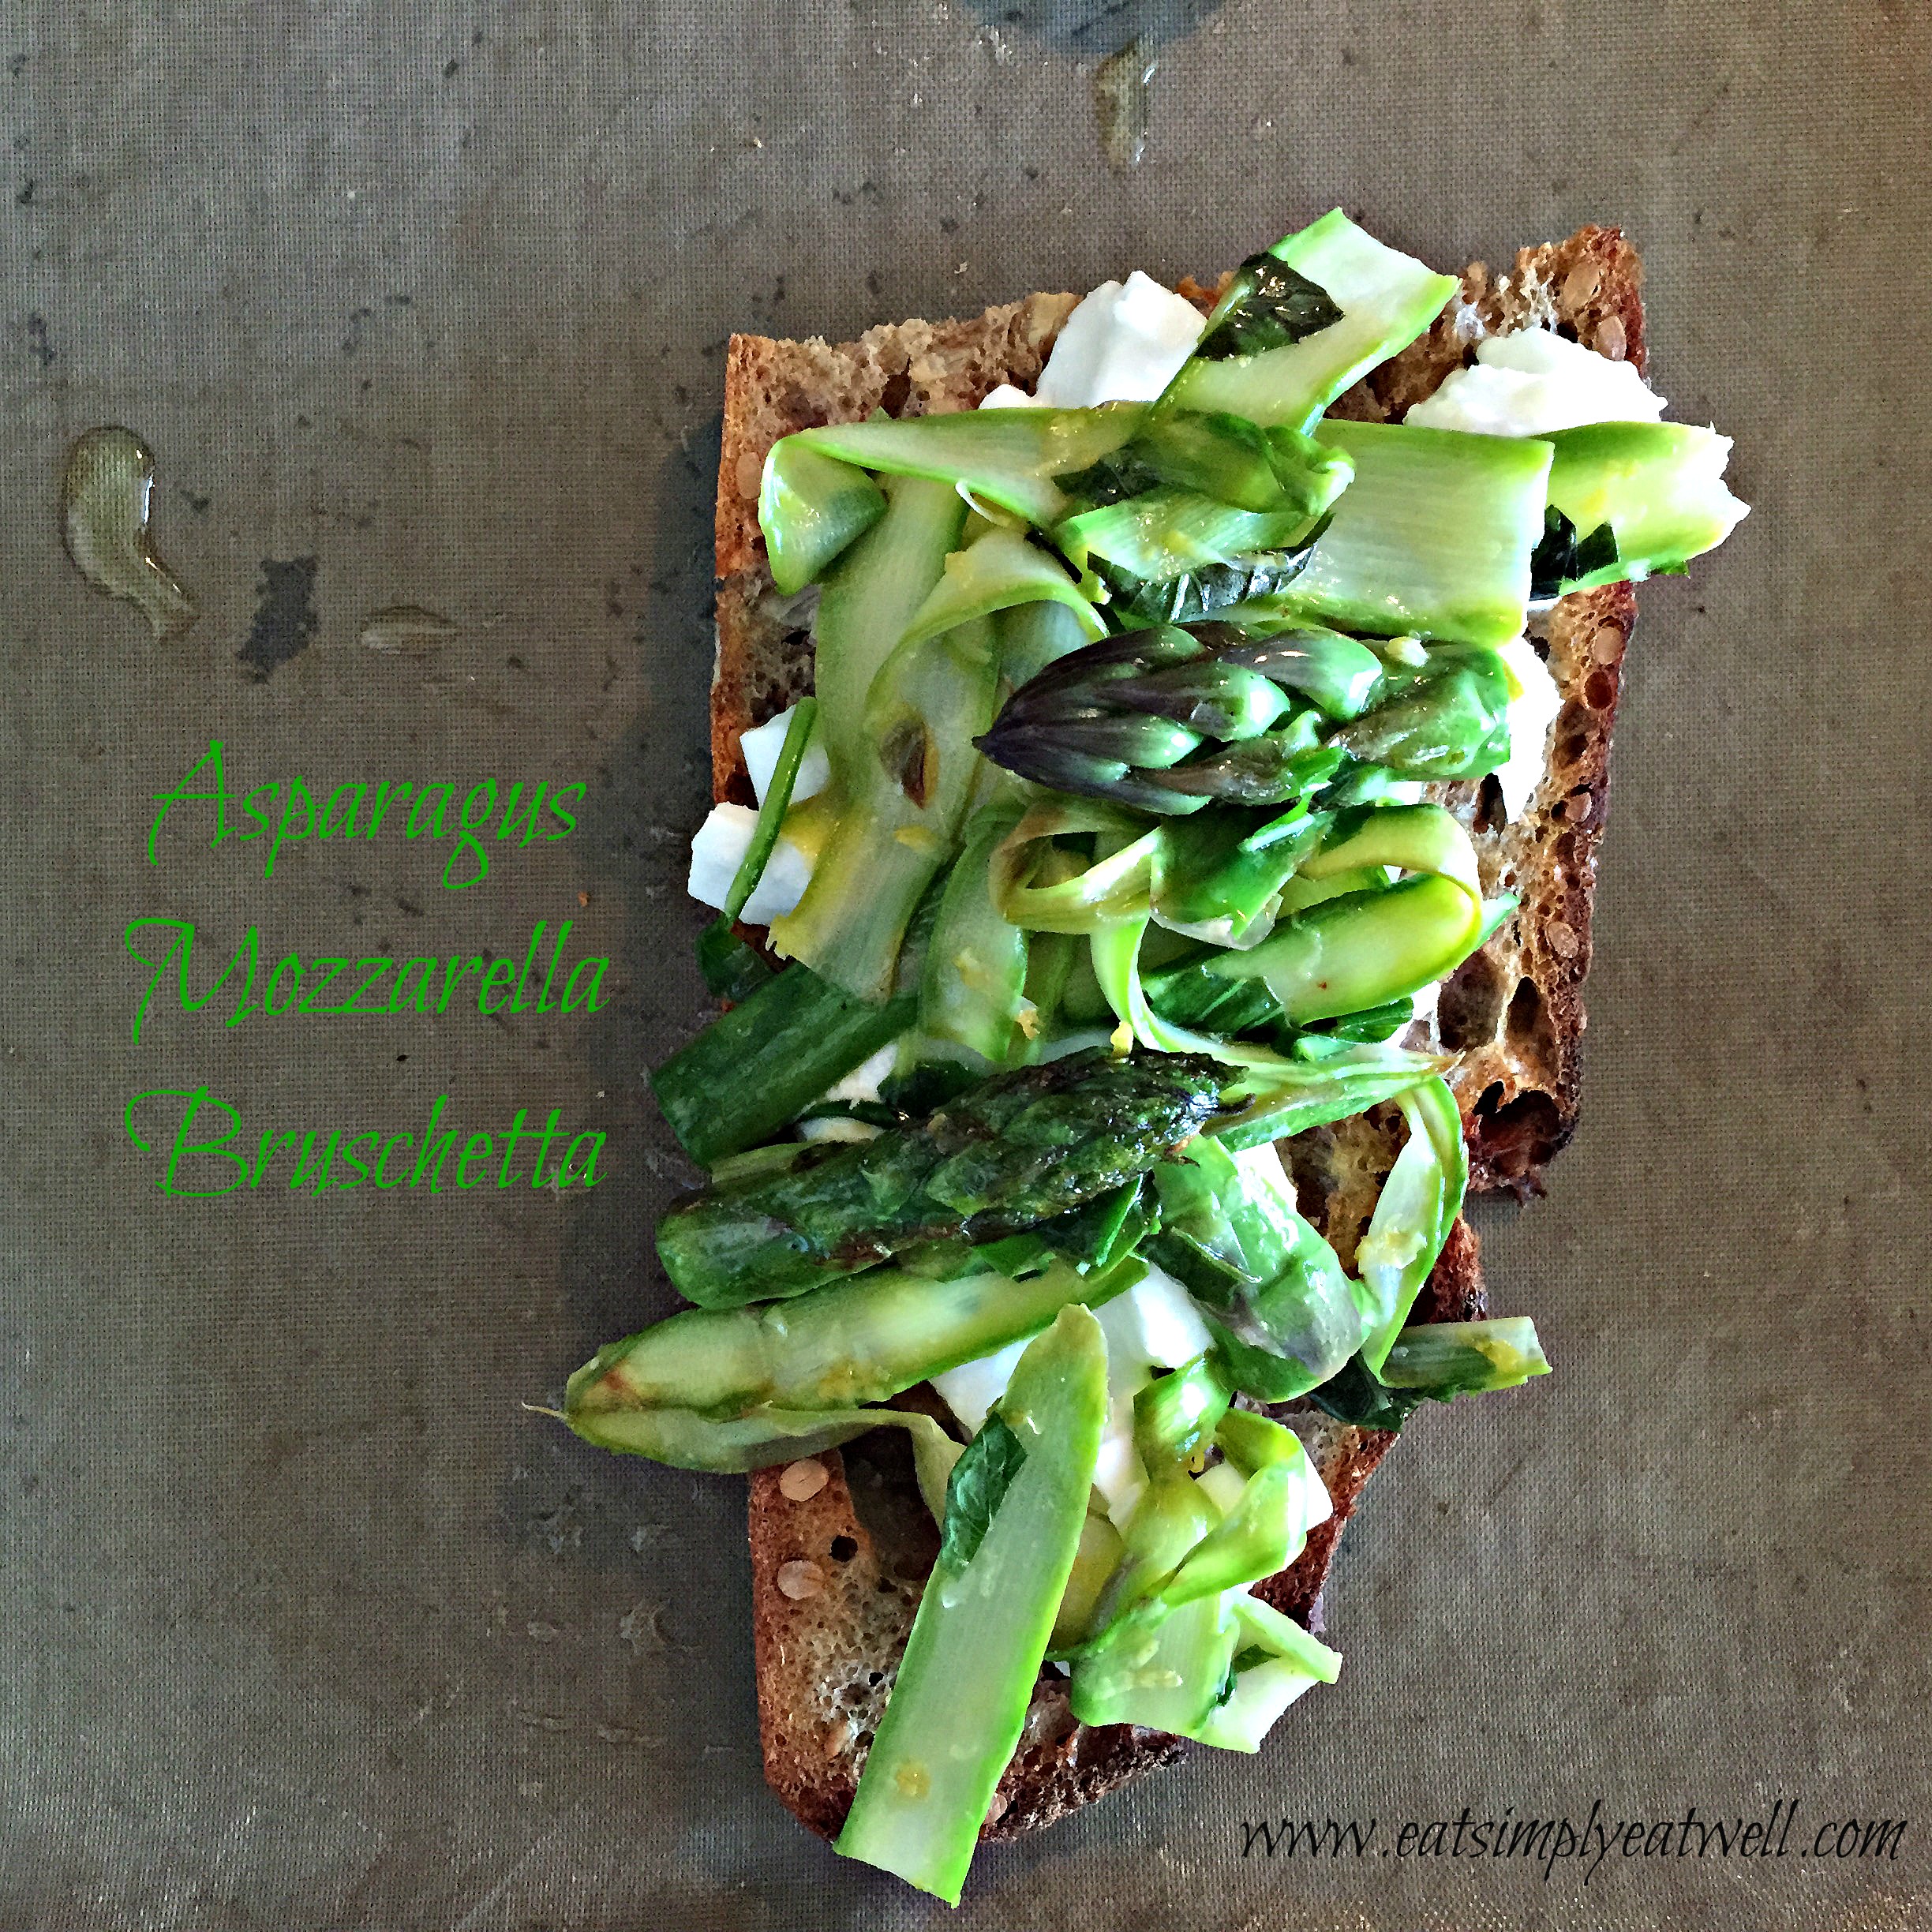
Asparagus-mozzarella-bruschettaWe popped into a local restaurant on a long walk last week to check out what they were serving and to see if by any chance they had open spots for Sunday (they didn’t – Mother’s Day was, not surprisingly, sold out). The manager walked us through the special of the month: the Asparagus Week buffet.

As I read down the list, I kept thinking: I can make these at home. Asparagus! Now there’s a seasonal vegetable to take advantage of. Stockmann had asparagus on a special sale, and while our local asparagus isn’t available yet, I bought a couple of bunches and brought it home for kitchen experimentation.

First up were these super simple but ultimately delicious Asparagus Mozzarella Bruschetta. Here’s a dish that is literally 15 minutes from start to finish. Turn your oven on. Shave the asparagus while the oven heats up. Rub garlic on bread and drizzle olive oil. Pop bread in oven. Cook asparagus. Pull bread out. Assemble. Bread back in oven. Fry Eggs. Plate. Serve.

If shaving asparagus into thin ribbons seems like too much work – trust me: it’s worth it. You’ll know exactly why when you take your first bite.

Go get your hands on some asparagus. These are delicious. Breakfast? Lunch? Dinner? Snack? Take your pick. There’s no time of day when you’d be sad to be sitting in front of this plateful.

Asparagus-mozzarella-bruschetta-egg-com

Asparagus Mozzarella Bruschetta w/ Fried Eggs

Preheat oven to 200°C/400°F. Line an oven pan with parchment paper.

  • 4 slices artisan bread; I prefer whole wheat sourdough
  • 1 large garlic clove, peeled and sliced in half
  • olive oil
  • 8 asparagus spears
  • zest of 1/2 lemon
  • juice of 1/2 lemon
  • 1/4 teaspoon salt
  • 2-3 grinds fresh black pepper
  • 8-10 basil leaves, julienned
  • 1/2 ball buffala mozzarella, diced
  • 4 organic eggs

Lay the bread out on the pan and rub the surface of each with 1/2 garlic clove (you should use up the entire clove in this process. Drizzle the bread slices with olive oil and place in the hot oven. Set the timer for 5 minutes. If the timer rings before the asparagus is done, check to see if the bread is toasted to a golden brown. If it is, pull the pan from the oven and set aside until you are ready to assemble the bruschetta. (It may need more time: oven temperatures and bread thickness varies, so do check it and put it back in if needed).

Cut the tough ends off of the asparagus spears and discard or save for vegetable broth. Cut off the tips and reserve. Using a vegetable peeler, shave the asparagus spears into long, thin ribbons. Heat a frying pan over medium high heat and add 1 tablespoon olive oil. Mince the remaining garlic clove half and add it to the pan. Stir briefly until the garlic just begins to brown. Add the asparagus, lemon zest and juice, salt and pepper. Cook the asparagus shavings until the just begin to soften. Remove from heat, stir in the basil, and transfer the asparagus to a plate.

Return the pan to the heat and add more oil if needed. Add in the asparagus tips and cook until crispy. Remove the asparagus spears from the pan.

Reduce the heat under the pan to medium. Carefully crack in 4 eggs into the pan. Let the eggs cook briefly until the white just begins to set around the edges. Carefully pour in about 3 tablespoons of water and cover with a lid to steam the eggs.

While the eggs cook, assemble the bruschetta. Divide the buffala mozzarella evenly between the four slices of bread. Arrange the asparagus shavings over the top and arrange two asparagus tips on the top of each bruschetta. Return to oven for 1 minute. By this time, your eggs will be done.

Serve 2 for a main course or 4 as a starter.

Love it? Comment below and Share it forward!

Filed Under: Appetizers, Main Course, Meatless Monday Tagged With: asparagus, bruschetta

Just Eat It: Za’atar Eggplant Crisps with Yogurt

May 5, 2015 by aplough

This recipe is a classic case of planning one thing and ending up with something much, much better.

It all started with small video clip that I can’t get out of my mind: a man standing behind a giant pile of beautiful, yellow bananas, all perfectly edible, with a big note saying “rejected” on them – rejected because they are the wrong shape or size per supermarket regulations. What led us to this place where perfectly good food gets tossed away because it’s not cosmetically perfect?

This led me down a new trail to researching food waste.  I had been perusing food news as I often do – winding down just before bed.  I came across something I had somehow missed until just now: a trailer for a documentary that aired on April 22nd for Earth Day by a Canadian couple Jen Rustemayer and Grant Baldwin. The film, Just Eat It covers a year in the life of the couple as they spend the year eating only food that would otherwise be thrown away and researching the why, how and where of the incredible amount of edible food that is simply thrown away every day. The statistics shared in the short clips I saw made me want to get my hands on the entire documentary so that I can watch and learn a whole lot more. Take a look:

Here are a few highlights from the clips that made me think again about the value I place on food and ideas we all have about what constitutes good food vs. less appealing or inedible:

  • 40% of the food grown in America gets thrown away (btw: in the UK the number is estimated to be 50%)
  • 30% of the food grown in America gets thrown away at the farm – for cosmetic reasons: too large; wrong shape; minor defect (i.e. slightly different color on skin or growing mark)
  • the average American family throws away 25% of the food they purchase – a fact brought home with a clip of a woman leaving a grocery store with 4 grocery bags, dropping one from her hand, and continuing to walk on…
  • food wasted in grocery stores and restaurants mostly doesn’t get composted – it ends up on the landfill, where it proceeds to release methane gas into the atmosphere
  • 15 million American families struggle to get enough food every month

All this combined with things we may already be aware of: the world has a water crisis; climate change heavily impacts the ability to grow and store food in many parts of the world; the world’s major health problems are mostly diet-related – caused in many cases by eating food that is highly processed with a shelf life of “nearly forever” – implying that some of the food being wasted could be used to replaced the unhealthy stuff in people’s homes so that they could make better choices.

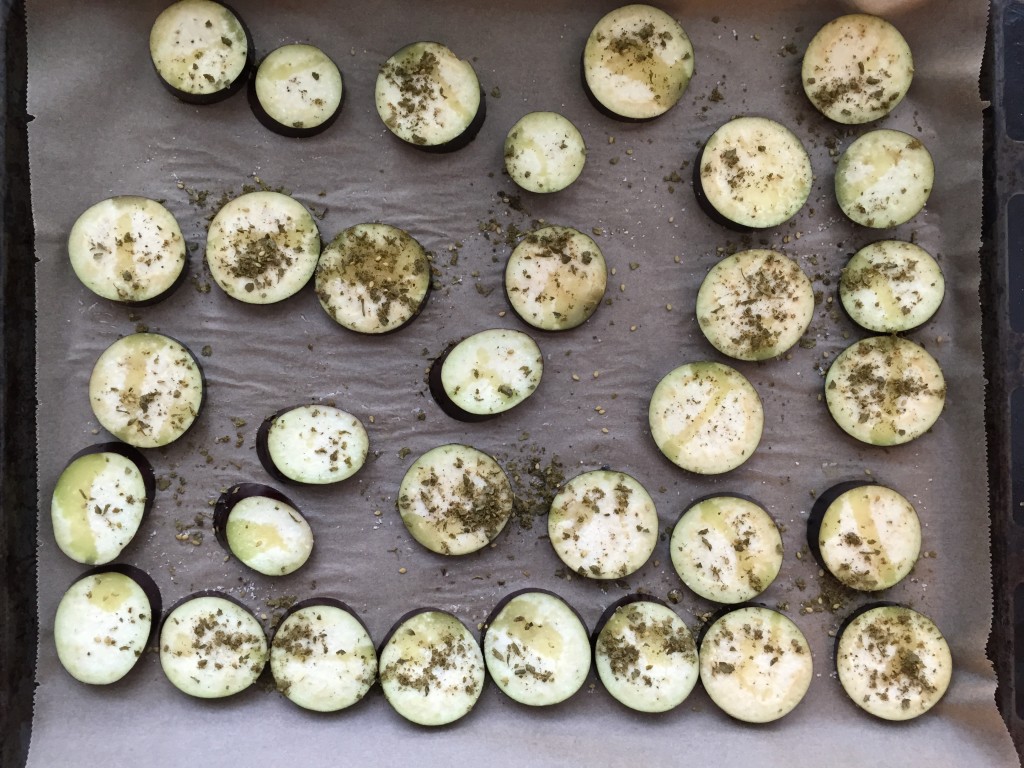
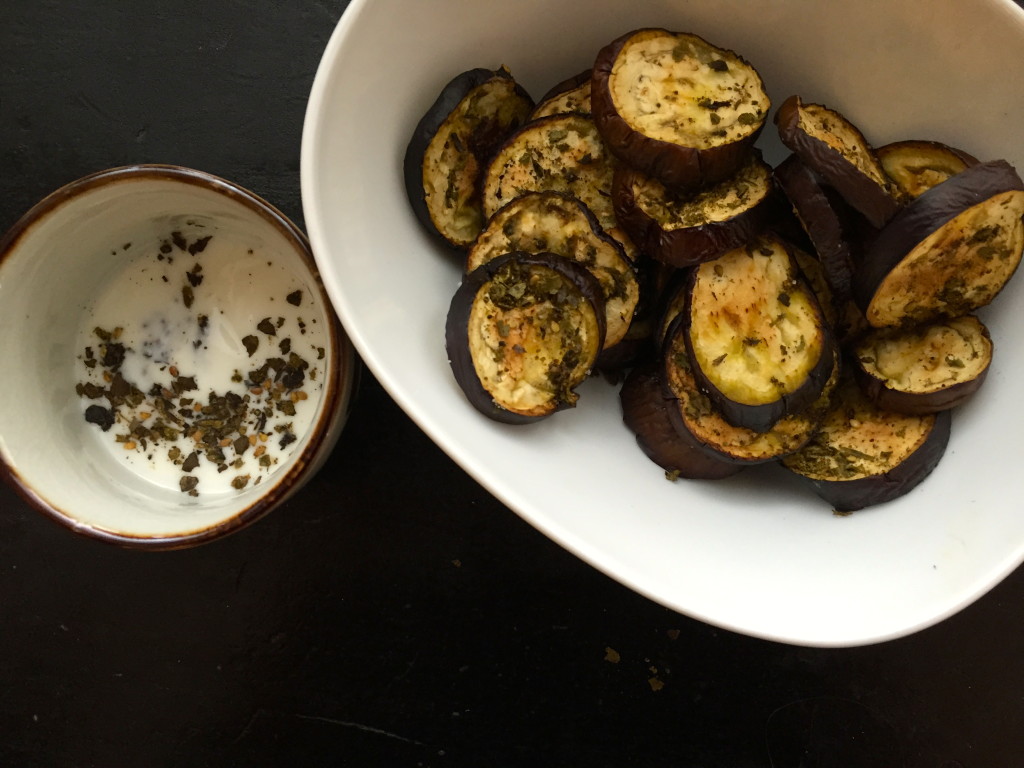
eggplant slices ready for the oven

eggplant slices ready for the oven

So I turned on the oven and went about making eggplant into something I thought I’d add to dinner, later. But as ‘way leads on to way’ (Robert Frost), I turned a corner when I pulled out the Za’atar and serendipitously created a snack I’ll be coming back to again and again.

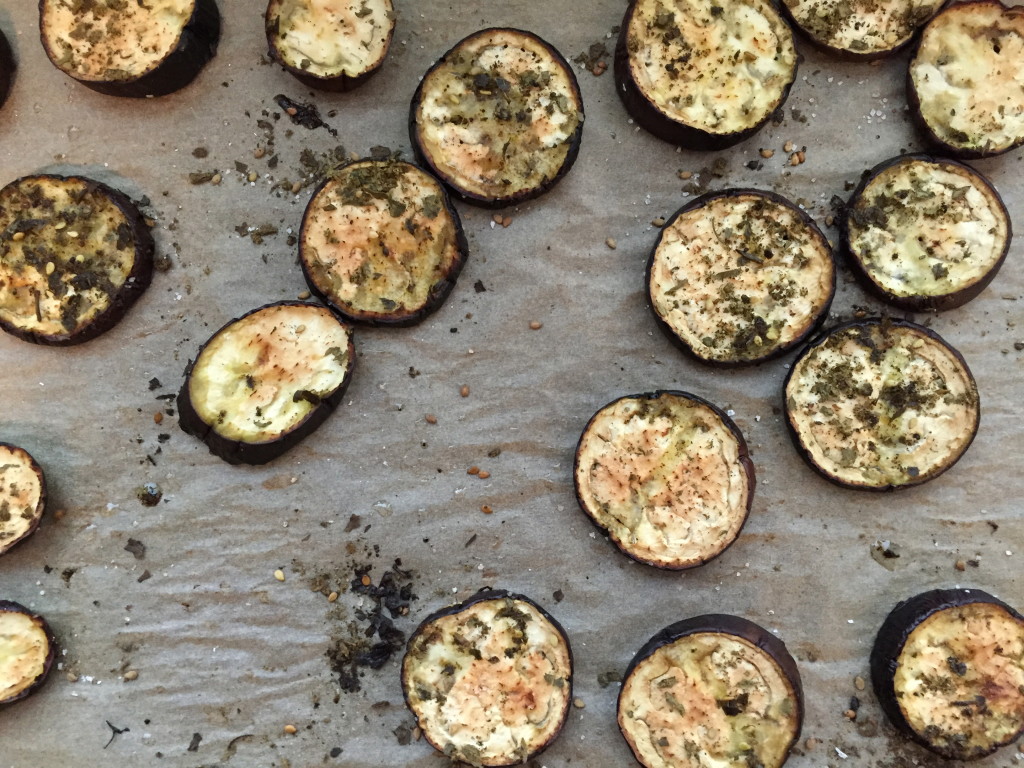
Eggplant slices after roasting

Eggplant slices after roasting

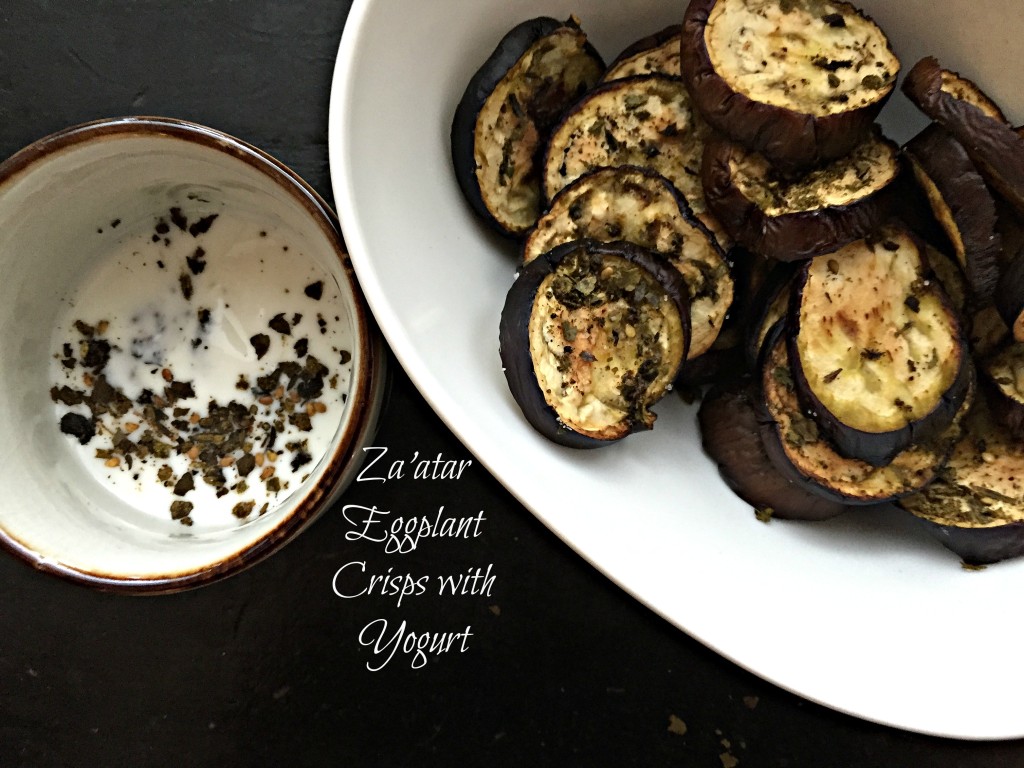
So pull out a knife and your small, ripe eggplants, and get cooking. These are amazing and eggplants are really good for you. The eggplants are cooked to the point where they just begin to dry out but are still pliable.  The savory combination of salt, olive oil and Za’atar coupled with the smooth, tart yogurt is simply perfection. And you don’t need to wait until your eggplants are on their way out, either: just choose the smaller, younger eggplants so they aren’t bitter, and get cooking!

 If you’re interested in learning more about Food Waste, solutions being implemented, and what you can do, here are some resources:
  • Jonathan Bloom’s website Wasted Food
  • Jen and Grant, creators of the Just Eat It film, have a blog: Clean Bin Project
  • Kudos to the city of Seattle: it’s now against the law to throw food in the trash
  • Food Rescue in DC is using food that would be wasted to feed those who need it
  • France gets rid of “best by” label on dry food goods and has appointed a committee to reduce food waste nation-wide
  • in the UK: WRAP is working on providing information, programs and influencing policies that impact food waste
Ready for dipping

Ready for dipping

Za’atar Eggplant Crisps with Yogurt

3-4 small eggplants, ends removed and sliced to 1/2″ or 1 cm

1 tablespoon Za’atar*

salt to sprinkle

olive oil to drizzle

1/2 cup Turkish or Greek yogurt (low-fat works great too)

Preheat your oven to 200°C/400°F.  Line a baking sheet with parchment paper

Lay the eggplant slices out on the baking sheet and sprinkle lightly with salt.  Drizzle olive oil over the slices, and then sprinkle each slice generously with Za’atar.  Bake for 20 minutes. Remove from oven, cool slightly, and serve warm with yogurt that’s been sprinkled with additional Za’atar, if desired.

Serves 4 as an appetizer

 *Note: you can buy Za’atar from spice shops and grocery stores, or you can make your own. Try this recipe or this one.
 Looking for other eggplant recipes? Try these:
  • Baked Eggplant with Tomato, Red Lentil and Herb Sauce
  • Roasted Eggplant filled with Savory Vegetable Medley
  • Grilled Zucchini and Eggplant with Lemon Mint Yogurt Dip

Did you like this post? What are your thoughts on food waste or how to make better use of the food you buy? We’d love to here from you! Go ahead and leave a comment below and share this with your friends.

Filed Under: Appetizers, Sides, Snack Tagged With: meatless, vegetarian

  • « Previous Page
  • 1
  • 2
  • 3
  • 4
  • Next Page »

Find me on social media

  • Bloglovin
  • Facebook
  • Instagram
  • Pinterest
  • Twitter

Looking for something?

Eat Simply, Eat Well 's gallery on Punk Domestics
  • Bloglovin
  • Facebook
  • Instagram
  • Pinterest
  • Twitter

Copyright © 2025 · Foodie Pro Theme by Shay Bocks · Built on the Genesis Framework · Powered by WordPress