Eat Simply, Eat Well

Healthy recipes & tips to help you live the good life. by Ann Plough

Tomato Cheddar Pie

July 14, 2016 by aplough

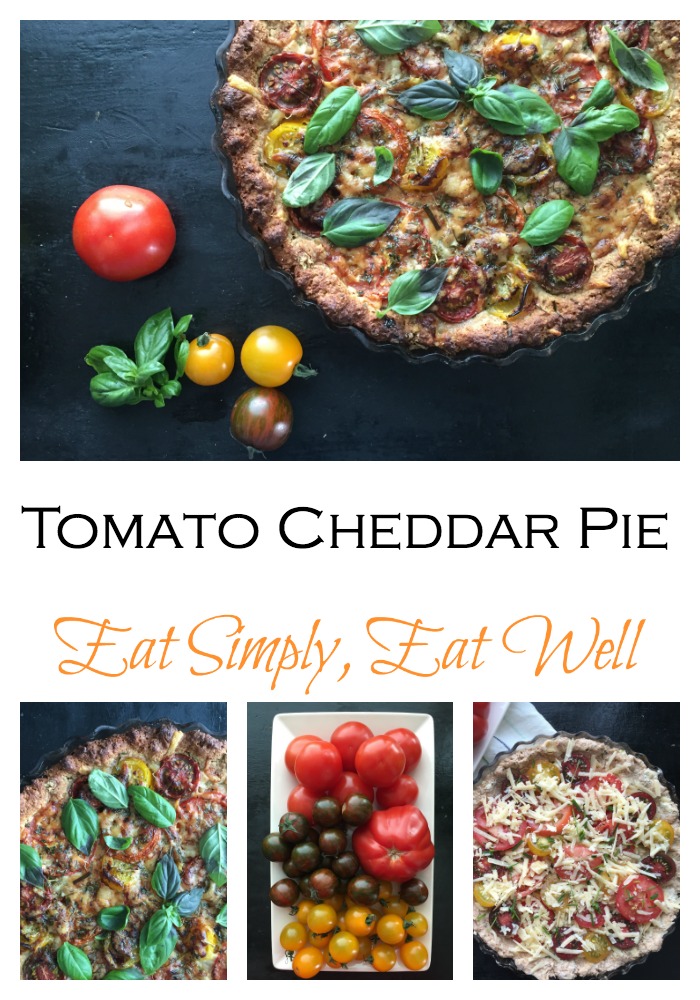
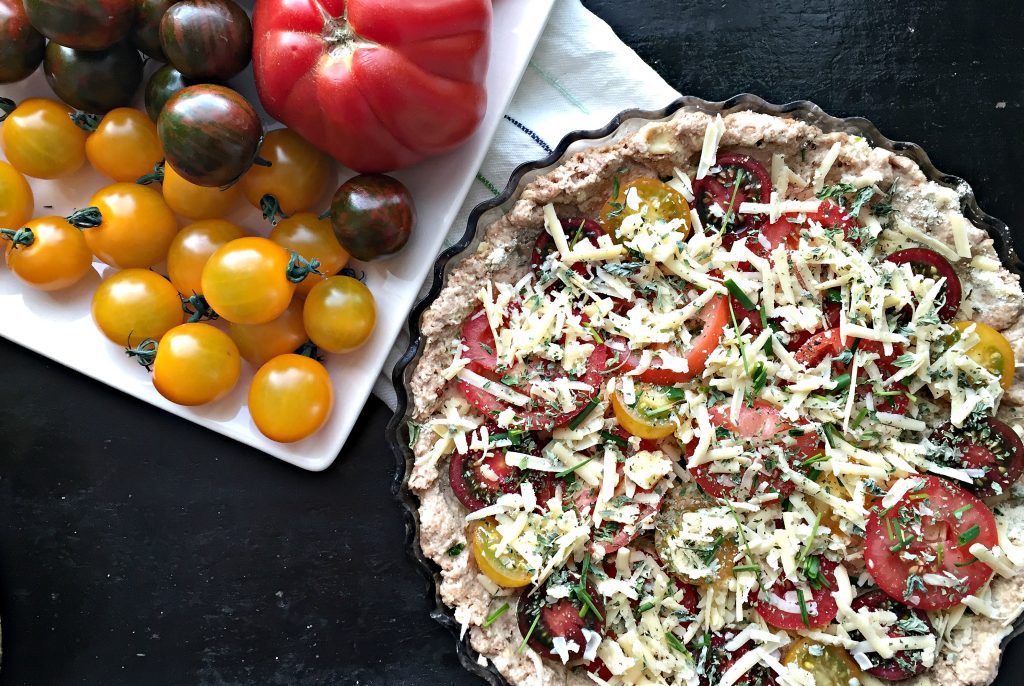
Tomato Cheddar Pie. Just look at this thing.

Tomatoe_Pie_logo

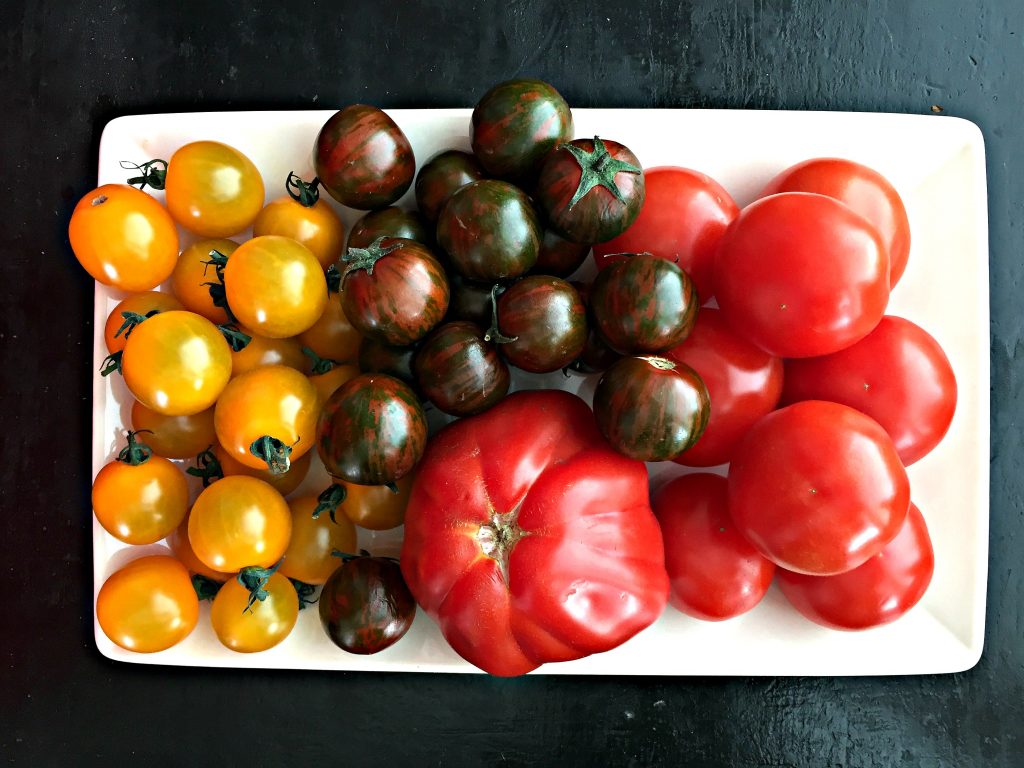
Summer doesn’t get any better than this: long, light days. Clear blue skies. Mostly warm. Scattered showers to keep the dust down and the garden watered. And produce ripening almost faster than we can pick it. Down in my small garden patch, the cherry tomatoes are really starting to take off, each small orb a delightful sweet & sour mouthful. And of course, eating them fresh is always a good idea, but if you want to take them up another notch, why not pie?

Tomatoes_raw

Now pie. That’s a really good idea.

This Tomato Cheddar Pie was inspired by a recipe in Fine Cooking from the Aug/Sept 2013 issue, and has been modified slightly to suit my own taste. I think you’re going to love it, especially if you have a bowl of tomatoes in your kitchen begging to be consumed right now.  The base is buttermilk biscuit which creates a nice flaky layer upon which the rest of the ingredients sit. The tomato juices blend with the herbs and cheese, but thanks to a sprinkle of corn flour over the base, it doesn’t turn into a soggy mess.

Tomato Pie_raw

A few notes: 

  • if you’re gluten-free, feel free to sub in your favorite gluten-free flour
  • if you don’t use dairy, sub in your favorite nondairy cheese and use the olive oil option instead of butter
  • I love the combination of chives, oregano and basil in this, but get creative – the tomatoes can take it! It’ll be delicious either way.
  • Serve a wedge of this with a large salad of fresh summer greens and you’ll have fans gathering around your table.
  • If you reheat this, I recommend doing so in the oven for best results.

Tomato Cheddar Pie

Preheat the oven 200°C/425°F.

To prepare the buttermilk crust:

  • 1 3/4 whole wheat flour (or the gluten-free flour of your choice)
  • 2 teaspoons baking powder
  • 1/2 teaspoon sea salt
  • 6 tablespoons cold butter (or 6 T olive oil, added together with the buttermilk for a vegan option)
  • 1/2 cup buttermilk (or 3/4 teaspoon oat milk + 1 teaspoon lemon juice) + extra if the dough feels too dry
  • 1 heaped tablespoon fine cornmeal

Combine the flour, baking powder, sugar and salt in a bowl. Add the butter to the flour mixture, and using a pastry blender or a fork, mash the butter into the flour mixture until the butter is the size of peas. Pour the buttermilk over the flour-butter mixture and stir to combine, using your hands to shape it gently. Don’t over process – you just need it to hold together. If you handle it too much, the crust will be tough.

Wet your hands so your fingers won’t stick to the dough. Press the dough into the bottom and up the sides of an oiled 10″/25 cm tart tin. Sprinkle the cornmeal over the base of the crust in an even layer.

For the filling:

  • 20 large cherry tomatoes cut in half or 3 large tomatoes cut into slices
  • 2 tablespoons fresh chives, chopped
  • 2 teaspoons dried oregano
  • 1/2 – 3/4 cup cheddar cheese, grated on the large holes of a box grater
  • 1 tablespoon olive oil
  • 1/2 teaspoon salt
  • 1/4 teaspoon ground pepper
  • 1/4 cup fresh basil leaves

Sprinkle half of the chives, oregano and cheese over the bottom of the tart crust. Arrange the tomatoes, cut side up, to cover the bottom of the tart. Sprinkle the salt and pepper evenly over the tops of the tomatoes. Drizzle with olive oil. Sprinkle the remaining chives, oregano and cheese over the tops of the tomatoes. Place the pie into the hot oven and bake 20-25 minutes until the crust is golden brown around the edges and the tomatoes begin to brown as well.

Remove from oven and cool 10 minutes. Sprinkle the fresh basil leaves over the top, and serve.

Serves 6-8.

Eat Simply, Eat Well.

Ann

Did you enjoy this post? Please let me know in the comments below, and share it with your friends on social media!

Tomato_Pie_Pinterest

Filed Under: Breakfast, Main Course, Meatless Monday, Uncategorized, Vegetarian

Healthy Fried Rice

May 2, 2016 by aplough

Healthy-Fried-Rice_text_20160502

The word Fried Rice doesn’t always conjure up images of health food – but there’s no reason it can’t be a delicious and healthy dinner choice.

The first thing is to change white rice to brown if you haven’t already made the shift. White rice has very little nutritional value since the bran is removed, so basically our bodies process it quickly as a sugar source, causing an insulin spike, and that’s just no good for anyone.

If you eat a lot of fried rice, then switching to brown rice will do your body a big nutritional favor by adding a nice dose of healthy fiber along with along with significant amounts of magnesium and vitamin B6, and small dose of iron. Pretty great, hey?

This fried rice recipe is also loaded with cooked, steamed and raw veggies for to add flavor, texture and nutrients, as well as eggs for protein.

Even better – this fried rice recipe is super fast if you have cooked rice ready to go. Here’s a tip: whenever you make brown rice, make a big batch and freeze it in 1 cup /2.5 dl portions so that you can thaw it quickly and add it to dishes like this one, soups, or serve it up with some simple stir-fried vegetables. It’s away to make fast food at home in little time and still control the ingredients that go into your food.

We enjoyed this dish on a sleepy Sunday afternoon after a morning spent outside, and it literally took 15 minutes to make the entire thing – which means you can fit this into your schedule any day of the week and ensure a healthy dinner that everyone will love. 

And summer is coming!

Which means pretty soon there will be a bounty of fresh veggies coming out of gardens and farmers markets. Here’s the perfect way to use them up.

Enjoy!


Healthy-Fried-Rice_detail_logo_20160502

Healthy Fried Rice 

  • 2 tablespoons olive oil
  • 1 yellow onion, diced
  • 1 carrot, diced
  • 1 large or 2 small garlic cloves, peeled and minced
  • 1 cup/2 dl cubed fresh zucchini
  • 1 1/2/4 dl cup cooked brown rice
  • 1/2 teaspoon salt + more to taste
  • 1/4 teaspoon freshly ground black pepper
  • 3 eggs, beaten  + 2 tablespoons cold water
  • 2 large handfuls fresh spinach, rinsed and roughly chopped
  • 2 green onions, thinly sliced

In a large, heavy-bottomed frying pan over medium heat, warm the oil and add in the onion and carrot. Cook for 5 minutes or until onions are translucent. Add the garlic and zucchini and cook 3 minutes more. Add the rice, eggs, salt and pepper and stir in well. Allow the mixture to cook, undisturbed, for 5 minutes, then flip the mixture over in small portions and cook for 2 minutes more. Place the spinach on top of the mixture and put the lid on. Steam the spinach for 1-2 minutes until just wilted. Add the green onion, stir the onion through the mixture, and serve.

Serves 4.

Eat simply, eat well,

Ann

Did you like this post? Let me know in the comments below, and please share this with your friends!

Have you signed up for the ESEW newsletter yet? If not, scroll back up to the top of the page and fill out the form at the top right to get the recipes and tips in your mailbox. 

Healthy-Fried-Rice_Pinterest_20160502

Filed Under: Gluten-free, Main Course, Meatless Monday, Vegetarian

Stuffed Eggplant

April 27, 2016 by aplough

Stuffed-Eggplant_forkandknife_title_20160427

If you’ve been reading this blog for a while, it’s no secret that I love eggplant. Once roasted, this odd purple vegetable goes from stiff and a bit rubbery to smooth and luscious, and it pairs well with tomatoes, onion, lemon and olive oil to make a superbly easy and satisfying main course.

So often vegetables are pushed to the sides of our plates, served up alongside a hunk of meat, but it’s time to of put vegetables where they belong: front and center as the main course. 

Stuffed-Eggplant_Roasted_20160427

You can, of course, serve this stuffed eggplant as a side dish, but I assure you, once you’ve tasted these, you’re not going to be out looking for meat! Filled with a mixture of whole wheat couscous, fresh cherry tomatoes, spring onion and cilantro, and flavored with olive oil, lemon, smoked paprika and chili – these beauties are good served warm or at room temperature – which means you can make them ahead, use the leftovers for lunch, or even freeze the extras for a delicious meal later.

The middle east has a version of stuffed eggplant which is a thing of legends: Imam biyaldi (the Imam fainted). The story goes that a young Turkish bride was given 12 large pots of the finest, most expensive olive oil for her husband. She made a stuffed eggplant dish stuffed with tomatoes, onions, garlic – and copious amounts of olive oil. Her husband loved the dish so much that he asked her to make it every single day. She did – for 12 days. On the 13th day, the stuffed eggplant was absent from the table. “Why?” asked the disappointed husband? “my dear, we are out of olive oil and I cannot make it until you purchase some more.” Upon hearing that the expensive gift had been completely used up, the Imam fainted. Imam biyaldi.

My version uses olive oil too, and flavors of the middle east, though it is not like the traditional Turkish dish. I think you’ll love this, though! The recipe can be easily scaled up or down depending on the size of the crowd you are serving, and any leftovers will be fought over the following day. I typically serve 2 eggplant halves per person; though you could also serve one half plus a salad for a lighter meal.

Stuffed-Eggplant_plated_1_20160427

Stuffed Eggplant

First, prepare the eggplant:

  • 2 medium-sized eggplants
  • olive oil, salt and pepper

Heat oven to 200°C/400°F.

Cut the eggplants in half lengthwise through the stem. Lay the eggplants cut-side up on a parchment-lined baking tray. Using a small paring knife, cut a cross-hatch into the cut side of the eggplant. Sprinkle each eggplant generously with salt and pepper and drizzle with olive oil.  Bake for 40-45 minutes until golden brown and very soft. Remove from oven.

Stuffed-Eggplant_eggplant-collage_20160427

Make the filling:

  • 1 cup/ 2.5 dl dried, whole wheat couscous*
  • 2 cups / 5 dl boiling water
  • 1 package cherry tomatoes
  • 1 small bunch of cilantro = 1 cup chopped stems & leaves; reserve the top leaves for garnish.
  • 2 green Spring onions, thinly sliced
  • 1/2 teaspoon + 1/2 teaspoon salt
  • 1/4 teaspoon pepper 
  • 1/4 cup/ 1/2 dl extra virgin olive oil
  • Zest and juice of one organic lemon
  • 1/2 teaspoon smoked paprika
  • 1/8 teaspoon chili powder

*To make it gluten-free, use millet, cooked according to packet instructions.

Pour the couscous into a small bowl and add 1/2 teaspoon salt and the boiling water. Cover with a plate and allow it to absorb the water for 5 minutes.

Cut the cherry tomatoes into into fourths and place into a medium-sized bowl. Add the chopped cilantro, green onion, remaining 1/2 teaspoon salt, pepper, olive oil, paprika, chili powder, lemon zest and lemon juice. Mix well to combine. Check the couscous to make sure it has absorbed all of the water. Fluff it lightly with a fork, then add it to the tomato mixture. Stir well to combine. Taste; adjust seasoning if necessary.

Top each eggplant half with 3/4 cup / 1.5 dl of the couscous mixture, pressing it down into the eggplant shell. I find it’s easiest to do this with my hands, but you can do this however you wish. Transfer the stuffed eggplant to individual serving plates and garnish with the remaining cilantro.

Serve warm or at room temperature.

Serves 2-4.

Eat simply, eat well,

Ann

Did you like this post? Do you have your own version of stuffed eggplant? Let me know in the comments below, and please share it with your friends!

Have you signed up for the ESEW newsletter yet? Make sure you don’t miss the recipes and tips I send out in to subscribers. Scroll back up to the top and fill out the form on the right-hand side!

Stuffed-Eggplant_Pinterest_vertical_20160427

Filed Under: Main Course, Meatless Monday, Uncategorized, Vegan, Vegetarian

  • 1
  • 2
  • 3
  • …
  • 10
  • Next Page »

Find me on social media

  • Bloglovin
  • Facebook
  • Instagram
  • Pinterest
  • Twitter

Looking for something?

Eat Simply, Eat Well 's gallery on Punk Domestics
  • Bloglovin
  • Facebook
  • Instagram
  • Pinterest
  • Twitter

Copyright © 2025 · Foodie Pro Theme by Shay Bocks · Built on the Genesis Framework · Powered by WordPress