Eat Simply, Eat Well

Healthy recipes & tips to help you live the good life. by Ann Plough

Smoked Salmon Soup with Summer Vegetables

September 11, 2015 by aplough

Salmon_Soup_SummerVeg_20150911

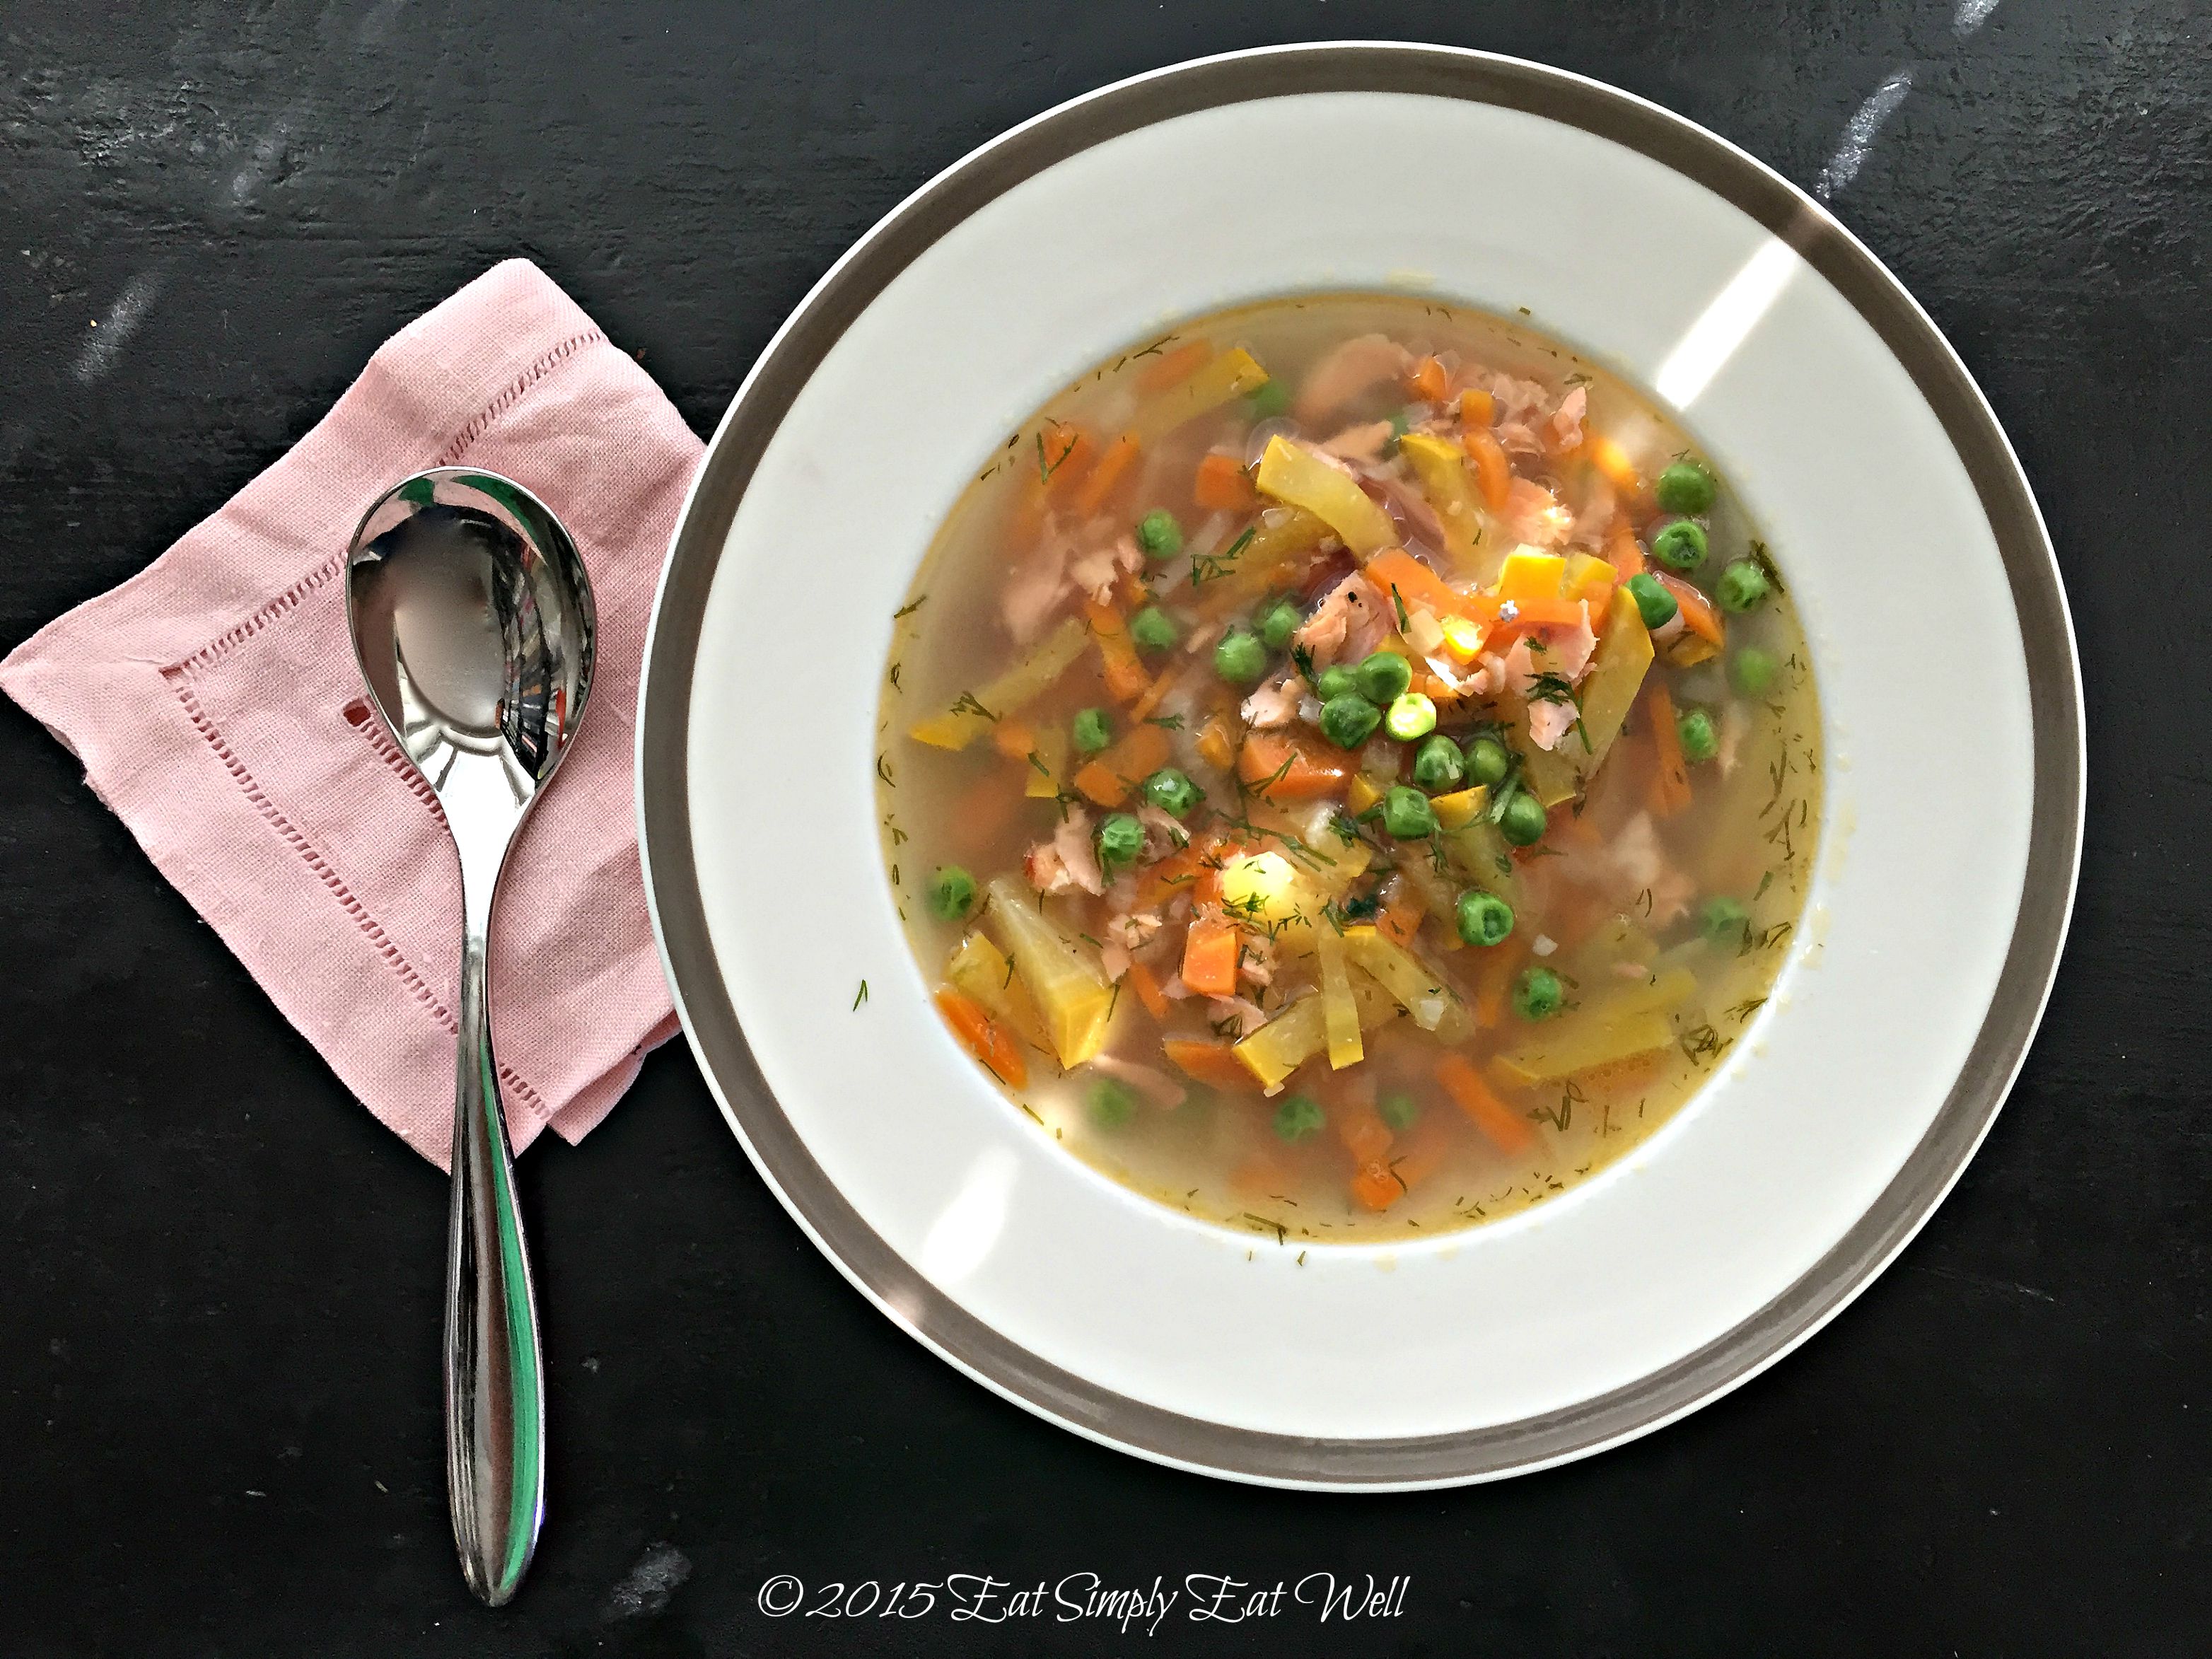
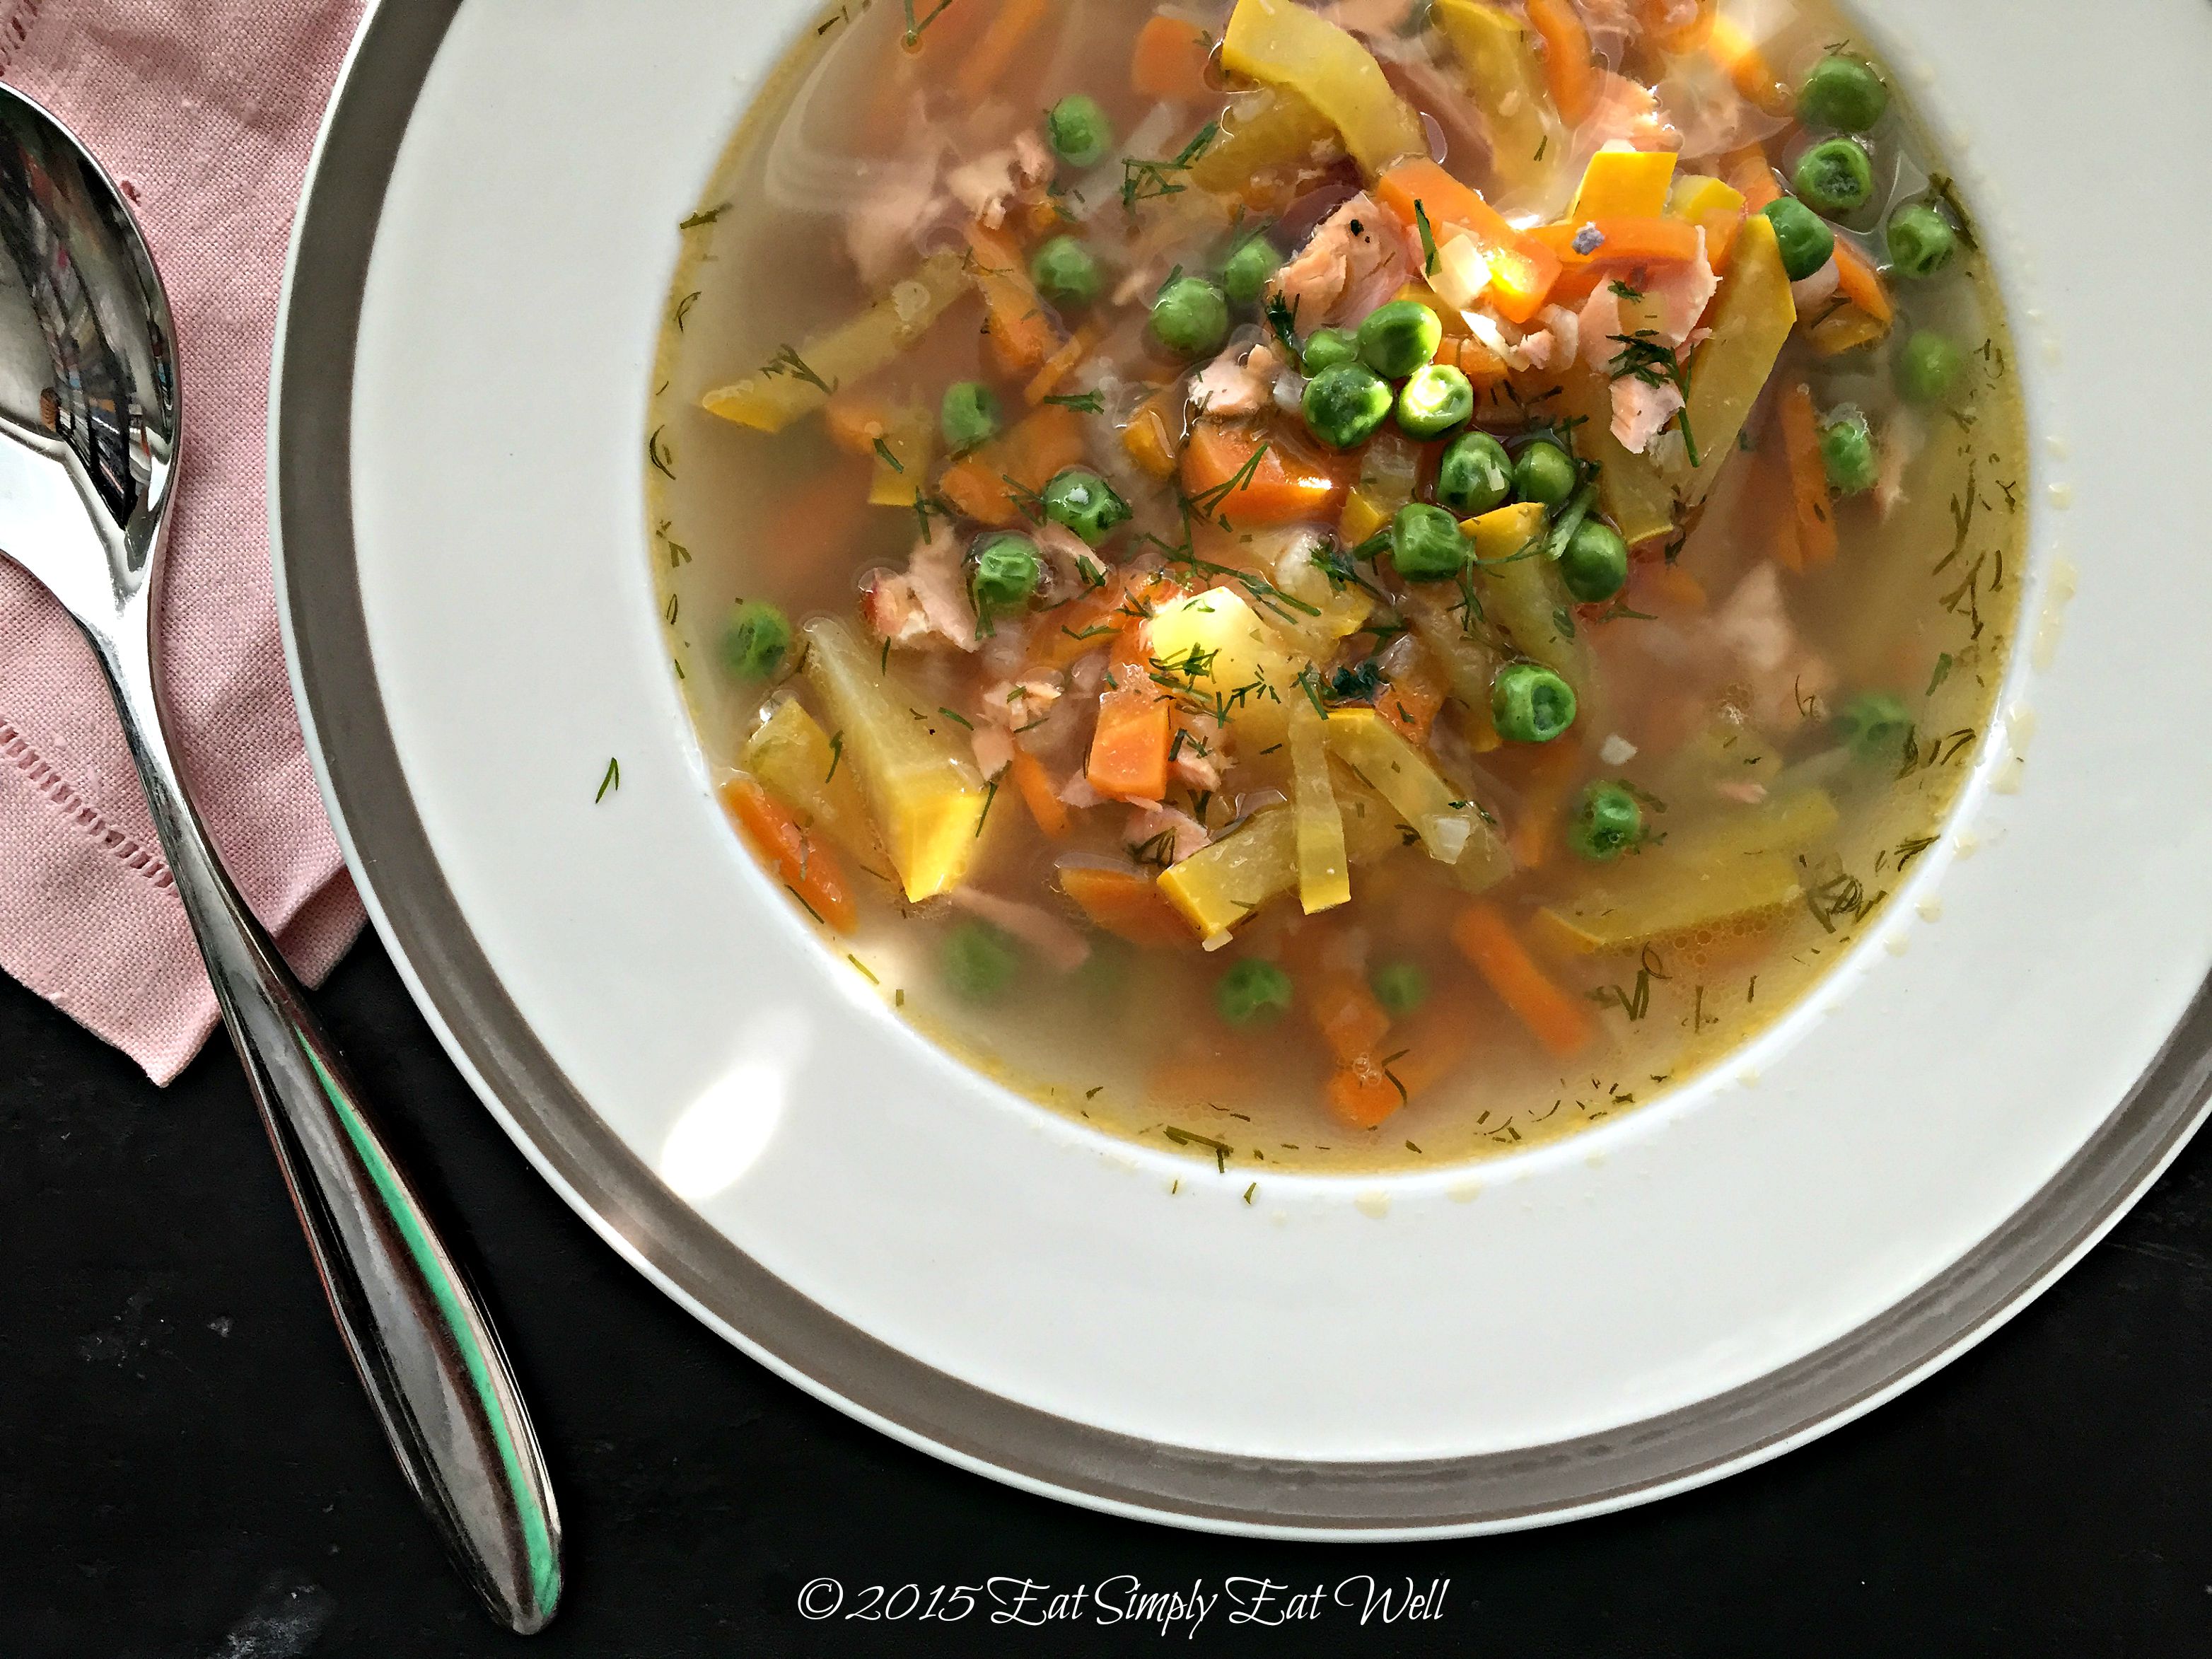
If you like fish soup, you’re going to love this recipe. Unlike many of the fish soups I’ve enjoyed in here in the Nordics, there are no potatoes in this one, and no cream or milk. Just a lovely, clean, light salmon stock perfumed with a bit of dill and filled with bright, colorful summer vegetables.

If you have fish stock on hand, either your own home-made version or store-bought, this soup is literally 15 minutes away from serving time. It’s fast, it’s easy, and it’s really, really good.

Packed into this soup are a myriad of colorful veggies: carrot, zucchini and peas.

Peas are still being sold in the markets around here, but if you can’t find fresh, frozen peas work really well here. The peas you find in your grocery market’s freezers go from field to freezer in about 2 hours when processed commercially, making frozen peas a healthy and delicious alternative to fresh.

We’ve already talked about the wonderful abundance of zucchini this time of year – so adding it to the soup seemed like a nice way to use up some more. It adds great texture and color here, and of course a few more nutrients. If it’s Winter and you want to make this soup, but there is no zucchini to be found, frozen corn would be a nice add-in here, as well.

Instead of using raw salmon, which is traditional in most salmon soups, this recipe calls for smoked salmon. The mild smoky flavor of the smoked salmon complements the vegetables so well! Smoked salmon is cured with salt, so don’t add salt until after you’ve added the salmon and tasted it – you can always adjust the seasonings at the very end if you feel it needs a little more.

This light, refreshing soup is perfect served absolutely on its own, or with a few slices of fresh bread. It also freezes well since there is no potato or cream, so you can double the batch and freeze some for a later date. Either way, you may find this a soup you want to make over and over again.

Salmon_Soup_SummerVeg_close_20150911

Smoked Salmon Soup with Summer Vegetables (gluten-free, dairy-free)

  • 1 tablespoon olive oil
  • 1 yellow onion, diced
  • 1 medium carrots, peeled and cut into small sticks
  • 1 cup zucchini, cut into small sticks
  • 1 small clove garlic, minced
  • 4 cups / 1 liter salmon stock or other fish stock
  • 150-200 g smoked salmon, separated into flakes, bones and skin removed
  • 1 cup fresh or frozen peas
  • salt and pepper if needed

Heat the olive oil in a 3-quart/liter heavy-bottomed pot over medium heat. Add the onions and carrots, and cook until the onions are soft and translucent, about 5 minutes. Add the zucchini and garlic and sauté an additional two minutes.

Add the salmon stock and bring to a boil. Reduce to a simmer and cook until the carrots are tender; about 8 minutes.

Add the peas, smoked salmon, and dill to the pot. Bring the mixture to a boil, and then immediately turn off the stove. Taste the soup and add salt and pepper if needed.

Serves 4.

Are you looking for other salmon recipes? Try these:

  • Smoked Salmon, Pomegranate, Pecans and Cheese on Mixed Greens
  • Smoked Salmon on Baked Potatoes
  • Smoked Salmon, Fennel and Broccoli Quiche

Did you like this recipe? Do you have favorite ways to use smoked salmon? I’d love to hear from you in the comments below!

Filed Under: Main Course, Soup

Wild Mushroom Pizza Pie

September 7, 2015 by aplough

Wild_Mushroom_Pizza_Pie_20150906

Looking through pictures from exactly a year ago, I am still amazed at what a good mushroom season it was. The woods were full of porcini, and we filled multiple baskets, day after day, that we subsequently dried, froze and preserved. Beautiful, perfect, delicious porcini.

But years are as different as the seasons within them, and so far, this is not a porcini year. Not to worry. There are still mushrooms in abundance, and with rain falling nearly every day, they have the watering they need to fuel their growth. Chanterelles (Cantharellus cibarius)are having a boom year, and it’s one of the most recognizable mushrooms – it’s golden peachy color beaming out against the background of mossy green, and sometimes hidden among the fallen birch trees of nearly the same color. The dark Black Trumpet mushrooms (Craterellus cornucopioidus) are showing up all over the country too – and once you’ve seen these, remember where they were. Easy to identify once you find them; they are not easy to see against the background and shadows of the forest, but the good news is they come back again and again every single year – so if you keep your new spot secret, chances are good you’ll find some every year..

One of my favorite mushrooms, even more so then my gateway mushroom the Chanterelle, are Hedgehog Mushrooms (Hydnum repandum). A pale peachy cream in color, it’s readily apparent where they get their name once you cut through the thick stem even with the forest floor and turn them upside down: the undersides are covered with tiny, soft, little teeth that match the color of the rest of the mushroom. You’ll be certain of exactly what you are looking at. Typically they grow in large groups underneath fir trees or in mixed forests in my part of the world, they have a sturdy, meaty texture and a wonderful flavor. Clean them well – in the forest if possible. As you can see from the picture below, those little teeth on the underside like to hang on to things, but if you clean as you pick, you’ll be giving your future self a gift. If snails have reached the tops of the mushroom first, simply use your mushroom knife to carefully cut away the affected pieces. Check the bottom of the stem: if there are little holes, cut the mushroom in half to make sure it’s not filled with worms. Sometimes you can save it; sometimes you can’t. But a minute in the forest saves ten minutes in the kitchen, so it’s worth taking a few moments to check and clean.

HedgehogMushroom_Vaaleaorakas_20150906

Occasionally I toss the hedgehogs into a roasting pan with chicken, onions and thyme – the flavors meld together to create a perfect harmony of flavors, especially when served over brown rice. But today, they are being served up without meat, shining in a dish along with onion, tomato and Italian spices, reminiscent of a deep dish pizza. I found the inspiration for this recipe in a now out-of-print Finnish-language mushroom cookbook Hulluna Sieniin (Crazy for Mushrooms). It runs over 845 pages and has the most extensive collection of mushroom recipes I have ever seen. Having been lucky enough to walk out of the woods with a basketful of hedgehogs and chanterelles, and despite the fact that I was covered with forest debris, pine needles in my hair, and needing a nice, hot, shower, I browsed through the book and the recipe for “Orakas Pizza” or “Hedgehog Pizza caught my eye. And indeed it was delicious. But I wanted it to be a little bit better – a little bit healthier.

So I made it again.

This time, I used a whole wheat crust, and olive oil instead of butter. I left out the cream and added a bit of egg and milk. This time, it wouldn’t even pretend to be a pizza: it’s absolutely a pizza pie: a pie that tastes like a pizza would, but with the crunchy crust, a lot more filling and a little egg to keep the filling from sliding all over the place. Low fat, full of whole grains, mushrooms, onions and tomatoes, seasoned with garlic, salt, pepper and Italian seasoning, this is healthy comfort food.

If you can’t find hedgehogs, Chanterelles make a fine substitute. If there is another mushroom you have on-hand or really love – use that instead. It’s all good. But keep those hedgehogs in mind, and snap them up when you can – they are a real treat.

Meanwhile, I’ll be back in the woods again, loading up my basket with whatever I find, and secretly dreaming of porcini.

Wild_Mushroom_Pizza_Pie_b_20150906

Wild Mushroom Pizza Pie

Preheat oven to 200°C/400°F

Step 1 – Make the Crust:

  • 1 1/4 cup/ 3 dl / 140g whole wheat flour
  • 1 teaspoon baking powder
  • 1/4 teaspoon salt
  • 2 tablespoons olive oil
  • 3 tablespoons cold water

Pour all of the ingredients into a medium-sized mixing bowl and stir until it comes together. Knead the ball of dough with your hands until it’s smooth. Press the dough into the bottom and up the sides of a 10″/ 27 cm tart pan.

Step 2 – Make the Filling:

  • 2 tablespoons olive oil, butter or ghee (do not use coconut oil – the flavor doesn’t suit this dish)
  • 1 liter/quart/4 cups fresh hedgehogs or chanterelle mushrooms, roughly chopped
  • 2 yellow onions, peeled and diced
  • 3 medium tomatoes, roughly chopped
  • 1 garlic clove, minced
  • 2 teaspoons Italian seasoning (Pizzamauste)
  • 1 teaspoon salt
  • 1/4 teaspoon freshly ground black pepper
  • 1 egg, beaten
  • 1/3 cup milk of choice (cow, oat, rice)
  • 1/4 cup grated cheese

In a large frying pan over medium heat, cook the mushrooms and onions until they both soften and the mushrooms have released most of their juices, about 5 minutes. Add the tomatoes, garlic, and spices and continue to cook, stirring occasionally, until nearly all of the juices have evaporated. Turn off the heat and let the mixture cool for 5 minutes.

Step 3 – Assemble & Bake:

Transfer the mushroom mixture to the crust-lined tart pan and spread it out evenly. Combine the egg and milk into a small bowl, and pour it evenly over the top. Sprinkle the grated cheese evenly over the entire tart. Bake for 25-30 minutes or until the top is golden brown.

Serves 4-6.

Looking for other recipes to open up the Fall season? Try these:

  • Beet, Carrot, Rosemary & Goat Cheese Galette
  • Porcini Thyme Tart
  • Chanterelle Soup

Did you like this post? What are you making with your mushrooms? I’d love to hear from you in the comments below!

Filed Under: Main Course, Meatless Monday, Vegetarian

What do you do with Giant Zucchini? Stuffed Zucchini with Quinoa Porcini Pilaf

August 31, 2015 by aplough

Stuffed_Zucchini_20150831

I bet you know what I’m talking about.

If you grow zucchini, chances are good that you have way too much zucchini.

If you’ve turned your back on your heavily producing zucchini plant for more than a day or two, chances are even better that at least one zucchini is waaayyyy bigger than anything you could’ve imagined – yes, there are giants among us.

And let’s not even get started on the fact that you likely planted all the seeds that came in that little seed packet…or you may even have been looking for variety, so you have zucchini in multiple sizes, shapes, colors…!!!

Zucchini. You’ve gotta love it. Nearly every gardener I know plants one or several plants every single spring, and then every single Summer, begins lamenting (half-smiling) that they are running out of ideas on how to eat it. They give it away. They start hiding it in food they serve to their children. They put it in cakes. They grill it. They leave it on doorsteps. Things begin to look a little desperate. Every single year.

Let’s start first with that big giant zucchini. I was gifted several zucchini by my neighbor gardener late last week. She’d planted 8 or 9 zucchini plants, and her husband begged her to “please, just give some away!!!”. With my zucchini plants failing to produce almost entirely (don’t ask – it’s the rabbits – they’ve been snacking all summer long on everything from onion tops, to kale, to squash) I was more than happy to pack some into my bike basket and haul them home. One was HUGE, and I had a grin to match. Why? Because I’d been waiting all summer for a chance to stuff a zucchini with pilaf and create a full meal out of it.

Zucchini is a highly nutritious plant. It is:

  • low-calorie: just 36 calories per cup/100g
  • high in antioxidants
  • a primary food source of alpha carotene and beta carotene
  • a good source of the polysaccharides that have been linked in animal studies to protection against diabetes and for insulin regulation
  • an excellent source of copper, manganese
  • a good source of vitamin C, magnesium, fiber, phosphorus, potassium, folate, vitamin B6 and vitamin K

Source: www.whfoods.com

Stuffed_zucchini_3_20150831

And be sure to include the skin in your recipe: it contains a high portion of the above benefits, so get those into your belly, and not the compost.

That over-sized zucchini is an asset, it really is. Once you try this recipe, you’ll be tempted to leave a few zucchini to grow until the reach the giant size of this one so you can make it again and again. If there are leftovers, it reheats well and freezes well too. So go ahead, go crazy with this one. And then maybe next year, you’ll add a couple more zucchini plants than last year…maybe…

Stuffed_Zucchini_2_20150831

Stuffed Zucchini with Quinoa Porcini Pilaf

Preheat oven to 200°C/400°F

Step 1: Prepare the Quinoa

  • 1 cup / 2 dl Quinoa
  • 1 3/4 cups / 3 1.2 dl water
  • 3/4 teaspoon salt

Combine the ingredients in a small pot with a lid. Bring to a boil; reduce to a simmer; cover; and cook for 25 minutes over low heat.

Step 2. Prepare the zucchini

  • 1 giant zucchini (1 foot / 0.3 meters or longer)
  • salt, pepper, fresh lemon

Wash and dry the zucchini. Cut it in half lengthwise through the stem. Using a spoon, carve out the center pith with the seeds, and place the pith in a bowl for use later. Scape out a little more of the zucchini to create an even “bowl” in the center of each half. Sprinkle the inside of the zucchini evenly with salt, pepper and lemon juice. Place on a parchment-lined oven pan, and bake in the oven for 10 minutes. Remove and allow to cool.

Step 3: Prepare the filling

  • 2 tablespoons olive oil
  • 1 large yellow onion, diced
  • 1 lb/1 liter/400g fresh or frozen porcini mushrooms/herkkutatti/ceps/boletus edulis or 30g dried porcini soaked for 15 minutes in hot water, drained)
  • cooked Quinoa from step one, above (3 cups/6 dl)
  • 1/2 cup  1 dl grated carrots
  • 1/2 cup diced red or yellow sweet pepper (paprika)
  • 6 sundried tomatoes in oil, minced
  • 2 large garlic cloves, minced
  • 1 tablespoon fresh sage, minced
  • 1.5 teaspoons salt
  • 1/2 teaspoon freshly ground black pepper
  • 3 tablespoons fresh, minced parsley
  • 2 teaspoons fresh lemon juice
  • parsley and yogurt for garnish

Heat the olive oil over medium heat in a large, heavy frying pan. Add the onion and mushrooms and cook until tender, about 5 minutes. Chop the zucchini center/pith into small pieces and add it to the pan.

Add the Quinoa, carrots, sweet pepper, garlic, sun dried tomatoes, sage, salt and pepper, and stir well to combine. Cook, stirring occasionally, for an additional 10 minutes, allowing the excess liquid to steam away so the mixture is fairly dry. Add the lemon juice and parsley and stir well. Taste; add more salt/pepper if desired.

Step 4: Assemble & Bake

Pour out any liquid that has pooled in the bottom of the zucchini halves, being careful not to break them. Return them to the baking sheet, and divide the Quinoa filling evenly between the two halves, mounding it up high and packing it in. (if it doesn’t all quite fit, store the remainder in an air-tight container in the refrigerator for up to 4 days).

Place the stuffed zucchini halves into the hot oven and bake for 20 minutes. Remove the zucchini pan from oven and allow the halves to cool 10-15 minutes before serving.

To serve, transfer zucchini to a large tray and drizzle with plain yogurt and sprinkle fresh parsley over the top. For a complete meal, serve with a green salad.

Serves 6-8.

Need more zucchini ideas? Try these:

  • Zucchini Potato Gratin
  • Grilled Zucchini and Eggplant with Lemon Mint Yogurt Dip
  • Zucchini Chocolate Chunk Cake
  • Hank Shaw’s Sicilian Dried Zucchini

Did you like this recipe? Let us know in the comments below!


Filed Under: Main Course, Meatless Monday, Vegetarian

  • « Previous Page
  • 1
  • …
  • 5
  • 6
  • 7
  • 8
  • 9
  • …
  • 14
  • Next Page »

Find me on social media

  • Bloglovin
  • Facebook
  • Instagram
  • Pinterest
  • Twitter

Looking for something?

Eat Simply, Eat Well 's gallery on Punk Domestics
  • Bloglovin
  • Facebook
  • Instagram
  • Pinterest
  • Twitter

Copyright © 2025 · Foodie Pro Theme by Shay Bocks · Built on the Genesis Framework · Powered by WordPress