 |
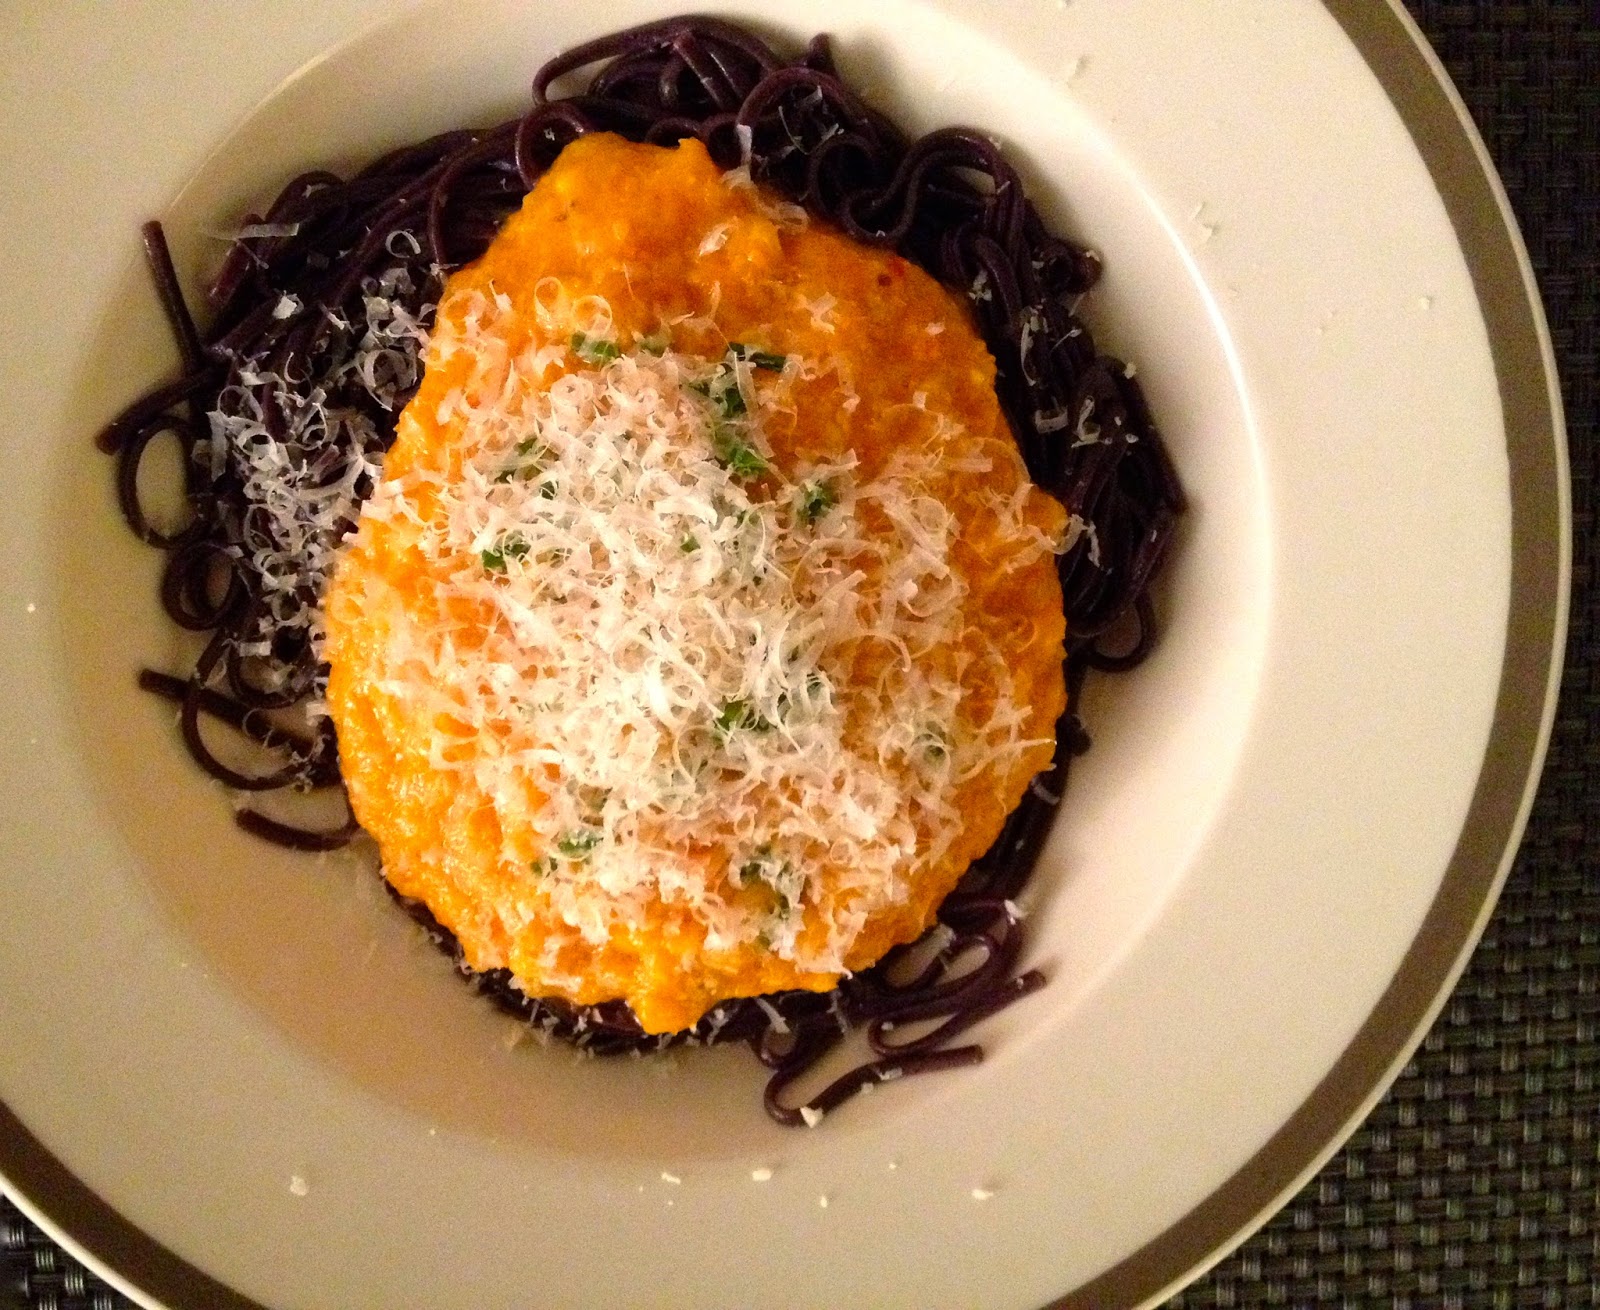
| Pumpkin and Roasted Red Pepper Puree over Black Rice Noodles |
I sometimes get asked how I come up with recipes. The truth is there is no real formula. Sometimes it’s something that has been spinning around in my head for a while, sometimes I am inspired by something I’ve eaten somewhere and sometimes it starts with a single ingredient that I want to play with.
In the case of this recipe, it started with wanting to do something different with pumpkin. We have a fair amount of frozen pumpkin puree in our freezer right now – which is a really good situation to be in. There is always a good use for pumpkin. I’ve been wanting to put some new flavor notes into pumpkin – not just the pumpkin pie side of things with warm spices like cinnamon and clove; nor was I in the mood to add sage or lovely, creamy coconut milk, although both are very good and I have used them with pumpkins many times in the past.
I wanted a change. And I wanted pasta.
So that’s where it began. I pulled out the pumpkin. Decided a lot of good savory stuff starts with onion, carrot, garlic; simmer in oil. So I did that. Added the pumpkin. Boring. Very boring. Let it simmer some more while I dug in the cupboard searching for noodles and inspiration. Spaghetti? No. Whole wheat linguine? No. 100% Buckwheat soba? Mayb…and then my eyes settled on the Black Rice Noodles nestling just below the spaghetti near the bottom of the basket in which I keep my various varieties of pasta and things started rolling.
Preserved Roasted Red Pepper that I’d made following Hank Shaw’s recipe went into the pot. Together with a whisper of cayenne pepper the peppers completely transformed the dish from boring-tastes-a-bit-like-onion waste of culinary time to a sensory experience where the deep roasted flavor that comes from ripe sweet red peppers that have been blackened under the broiler, peeled, salted and soaked in vinegar and oil to preserve melded with the smooth sweetness of the pumpkin in a palate-pleasing balance. There was just enough salt to enhance the flavor with out tasting salty. The parmesan adds finishing touch together with a sprinkling of chives for charm.
You’ll likely dig into the beautiful mass on the plate before you with a mild hesitation, wondering what is exactly that you’re in for. After the first bite, you’ll start shoveling in sauce-covered noodles, unable to get enough of that glorious flavor. All too soon, you’ll realize with some sadness that the last bite is getting nearer, the plate nearly empty, and you’ve just had one of the most tasty, surprising meals in a long, long time.
This meal is far from complicated, quick to make, and is a joy to behold. If you don’t have your own roasted red peppers, buy a bottle from your local grocer and get rolling with this. This is going into Winter rotation. Oh – and those noodles? An extra bonus if you or your guest has a grain or gluten allergy: they are wheat-free and gluten-free.
 |
| Seriously. Black Rice Noodles. You need to try these. |
Pumpkin & Roasted Red Pepper Puree w/ Black Rice Noodles
2 tablespoons rapeseed (or other cooking) oil
1/2 onion, minced
1 small carrot, peeled and diced
1 garlic clove, minced
1 cup pumpkin puree
1/2 cup roasted red pepper
1/8 teaspoon cayenne pepper
1/4 teaspoon fresh ground black pepper
1/2 teaspoon salt + more to taste
parmesan to grate over at the table
125g black rice noodles (1/2 bag)
Get your water on to boil for the noodles. Once it comes to a boil, turn off the heat, put on a lid, and wait until just before you are ready to serve to boil the noodles. They only take 5 minutes.
In a small pot, add the oil; let it heat up; add the onion and carrot. Cook until the onion is soft and translucent; about 5 minutes. Add the garlic clove and cook an additional minute. Add the pumpkin purer, red pepper, cayenne, black pepper and salt. Bring to a boil and simmer for 5 minutes to let the flavors heat up and combine. Remove from heat, and using and immersion blender, puree the mixture until smooth. If you don’t have an immersion blender, transfer the hot mixture to a heat-proof blender container and process until smooth. Taste and add more salt and pepper if needed (don’t oversalt – you don’t want to mask the other flavors). This will be a nice, thick, puree – this is what you want, so don’t be tempted to thin it out with water. Cover.
Bring your pasta water back to a boil. Add 1 teaspoon of salt, then the pasta. Cook for 5 minutes. Drain. Divide the pasta between two deep bowls. Top with the Pumpkin and Roasted Red Pepper Puree. Grate fresh parmesan cheese over the top of each dish and sprinkle with some fresh, chopped chives for garnish. Serve immediately, with extra parmesan at the table for grating.
Serves 2. Doubles easily.


