Eat Simply, Eat Well

Healthy recipes & tips to help you live the good life. by Ann Plough

Karjalanpiirakka & Sisu: After the war, Karelia went to Russia but the pies stayed here.

February 5, 2012 by aplough

Finns have sisu, a term that has no single word equivalent in any other language.  It is a combination of guts, perseverance, stubbornness, and courage in the face of a seemingly impossible situation.

The Winter War between Finland and Russia, which ended with a  War Treaty in 1940, demonstrated this clearly.  The Russians had ten times the soldiers, thirty times the aircraft and a hundred times as many tanks.  But, Stalin’s great Russian army lacked experienced leadership:  many of its higher-ranking officers, due to Stalin’s Great Purge in 1937, had been executed or  imprisoned – a series of events that is arguably  bad for the morale of those troops still left fighting the battle.  Finland, on the other hand, had a much smaller yet more determined army defending its rights as an independent nation, and as a result were able to hold off the Red Army of Russia much longer than anyone, including themselves, ever expected.  My guess is that it has something to do with the skiing skills all Finns begin to learn starting at age two, the adaptation to cold and uncomfortable winters, and the determination that “they could not become Russian” that gave them the necessary sisu to stand up and hold off the invaders.

As a result of the Winter War, Russia, its reputation greatly battered and suffering high losses, nevertheless gained a buffer for Leningrad.  Finland maintained independence and a enjoyed a higher appreciation and reputation internationally for standing up to the Russian Bear.

But Finland did lose something:  11% of it’s territory (Finnish Karelia) and 30% of its economic assets were given to the Russians during the signing of the War Treaty of 1940.  12% of its population, the Karelians who lived in the newly lost territory:  415,000 people, moved to other regions in Finland rather than live under Russian rule.  The government of Finland offered these migrant citizens compensations for their losses:

  • the resettlers were subsidized. Families were allocated land in proportion to their former property. Everyone evacuated from Karelia had the right to receive a homestead. City-dwellers and business-owners were given a monetary compensation. The right to homestead was extended also to other groups: veterans of war, widows and orphans of war.
  • the private owners of the land given to resettlers were monetarily compensated for the loss of real estate.
All this was very important for the Karelians – many of whom are still very bitter about their displacement and some of whom still call for the return of Karelia to Finnish hands.

From a culinary standpoint, Karelian Finns gave the rest of Finland something very important:  Karelian Pie, more commonly known all over Finland as Karjalanpiirakka.  


Kneading and Shaping
Ready to roll…
Into the oven 
Work in progress

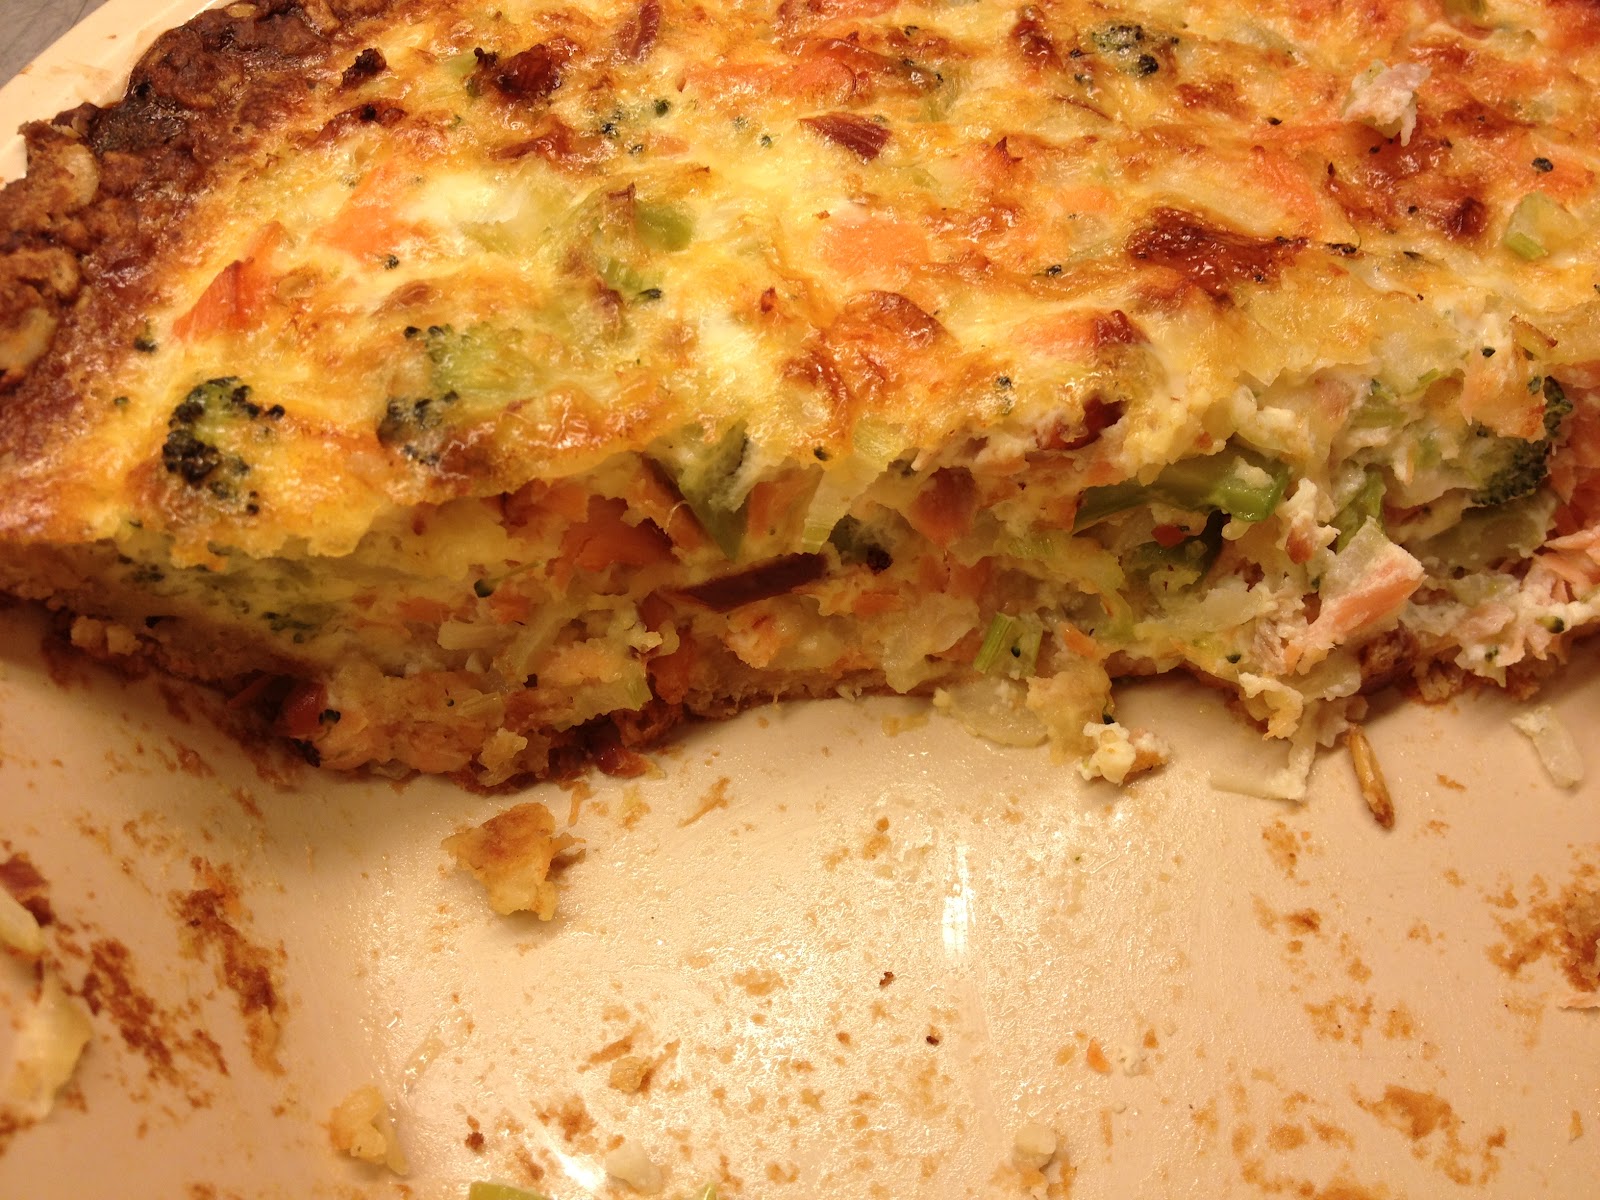
Walk into any coffee shop anywhere in Finland, or take a look into the bakery cases of any grocery store or bakery window, and you are sure to see the beautifully shaped rye pastries, filled with rice pudding and brushed with butter, waiting to be consumed by the millions in Finland every year.  These delicious morsels come in small and large sizes, sometimes enhanced with carrot cooked into the rice pudding or barley flour replacing the rye.  They are sometimes served up with egg butter, sometimes with pickled herring or a slice of cold smoked salmon, a dollop of sour cream or creme fraiche and dill, or served up plain and delicious, exactly as they come.  You can buy them in bulk in the freezer section to bake at home, from the local church and school bazaars, and find them in nearly every home you visit.  These are at once a delicacy and a staple in Finnish life.  

Remove from oven; brush with butter; first quality control test…


They are a bit time-consuming, though not difficult, to make.  I recommend at least tripling the recipe below, as the bulk of the time goes into forming the dough and making the rice pudding, and once you have the mess started, you might as well gain maximum benefit by filling your freezer with these beautiful gems so you can enjoy them on a cold, dark winter evening.  If you have a pasta roller, use this for thin, even crust – it’ll make your life much easier.  If you don’t have one, a rolling pin works fine as well.  And if you can rope a friend into joining you to make these – it’s a great job for a team.


Karelian Pies/Karjalanpiirakka
Adapted from Nordic Bakery Cookbook by Miisa Mink and Parasta Kotiruokaa by Aura Liimatainen


Filling: Rice Pudding
250 ml/1 cup water 
150 g short-grain rice (pudding rice)
750 ml/3 cups milk
1 teaspoon sea salt

Put the water into a suitably sized pot (if you are tripling the recipe as I suggest, use a large stockpot) and bring to a boil.  Add the rice and simmer fro 5-10 minutes.  Add the milk and continue to simmer over low heat for 30-40 minutes, stirring occasionally so the mixture doesn’t stick to the bottom.  The mixture will be ready when you have a thickened rice pudding consistency – similar to oat porridge. Stir in the salt and set aside while you make the pastry.  (I usually make the pastry in between stirring the rice mixture, but do whatever is in your comfort zone).

Tempting…


Crust
250 g wholemeal rye flour
1 teaspoon sea salt
200 ml of water
1 Tablespoon vegetable oil
plain flour, for dusting
75g unsalted butter, melted

Preheat oven to 220°C/425°F.

Put the rye flour and salt in a mixing bowl, add oil, and gradually add 200 ml of water, mixing with a round bladed pastry knife or by hand until a dough forms (or if you have a kitchen aid, insert the flat beater attachment, mix until dough forms, and finish by hand).  Transfer the dough to a lightly floured surface and shape it into a long sausage roll shape.  Divide into 20 pieces for large pies and 40 pieces for small pies.  Roll each piece into a small, uniformly shaped ball.  At this point, if you have a pastry roller, you will be thrilled to see how easily you can form beautifully shaped crusts.  If you don’t, use the rolling pin to roll each ball into thin rounds.  The thinner the crust here, the better the pie as it will be nice and crispy-chewy in texture. 

Assembly
Put 2 Tablespoons of filling into the middle of each round, leaving about 2 cm/ 1/2″ around the edge.  Lift up the edge of the pastry at opposite corners to begin forming an oval, and pinch the pastry between your thumb and forefingers.  Repeat around the edge of the pie, so that the edge is standing up and encasing but not covering the filling.

Place the pies, evenly spaced, onto parchment paper-covered trays.  Bake in the preheated oven for 15-20 minutes until golden brown and crispy around the edges. 

Dwindling stock…already!

While the pies are baking, melt the butter.  Remove the pies from the oven, place on a cooling rack, and brush the entire surface and edges of the pies lightly with melted butter.  Allow to cool.  


Traditionally, these are served with egg butter mixture (see below).  If you are like me and don’t like egg butter, try them with a slice of boiled egg and a fresh basil leaf or two.  Delicious!

Makes 20 large or 40 small Karelian Pies.  I prefer them small…

These freeze well.  To serve after frozen, reheat at 200°C/400°F for 10-15 minutes.

Egg Topping (traditional but optional.  I actually don’t like it)
1 egg, hardboiled
40 g unsalted butter, softened at room temperature

Filed Under: Uncategorized

Smoked Salmon, Fennel & Broccoli Quiche

January 29, 2012 by aplough

Winter Warmth

 I remember the first time I cooked salmon – mostly because it was a resounding Fail.  I was in junior high school, and one of my jobs was to make dinner for my family every night.  I’d get home from school around 3:45 PM, eat a snack, and get something into the oven.  I had figured out how make a beef roast, chicken breasts, turkey drumsticks, pork chops, meatloaf, spaghetti – of course back then my default was to put the meat-of-the-day into a roasting pan add a little water, onions, salt, pepper and garlic powder – or maybe a bag of Mrs Grass’s Onion Mix, cover the whole thing tightly with foil, and put it in the oven at 425°F for 3ish hours.  This worked pretty well most of the time – or at least, I didn’t get many complaints.

Then my mom bought salmon.  We didn’t usually have salmon when I was a kid.  I’m guessing that for a large family, even in the Pacific Northwest where salmon is abundant, it was pretty expensive.  So I am pretty sure that this salmon would have been a treat for us.  That is, if I had known how to cook it.  But, having no clue whatsoever about cooking fish, I did what I always did:  the salmon went in the roasting pan.  I added a little water, salt and pepper, and some onion slices.  I covered the whole thing with foil, popped it into the 425°F oven, and went about my business (homework, house cleaning, laundry, computer games…) for about 3 hours.  I took it of the oven about the time my Mom arrived home from work.  I lifted the lid and it looked rather dried and charred and not at all appealing.  A bit like poorly done salmon jerky.  I remember the bewildered, disappointed look on my Mom’s face, but we served it up for dinner with potatoes and a salad, and I decided that I didn’t really like salmon anyhow.
Grilling salmon at the cabin
Fast forward many years later, after I’d had grilled salmon and poached salmon by people who knew the art of cooking fish well.  I too learned how to cook fish, and salmon is now one of my favorite foods to eat.  It makes an easy yet elegant dish, and allows for creative outlets in cooking as well.  When we are at the cabin, one of the favorite treats there is salmon cooked slowly in the smoke and heat of an open fire.  It is brined first, then pinned to a wooden plank with wooden pegs, set into a metal frame over the open fire, where it cooks slowly; the top layer caramelizes a bit; the aroma of the smoke melds into the tender flesh of the fish; and the end result is better than candy.  
Smoked salmon, if there is any left over after the initial fish fest immediately after the salmon is ready, is good in so many things.  On of my most recent concoctions is to throw it into a quiche for a warm dinner and a cold lunch the next day.  Putting it together is easy, and the oven does most of the work.  Serve it up with a green salad, and you’ll have a table full of smiling faces as they dig in and indulge.  The mild licorice flavor of the fennel is a nice complement for the smoked salmon.  One other note:  most quiche recipes call for using heavy cream.  I never liked the idea of fattening up a wonderful meal for no good reason, so I use 2% milk in all of my quiches.  I’ve never been sad with the result, but feel free to use heavy cream if that makes you happier!  Also, you can substitute half of the butter for with sour cream (nonfat works fine) or greek yogurt if you want to lower the fat content of the crust as well.  The result will be a slightly chewier crust, but it still tastes great!

Smoked Salmon, Fennel & Broccoli Quiche
Preheat the oven to 450°F or 225°C
Good to the last crumb.

Crust

100 g/4 Tablespoons butter, softened
1 large carrot, grated
1/2 cup flour
1/2 cup oatmeal
1/2 tsp baking powder
1/2 tsp salt
Mix the in a bowl until thoroughly combined and a soft dough forms.  Press the dough into the bottom and up the sides of a 10″ pie pan.  Bake in the oven for 10 minutes.  Remove from heat and lower the oven temperature to 400°F/200°C.
Filling
Whisk together, then set aside:
4 eggs
1 cup milk
Heat a large frying pan over medium heat and add 2 tablespoons of olive oil.  Heat for 30 seconds, then add:
1/4 cup fennel, diced
1 medium yellow onion, diced
Cook until onion and fennel soften, about 5 minutes.  The add:
1 cup broccoli florets, chopped small
Cook until the broccoli turns bright green.  Remove from heat.  Stir in:
300 g (about 1 1/2 cups) smoked salmon, cut into small pieces, taking care to remove all bones
1 cup mild cheese, shredded (mozzarella or edam work well here)

Stir mixture to combine, and pour into the prepared crust.  Pour the egg mixture evenly over the top, and bake in oven for 30 minutes  or until the top puffs slightly and the quiche is a dark golden brown.  Let rest for 10 minutes.  Serve with green salad.
Serves 6-8, depending on how hungry you are.
Note:  if you are using salmon that has been grilled rather than smoked, I recommend adding 1/2 teaspoon salt to the egg mixture, as the salmon problem has a lower salt content and you’ll need the salt for balance in this recipe.

Filed Under: Uncategorized

When there’s nothing in the house except stale bread and eggs

January 18, 2012 by aplough

Lake Paijanne on Christmas Day 2011 – no ice, no snow!

Somedays, the cupboards and fridge in my kitchen simply have nothing to offer me.  Inevitably, it’s on the days I’d most like to throw a plate of leftovers into the microwave a day, that this occurs. On one such day, after sniffing into the paper bag containing 4-day old ciabatta (read: dry and hard) and examining the fridge to find only a few lonely eggs and a few drops of milk, I had an inspiration:  Bread pudding – of course!

Light show, Helsinki, New Year’s Eve 2011

It’s the easiest thing in the world, and my guess is that it would be excellent made with old pulla, in the case that this unlikely problem were ever to happen in my house – old, uneaten pulla, that is.  But in this case,    I added cinnamon and cardamom for a sort-of pulla twist, a few lingonberries for tart twist, heated the oven to 400°F, and tossed the ingredients together in a bowl; then the baking dish, and let it bake for 30 minutes.

Unfortunately we ate it so quickly, there are no pictures to share, but take my word for that this is well worth your time and may make you hide fresh bread until it turns stale just so that you have an excuse to make this.

Bread Pudding
Preheat oven to 400°F/200°C


3 cups stale bread (firm white bread like ciabatta or pugliese or a mix of white & wheat works best – old & crunchy is good in this case)
2 eggs, lightly beaten
1 cup milk
1/4 cup brown sugar
1/2 teaspoon ground cinnamon
1/2 teaspoon ground cardamom
1/2 cup of berries: your choice (I used lingonberries for color and tartness)
1 – 2 Tablespoons of butter, cut into small pieces

Swan Latte, Fratello Torrefazione

In a medium-size bowl, whisk together the eggs, milk, brown sugar, cinnamon and cardamom.  Add the bread crumbs and toss to coat.  Let mixture sit for a couple of minutes so the bread crumbs absorb the moisture, add the berries, and toss again.   Pour the mixture into a small baking dish and add little pieces of butter across the top.  Bake in the oven for about 30 minutes or until the mixture turns golden brown on top and puffs up a little.

Serve warm, preferably with a cup of dark roast coffee.
Serves 2 (happily) or 4 (if you must share).

Cross country skiing in Jyväskylä, Jan 7th, 2011

Filed Under: Uncategorized

  • « Previous Page
  • 1
  • …
  • 46
  • 47
  • 48
  • 49
  • 50
  • Next Page »

Find me on social media

  • Bloglovin
  • Facebook
  • Instagram
  • Pinterest
  • Twitter

Looking for something?

Eat Simply, Eat Well 's gallery on Punk Domestics
  • Bloglovin
  • Facebook
  • Instagram
  • Pinterest
  • Twitter

Copyright © 2025 · Foodie Pro Theme by Shay Bocks · Built on the Genesis Framework · Powered by WordPress