 |
| Bonfire dinners = happy summer days |
Lakeside living. Fresh fish. A whole lot of sunshine. Laughter shared with the people you love. Food cooked over the fire. Garden-fresh produce. Lazy, breezy days. The makings of a good summer. Oh, and more fish. Yes, please.
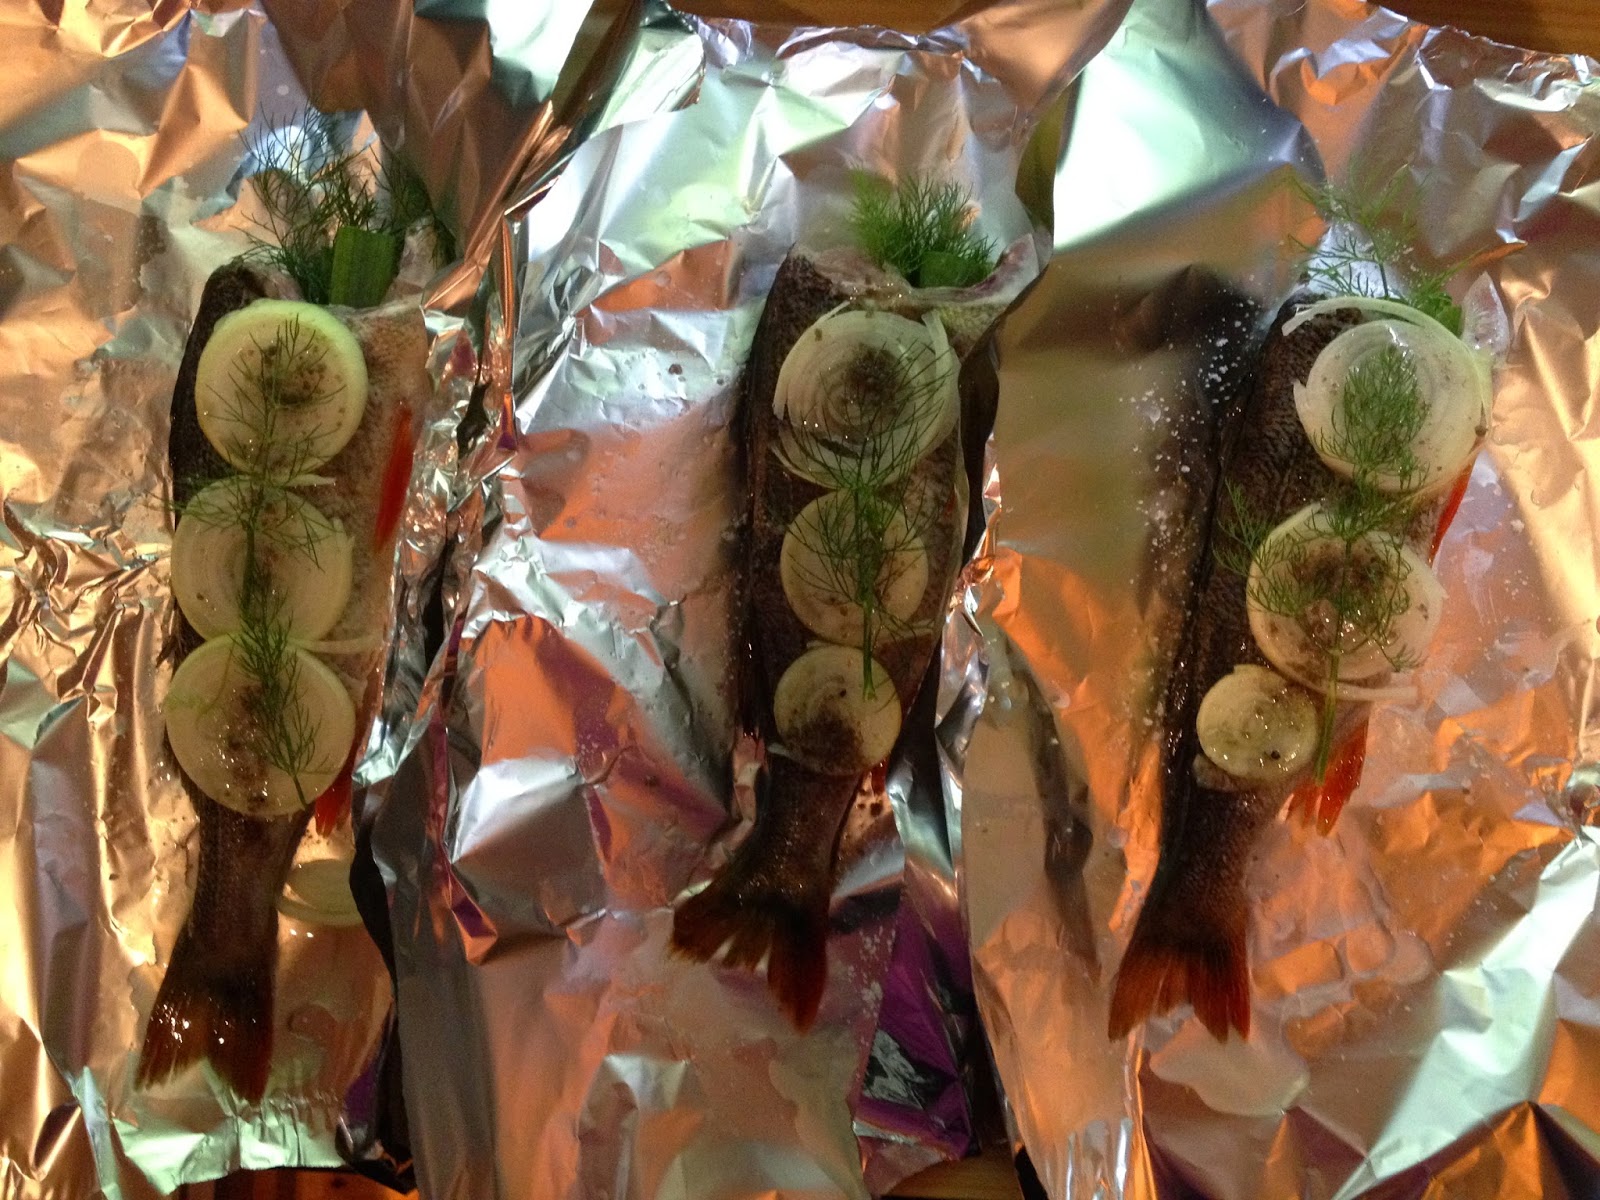 |
| Redfin perch (ahven) ready to take the heat. |
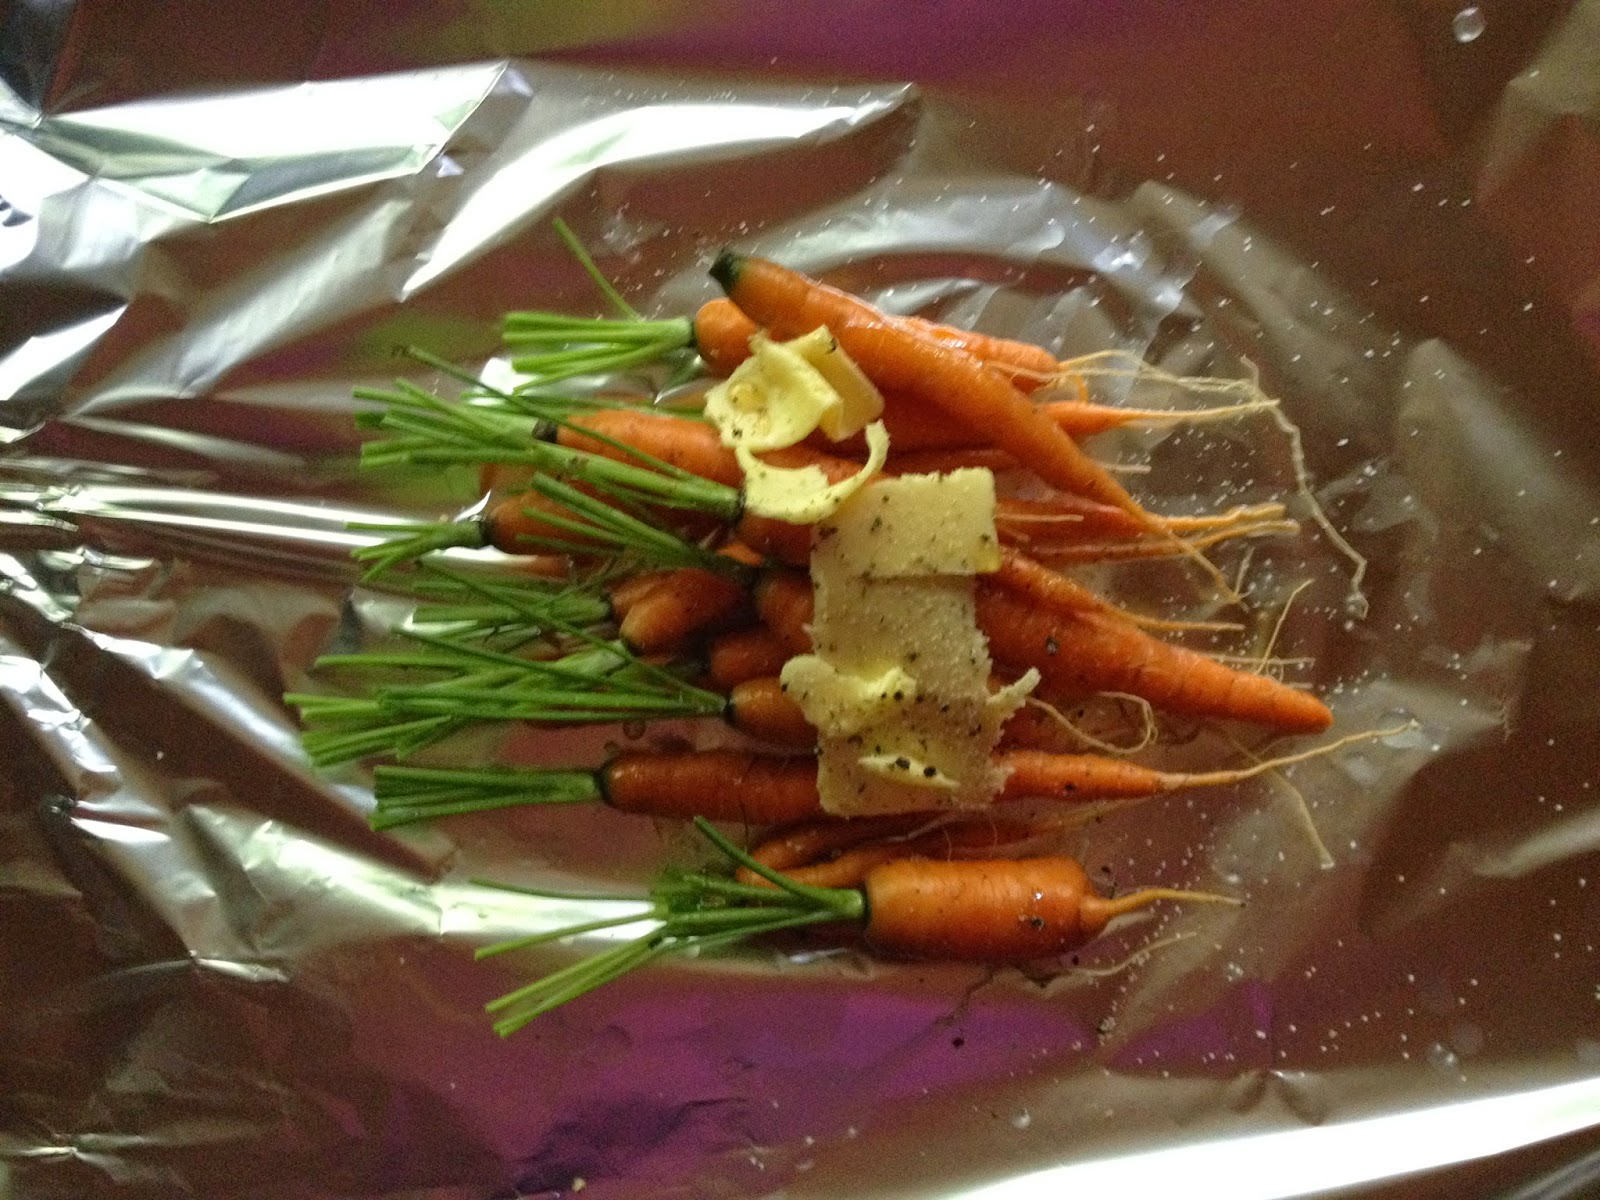 |
| Carrots with butter, honey, salt & pepper, ready for roasting. |
There was a lot of fish coming out of Lake Päijänne into our happy grasp this summer, most of it redfin perch (ahven) or pike (hauki). It seems every time we dropped the nets in, we pulled out a sizable catch. When you have 6 -10 fish (or sometimes more) coming out of the lake at the same time, you need to start getting creative about how to cook so that boredom (gasp!) doesn’t set in. Mostly, we’ve eaten it either smoked whole or filleted and pan-fried over the open fire. Excellent, finger-licking stuff.
 |
| Final moments over open flame – ideally the fire could have been a bit lower. |
This time, I wanted a lighter, juicier version, but one that still didn’t involve heating up the kitchen. Open fire cooking is another great advantage of cabin life, and who wouldn’t want to eat a fresh meal in the great outdoors with the wind blowing softly off of the lake? I’ve had success cooking fish in parchment or foil in the oven, so decided to try this over the open flame, and to serve foil-wrapped vegetables as side dishes cooked up in the same fashion.
 |
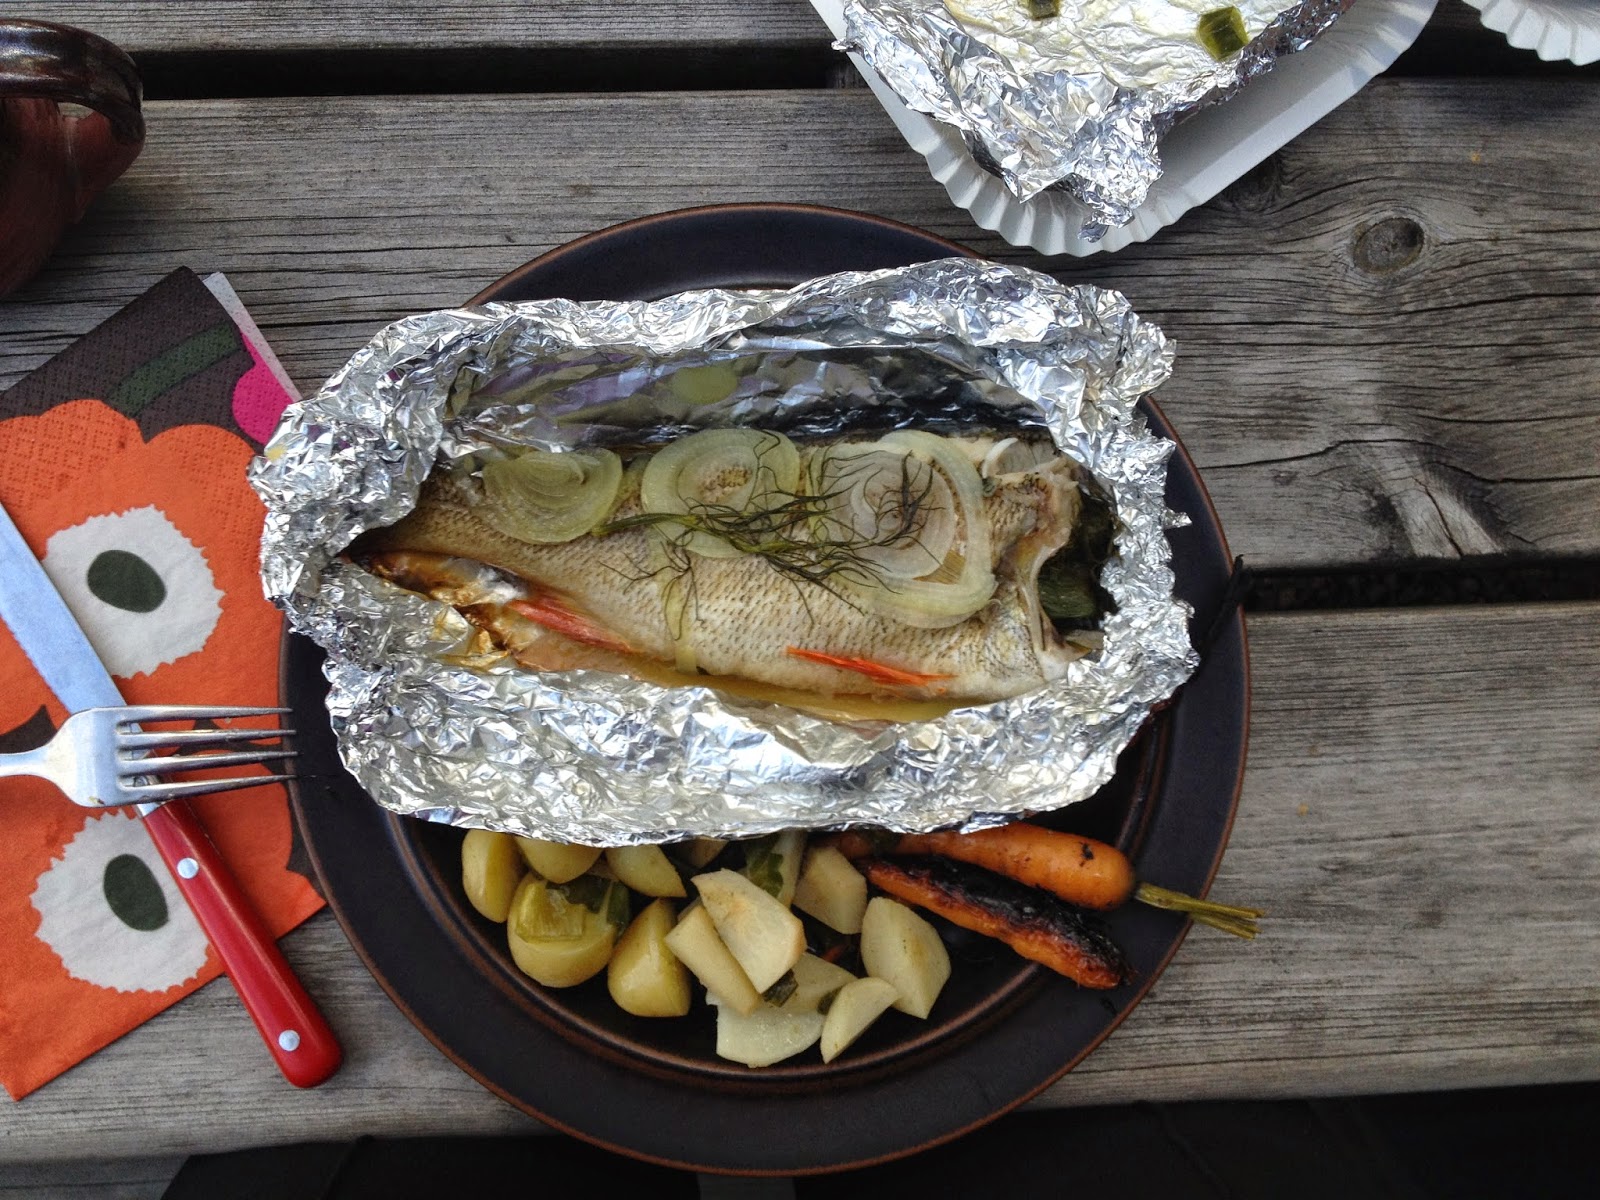
| Dinner is served |
I started with the vegetables first: root vegetables tend to take a long time to roast, and I wanted to give the carrots time to caramelize and the turnips and potatoes time to soften. The carrots & potatoes were excellent; next time I’ll par-cook the turnips for 5 – 7 min to get them to a delicious softness before putting them in foil.
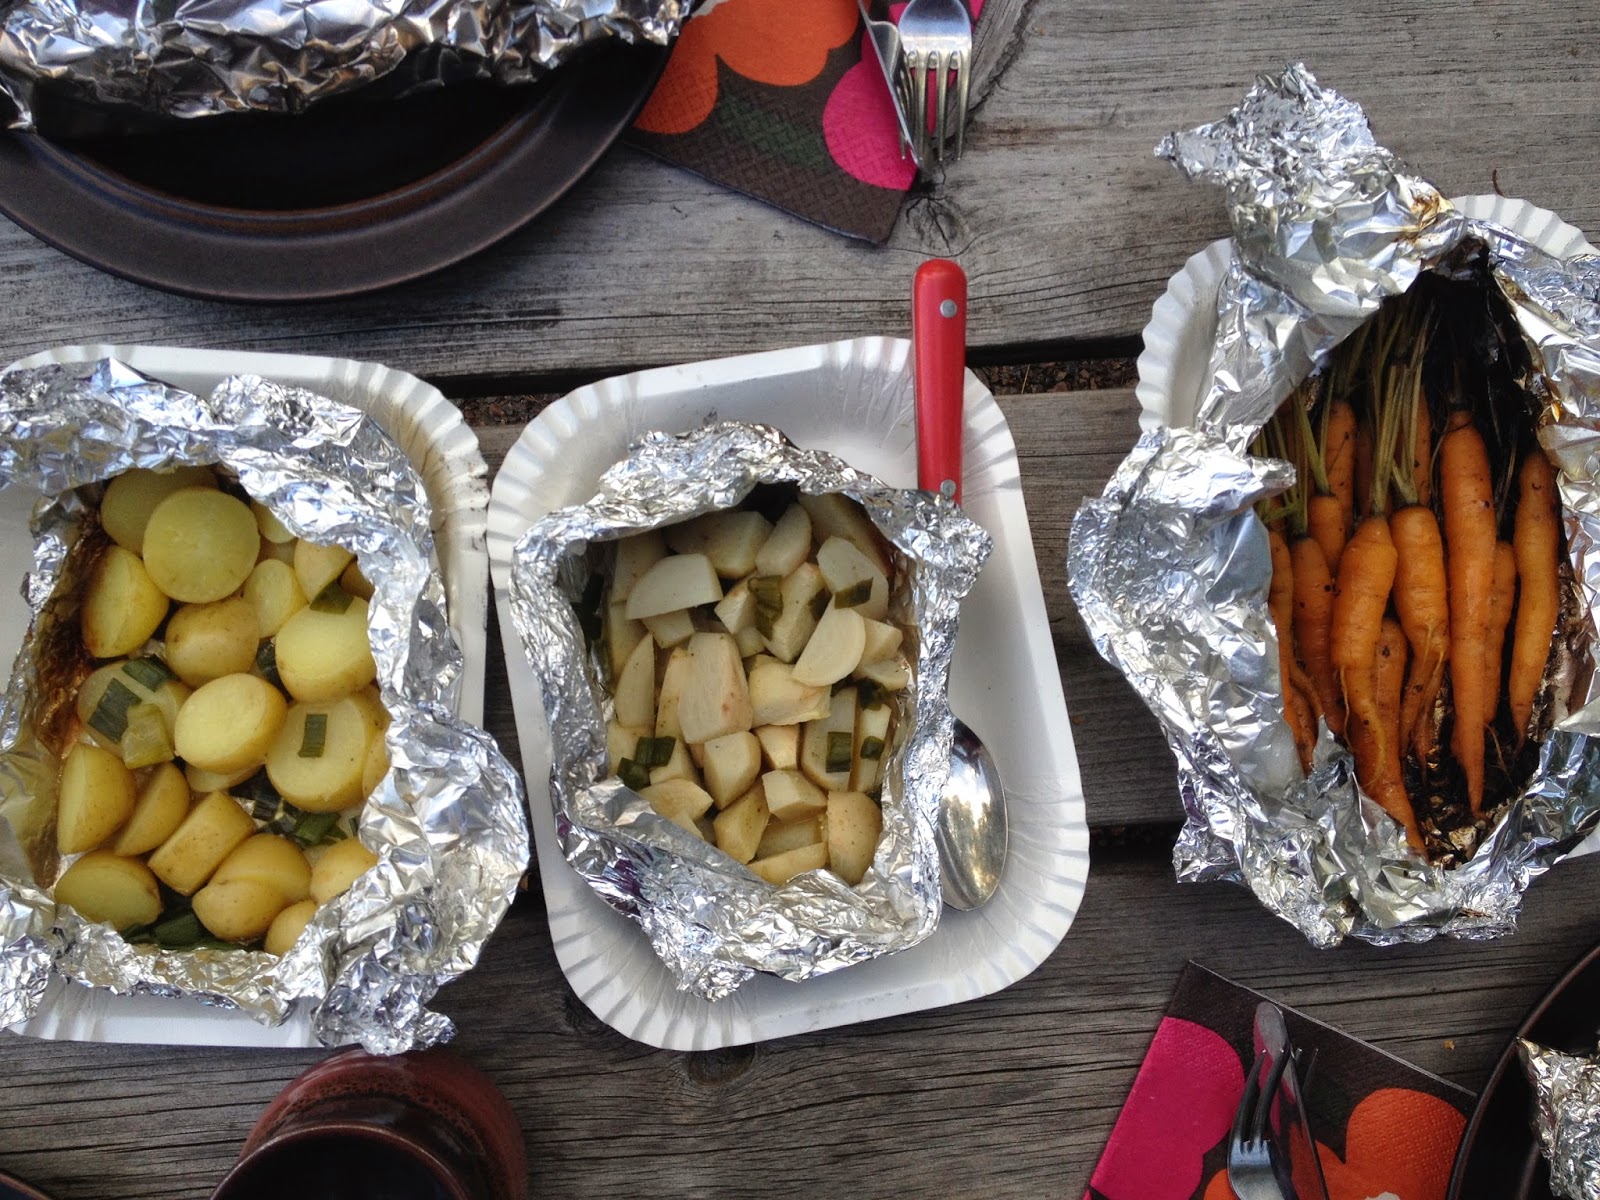 |
| L to R: new potatoes, turnips, carrots |
The red fin perch was a delight to eat this way: with a skin that peeled away easily with a fork and knife (make sure you descale/suomustaa the fish before you try this method). The steam trapped in the foil softened the fish into tender, moist flakes that pulled away from the bone, and the fish disappeared pretty quickly. Note: this will work pike perch and trout as well.
 |
| Foil-wrapped redfin perch
Foil-wrapped Redfin Perch
One redfin perch per person
Onion, peeled, cut into slices
Fresh Dill fronds
Lemon slices (best) or lemon juice
Salt
Olive Oil
First, get your campfire/nuoti going. You want to give it a chance to burn down so it’s mostly hot coals and low flame. Arrange a grill over the top of the flame.
Clean and descale your redfin perch. Lay out a large piece of foil per fish. Salt the fish inside and out. Lay each fish on one side on the foil lengthwise in line with the foil. Arrange onion slices (or the green tops if you have them), lemon slices and dill into the cavity of each fish and arrange them over the top of the fish as well. If you don’t have fresh lemon, do as I did in the picture above and sprinkle the cavity and the top of the salmon with lemon juice instead. Drizzle olive oil over the top of each fish. Bring the long sides of the foil up over the top of the fish, fold them over carefully several times, and press to seal. Roll up each end and seal.
Place the fish on the grill over the fire, and cook for 20-25 minutes. To check for doneness, open the top of one package (watch for the steam that will come pouring out) and push the tines of a fork into the fish near the spine and the neck opening; pull down lightly with the fork. If the fish pulls easily away from the bone and is moist a slightly flaky; it’s done (I always taste to make sure; (ahem) quality control). Remove from heat and serve.

Roasted Carrots
Fresh carrots; greens trimmed but with one inch or so remaining
Salt
Honey
Butter Arrange the washed, trimmed carrots on a piece of foil. Sprinkle with salt; drizzle with honey; and set a few pats of butter over the top. Close the foil; seal the package; and place on a grill over the open fire.
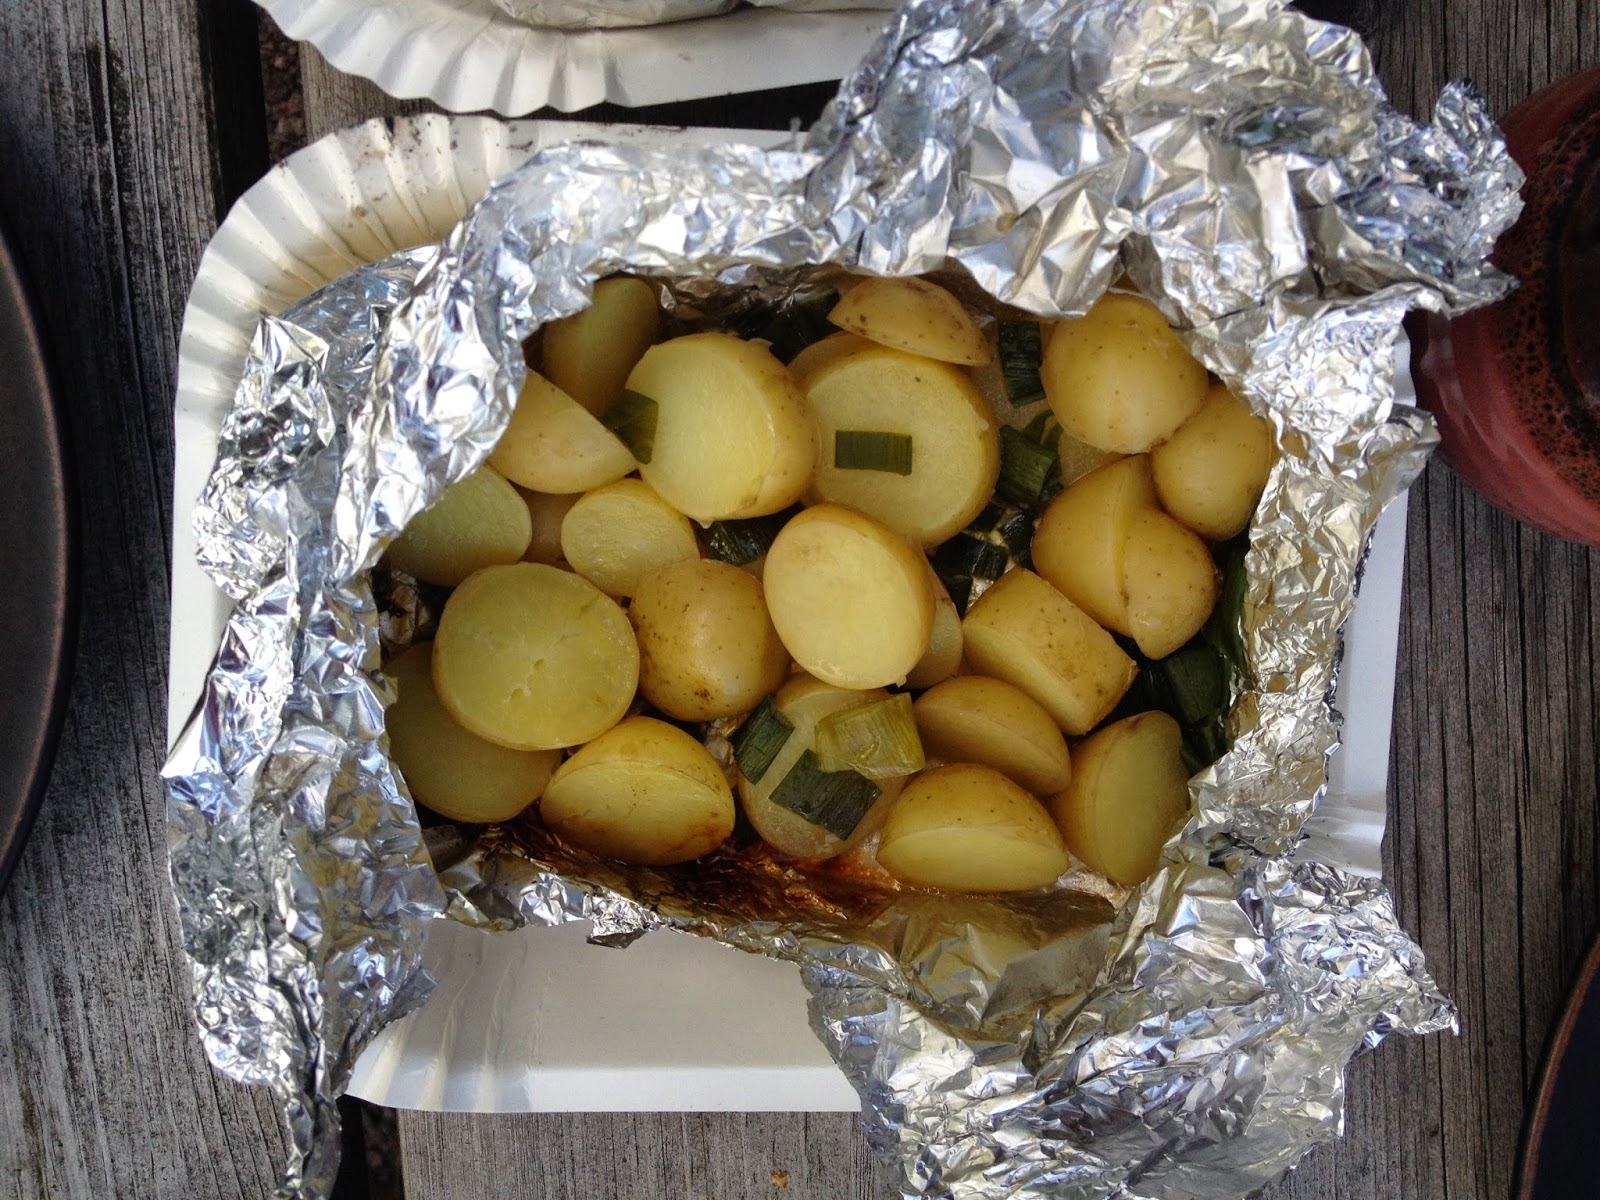
Roasted Potatoes
New potatoes washed and cut into chunks
Butter
Salt & Pepper
Green onion tops, cut into rounds, optional
Lay the washed, cut potatoes on a piece of foil. Sprinkle with salt & pepper and set a few pats of butter over the top. Close the foil; seal the package; and place on a grill over the open fire.
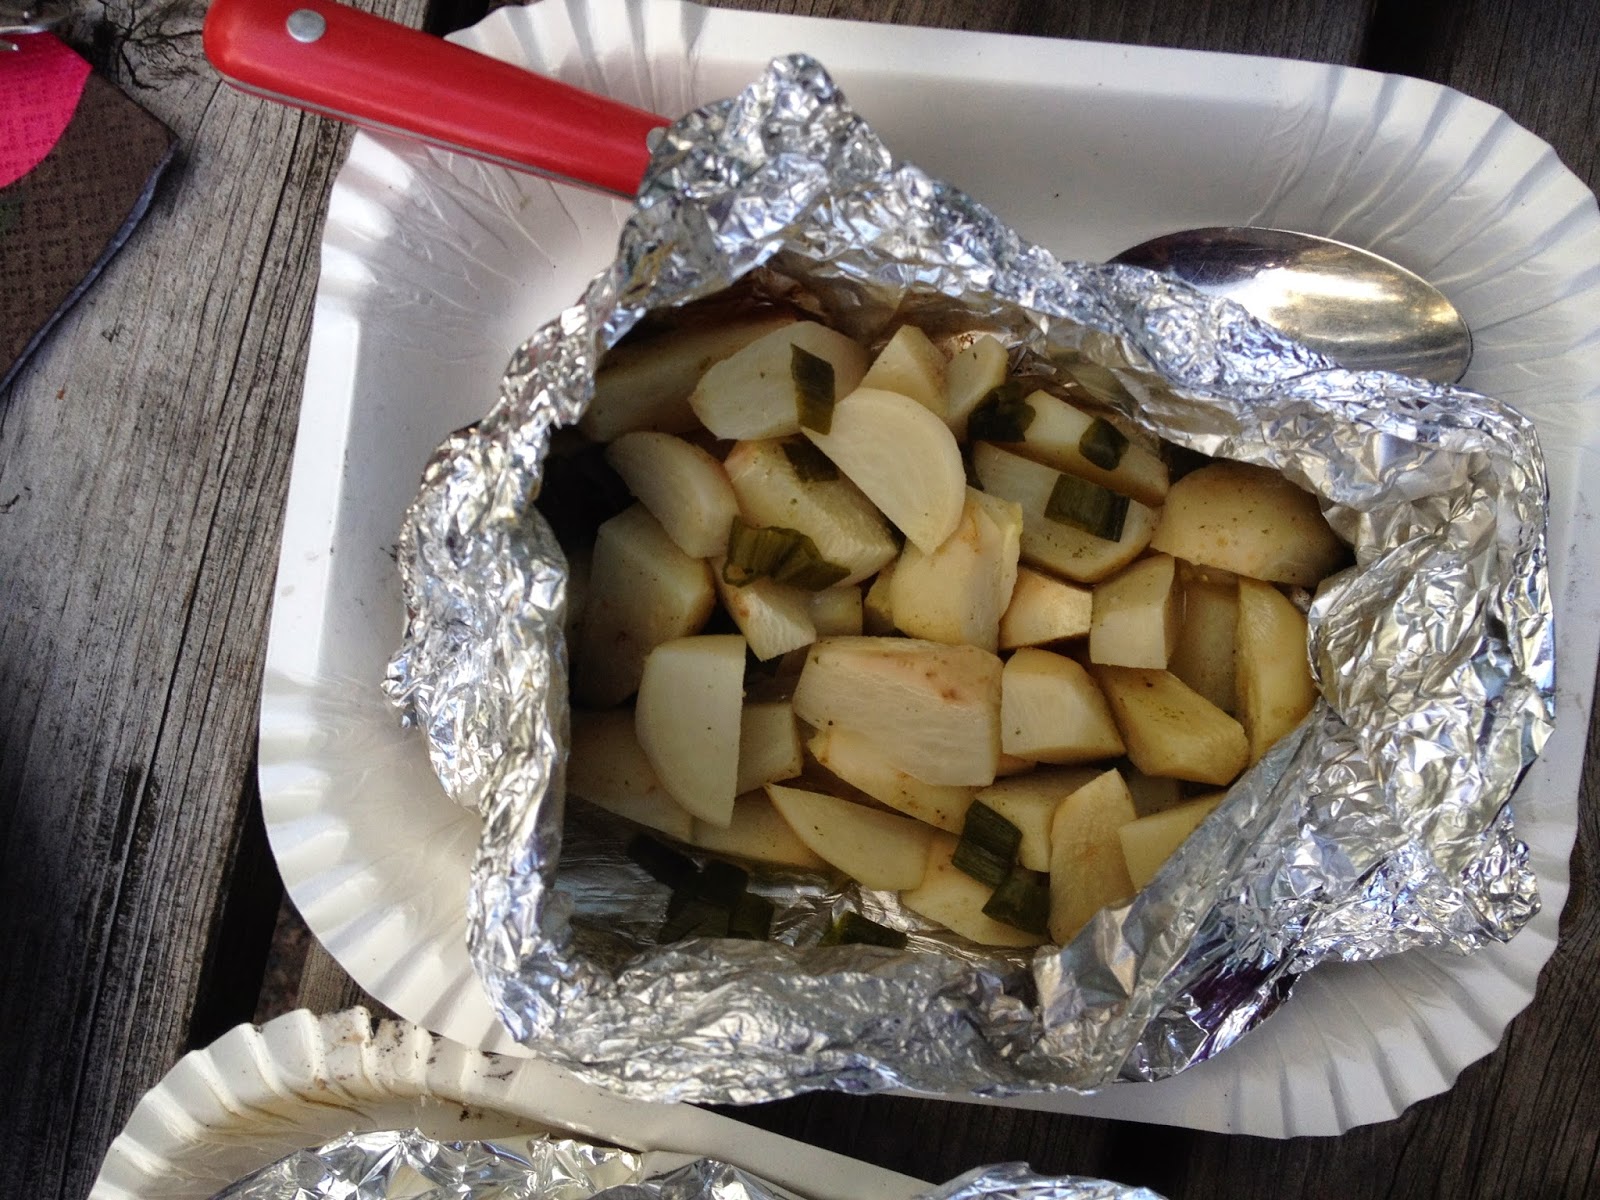
Roasted Turnips
Raw turnips, washed, peeled, and cut into chunks
Butter
Salt & Pepper Green onion tops, cut into rounds, optional
Place the turnips in a small pot, cover with water, bring to a boil, and boil for 5 minutes.
Place the cooked turnips on a piece of foil. Sprinkle with salt & pepper and set a few pats of butter over the top. Close the foil; seal the package; and place on a grill over the open fire.
|