|
| Beet, Carrot, Rosemary and Goat Cheese Galette |
I have been dreaming of this recipe since early spring when I planted my beets. I had grand plans of harvesting loads of beets: a few golden ones; dark red round ones, and the prettiest of them all, the lovely striped Chiaggio beets… and then along came a cold, rainy, long spring followed immediately by a long, dry, extremely hot summer. I was away for the first three weeks of really hot weather, and nearly every living thing in my garden died. The sole survivors were the mint which grew with great vigor and abundance everywhere; the oregano which has taken over the bed into which it was planted 3 years ago, 1/2 liter of strawberries, and a whole load of rhubarb. Not exactly a smashing success.
My local food market, thankfully, was stocked with beets harvested by those with better luck and far greater skill than I, so I was finally able to gather the elements of this recipe floating around in my mind, and produce a dinner for my dearest and me.
I know, first I call it a galette, and then I talk about pie, so what’s going on, here? A galette is French term for a flat, round, free-formed crusty pie or cake. In this case, an open-faced, free-form pie, using flaky crust dough, baked on a flat pan with the dough arranged an a relaxed fashion around and partially over the ingredients, and then baked. It’s easy to make and not at all fussy, so it doesn’t matter if it isn’t perfect; in fact, it shouldn’t be. The more rustic it looks, the better.
The first night we ate it all by itself, with no accompaniment. It was warm from the oven with the golden, flaky crust breaking under the edge of the of fork and dissolving in our mouths. The tanginess of the goat cheese balanced the sweet honey and earthiness of the beets and carrots, while the small bit of rosemary added a welcome perfume. It was delicious. The next day I had one of the remaining slices for lunch, served slightly warmed, together with a fresh green salad. The crust wasn’t as crisp on day two, but it was still delicious, so feel free to make this a day ahead and rewarm it to serve if needed. Warming it in a 200°C/425°F oven for 10 minutes would re-crisp the crust, as well.
It may look like a lot of work, but really, you expend a little bit effort and then wait while the action happens. So go ahead, get that crust started and you’ll be enjoying this in no time.
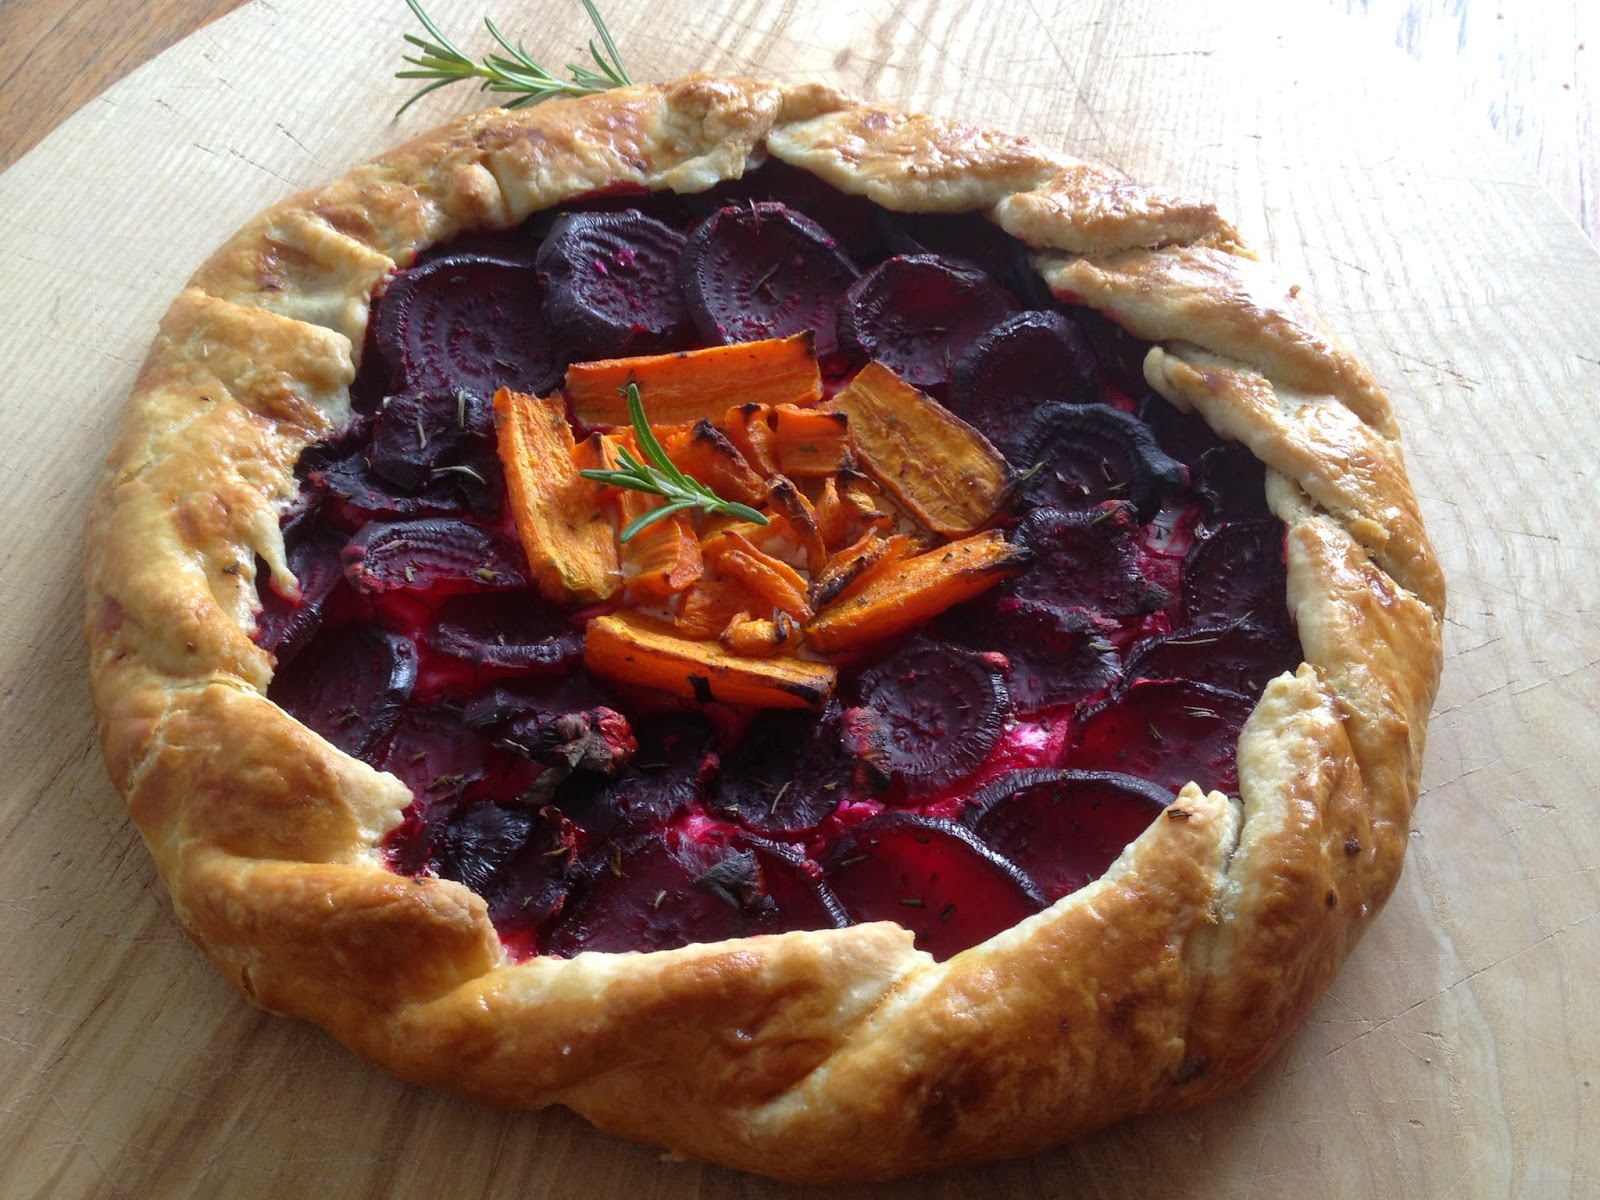 |
| Beet, Carrot, Rosemary & Goat Cheese Galette |
Beet, Carrot, Rosemary & Goat Cheese Galette
Flaky Tart Crust
1 teaspoon / 5 ml salt
2/3 cup / 150 ml cold water
3 cups + 2 tablespoons / 455g all-purpose flour
1 cup + 5 tablespoons / 300 g very cold butter
In a small bowl, combine the salt and the water and stir to dissolve. Keep cold until ready to use.
You can make the dough in a food processor or by hand. To use a food processor, but the flour in the work bowl. Cut the butter into pieces and scatter over the flour. Pulse briefly until the mixture forms large crumbs, and some of the butter pieces are about the size of peas. Add the water-salt mixture and pulse briefly until the dough starts to form a ball, but is not completely smooth. You should still see butter chunks.
To make by hand, put the flour in a bowl. Cut the butter into pieces and scatter over the flour. Using your hands, a fork or a pastry blender (my preferred tool), work the butter into the flour until the mixture forms large chunks and some of the butter pieces are about the size of peas. Pour in the water-salt mixture and, using your hands, work the dough together so it forms a ball but is not smooth. You should still see butter chunks.
On a floured work surface, divide the dough into two equal balls and shape each ball into a disk about 1 inch / 2.5 cm thick. Wrap each disk in plastic wrap and chill for at least two hours or up to overnight.
You will need only one disk of dough for this recipe. If you do not plan to use the other disk immediately, place the disk in a plastic bag, label with contents and date, and freeze. Remove from the freezer and thaw in the refrigerator one night before you’d like to use it.
Make the filling:
5 medium-sized beets
2 large carrots, cut in half lengthwise
1 container of soft goat cheese
1 teaspoon chopped, fresh, rosemary
1/2 teaspoon Maldon salt or orange citrus salt
1 teaspoon of runny honey
1 egg, beaten
Preheat oven to 200°C/425°F.
Wash the beets if they are muddy, cut off the long thin root end but leave the stem end intact. Place on an oven-proof tray and place in the hot oven for 30 minutes. While the beets roast, peel and slice the carrots and toss them with a drizzle of olive oil. After the beets have been in the oven, add the carrots to the same try and cook for another 15 minutes. The beets should be tender when pierced with a fork; if they are not, cook them a little longer. The carrots should be slightly caramelized and brown; remove them before the beets if needed.
To assemble:
On a lightly floured surface, roll 1 disk of crust (recipe above) out into a large circle measuring 40 cm / 15 inches in diameter. Don’t worry if it’s not a perfect circle, or if the edges are a bit rough. The great thing about a galette, is that it is supposed to be a bit rustic. Place the crust onto a parchment covered tray.
Spread the center of the crust with a layer of goat cheese – use all of it, and spread it out so it’s 1.5cm / 1/2 inch from the edge.
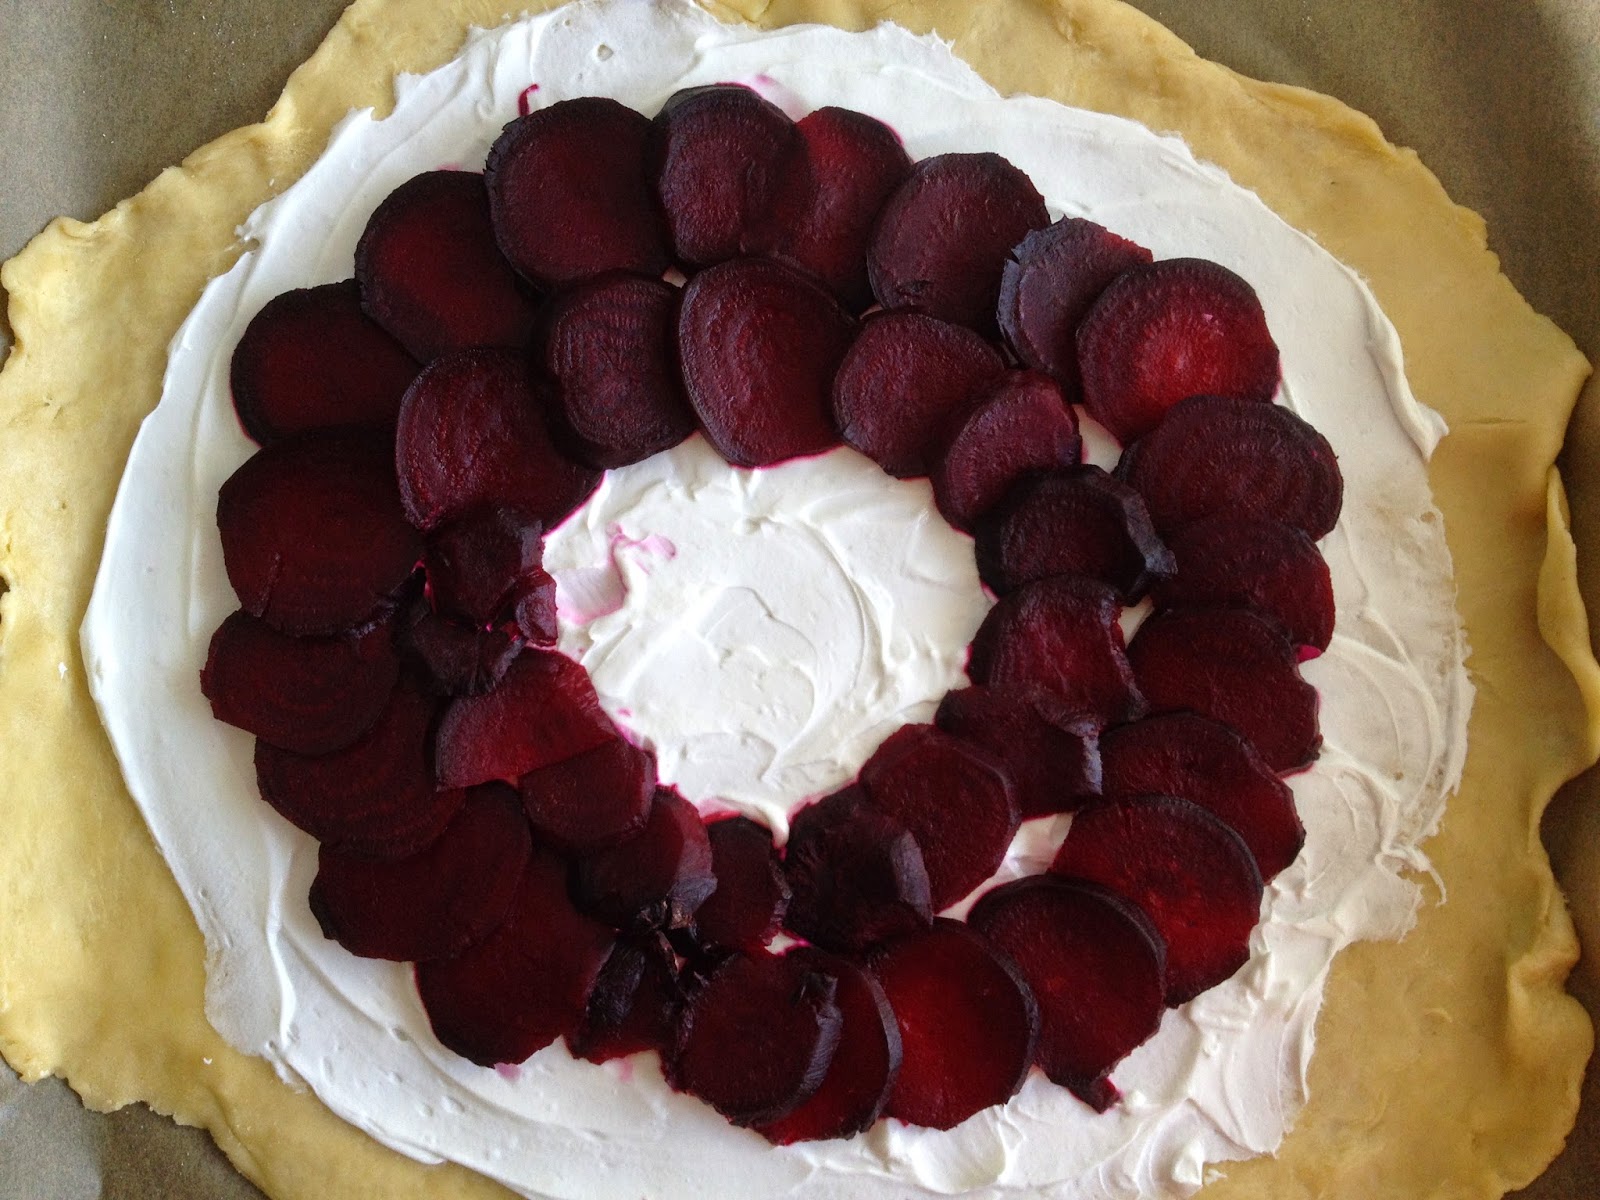
Slice the beets into thin layers and lay them out across the the goat cheese, starting 2.5 cm / 1 inch in from the edge of the goat cheese, letting them overlap slightly. Leave a small empty circle of goat cheese in the middle. Cut the carrots into small chunks or strips and arrange them in the center. Sprinkle the chopped rosemary and the Maldon salt over the top of the carrots and the beets. Drizzle honey over the top.

Fold the edge of the crust over the outside section of the beets, working from one point in the circle and turning the crust slightly under itself as you work the dough up and over. Brush the crust with beaten egg. Place the tray with the galette into the hot oven and bake for 20-25 minutes or until the crust is golden and crisp.
Serves 6-8 as a main course. I recommend you serve it with a nice green salad. Also makes a wonderful appetizer.