This recipe came to me as I’d just made a few cups of fresh flour and wanted to try it in a tart – and the winds howling outside made a quick tart like this one, reminiscent of summer tomatoes but making the best of what can be found in winter, seem like a really good idea. In addition, I had some sheep’s cheese left over from a Christmas party that needed using – and since I’d only used sheep’s cheese once before, wanted to try it in a tart instead of goat cheese.
Since the snow is once again blowing outside my window, this seems like a good time to share this with you so you can get yourself geared up for a day outside in the snow.
 If you’re wondering where you can find sheep cheese, I found at a local ethnic market in Itäkeskus near the Intersport which serves Turkish and African immigrants mostly, and is full of wonderful food finds like fresh okra, pure pomegranate juice at a reasonable price, beautiful fresh dates, and store-made Baklava – along with rows and rows of things I don’t recognize by name or sight, foreign-language labels not-withstanding. Nevertheless, the sheep cheese came in a can with a picture and a German label, and despite my rusty German, I knew what I was getting and had some fun ideas about how to use it. Good grocery stores should carry it too, but I always feel like a visit to an ethnic grocery store is like a trip out of the country in a culinary sense, and love the experience. This sheep cheese was stored in a salt brine, and has a flavor slightly more mild than goat’s cheese. I think it’d be a great substitute whenever a recipe calls for using a hard goat’s cheese.
For Christmas, I used it on these Grilled Polenta Cakes with Carmelized Onions, Goat Cheese and Honey posted on Food52 by Arielle Clementine – my favorite from the day’s appetizers. Absolutely lovely. I made everything the day before, and pan fried the polenta just before serving.
But this time I rather than an appetizer, I made something that makes a lovely lunch or dinner, served up with a nice green salad.
A few notes:
1. I don’t have a tart pan with a removable bottom, and I really wanted to present this out of the pan. I used a springform (cheesecake) pan which worked well enough; the tart pan is on my wish list.
2. The tomatoes can be made in advance and stored in the fridge for up to a week, or frozen. One tip is to leave the oven on when dinner is ready, shove the pan of tomatoes in at 200°C/400°F, and let them roast for 40 minutes while you enjoy dinner. Pull them out and let them cool while you do the dishes, store them in a lidded plastic container in the fridge, and you are ready to whip up your tart the next day.
3. Don’t use fresh cherry tomatoes for this: the tomatoes will release their liquid and make the tart too wet. They need to be roasted.
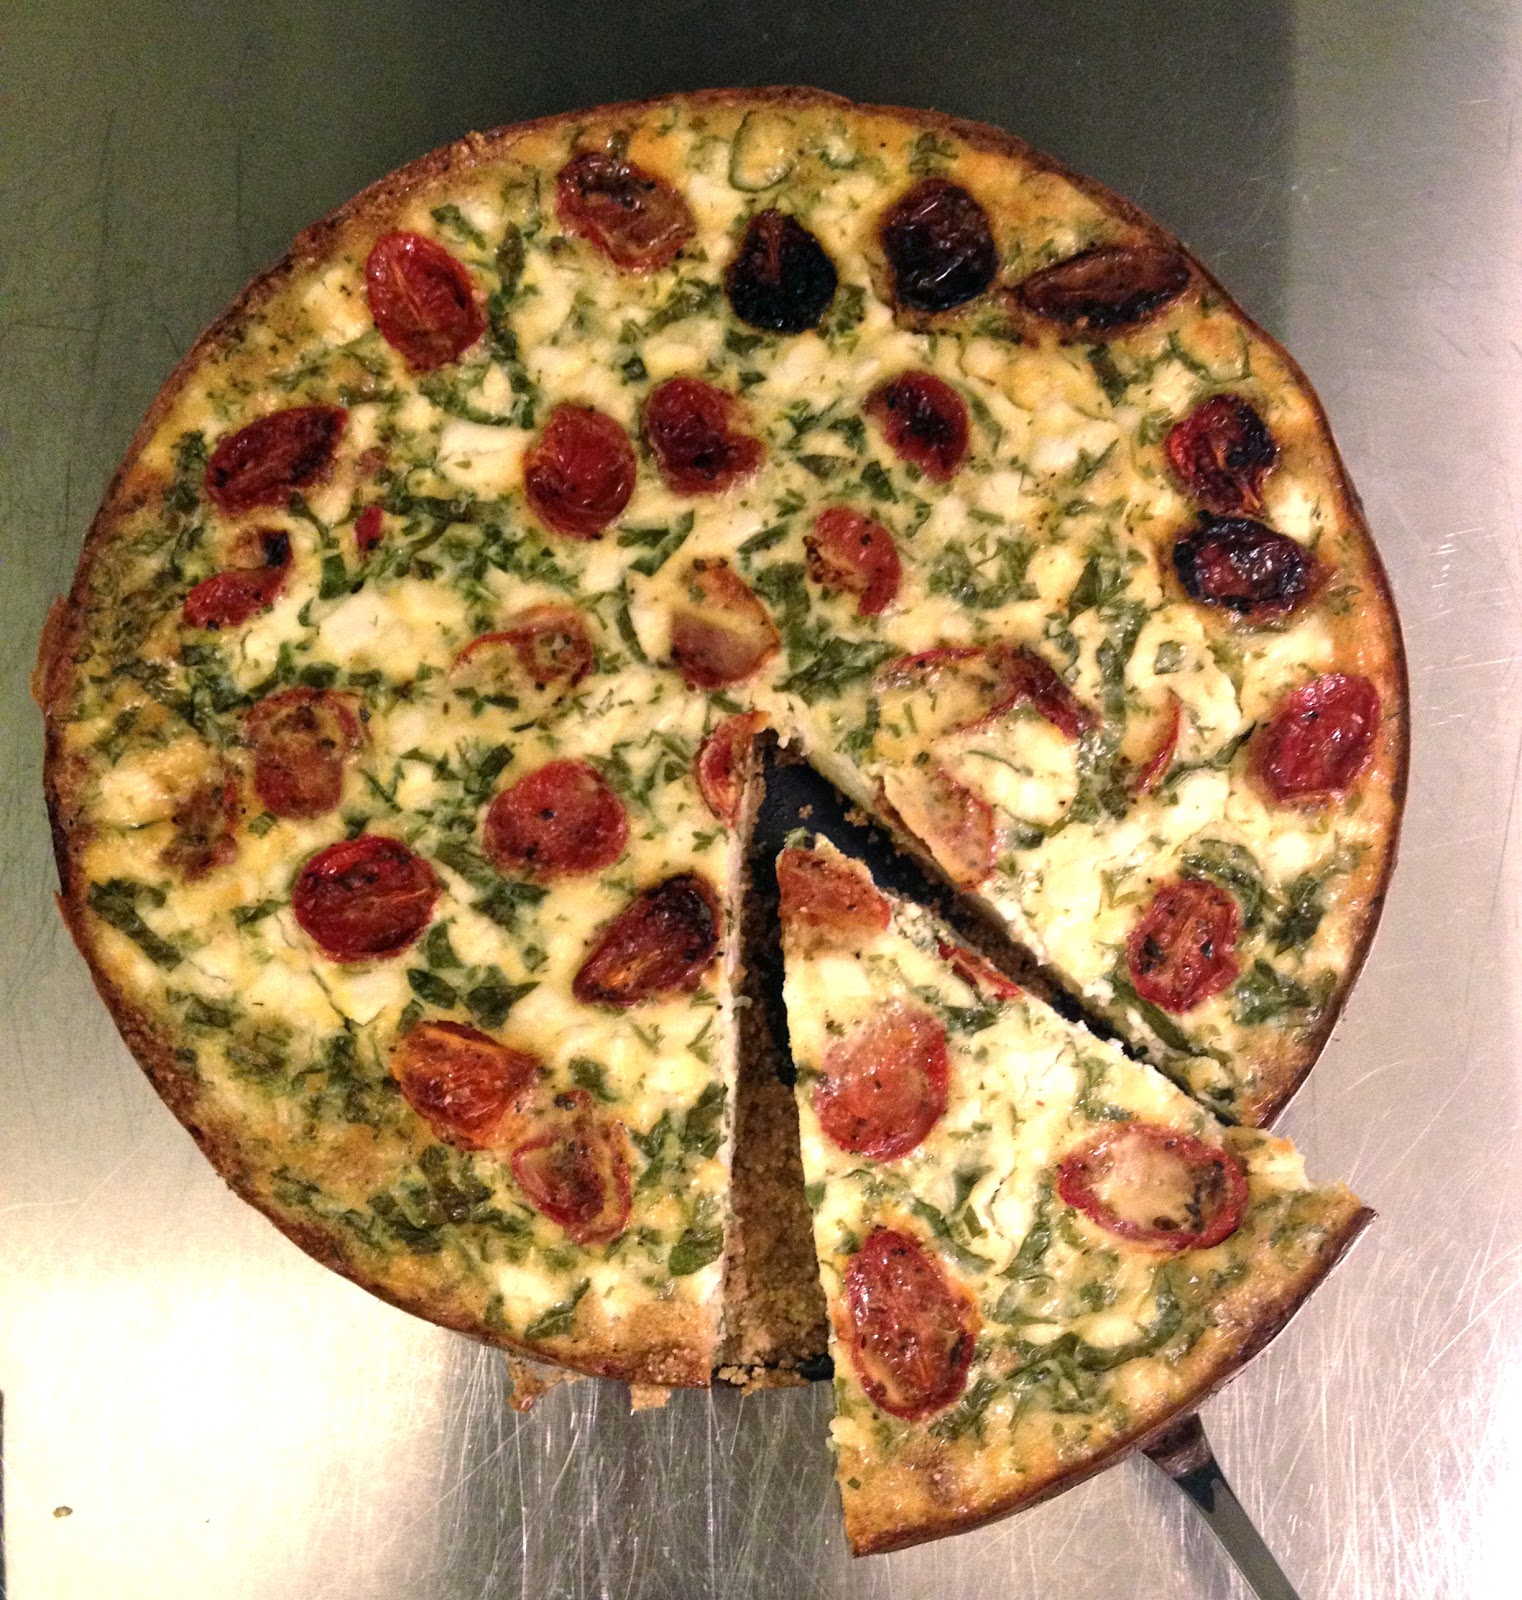
Roasted Cherry Tomato and Sheep Cheese Tart
Preheat oven to 225°C/425°F
Crust:
1 1/4 cup / 2 1/2 dl flour
1 teaspoon baking powder
1/2 teaspoon salt
1/2 cup olive oil (vegetable oil or melted butter can be used instead)
Combine the flour, baking powder and salt with a fork in a medium-sized bowl and stir to combine. Add the olive oil and stir again until the mixture comes together. Using your fingers, press it into the bottom and slightly up the sides of a 9″ springform pan or tart pan with removable bottom. Place the pan in the preheated oven and bake for 10 minutes or until golden brown. Remove from oven and fill immediately with prepared filling.
Filling:
3 eggs, beaten
1 1/2 cups / 3 dl whole milk
1 cup / 2 dl diced sheep cheese, or substitute goat cheese if needed
1/4 cup fresh, chopped parsley
1/4 cup fresh, chopped basil
1/2 teaspoon salt
1/2 teaspoon fresh ground pepper
1/2 pound / 250g roasted cherry tomatoes; recipe here
Combine the eggs, milk, sheep cheese, parsley, basil and salt in a medium-sized bowl. When the crust is baked and ready, remove from oven and immediately pour the egg mixture over the crust into the pan. Arrange the roasted cherry tomatoes over the top. Return the tart to the oven and bake until it is puffed on top and golden, 35-40 minutes. Allow the tart to rest for 10 minutes to set. Serve with a green salad
Serves 4.