Eat Simply, Eat Well

Healthy recipes & tips to help you live the good life. by Ann Plough

Stone Fruit Jam Part 2: Nectarine Mint Jam

August 2, 2014 by aplough

Nectarine Mint Jam
Jam isn’t something you normally think of when you come across a pile of nectarines.  And I have never, that I recall, seen a nectarine jam for sale.  It’s usually the peaches and apricots that get all the glory when it comes to jams and desserts, while nectarines are typically left for eating directly out of hand. 

But making nectarine jam is something you really ought to make time for.  I mean, I love a good, juicy peach – especially if the skin isn’t the fuzzy kind that pokes the tender skin above your lip as you bite into it; this is a challenge unique to peaches, and usually means you need to rub the outside of the skin vigorously on a paper towel or the thigh of your jeans to remove the fuzz. A perfect peach has minimal fuzz, and is so big that it overflows the palm of your hand when you hold it, and so sweet and juicy that you need to bend forward at the waist, chin forward as you bite into it, so that the juice that will inevitably spill over with every delicious bite runs down onto the ground rather than covering the front of your shirt.  That’s a good peach.

And then there’s the slightly tart, slightly sweet curious combination that comes with a perfectly ripe apricot – the kind that breaks open neatly beneath your thumbs so you can remove the pit, with just the right amount of softness and give between your teeth and that makes one of the best types of jams I can imagine.  Apricots are easy.

Nectarines aren’t something people get as excited about. The reason for this, I think, is that nectarines are picked, shipped, and arrive at a store or market near you, raw and crunchy and just not tasting that great.  Biting into a underripe nectarine is like sinking your teeth into an apple, except that you aren’t hoping for an apple at that point, you are hoping for the lovely juiciness that a peach brings, but you get something else entirely and it feels disappointing.  It doesn’t have to be this way.  Nectarines, (as long as they are ripe) because of their thin, smooth skin, don’t need to be peeled or undergo any laborious preparation before you use them.  Just take out the pit, slice them up, and they are ready to go.

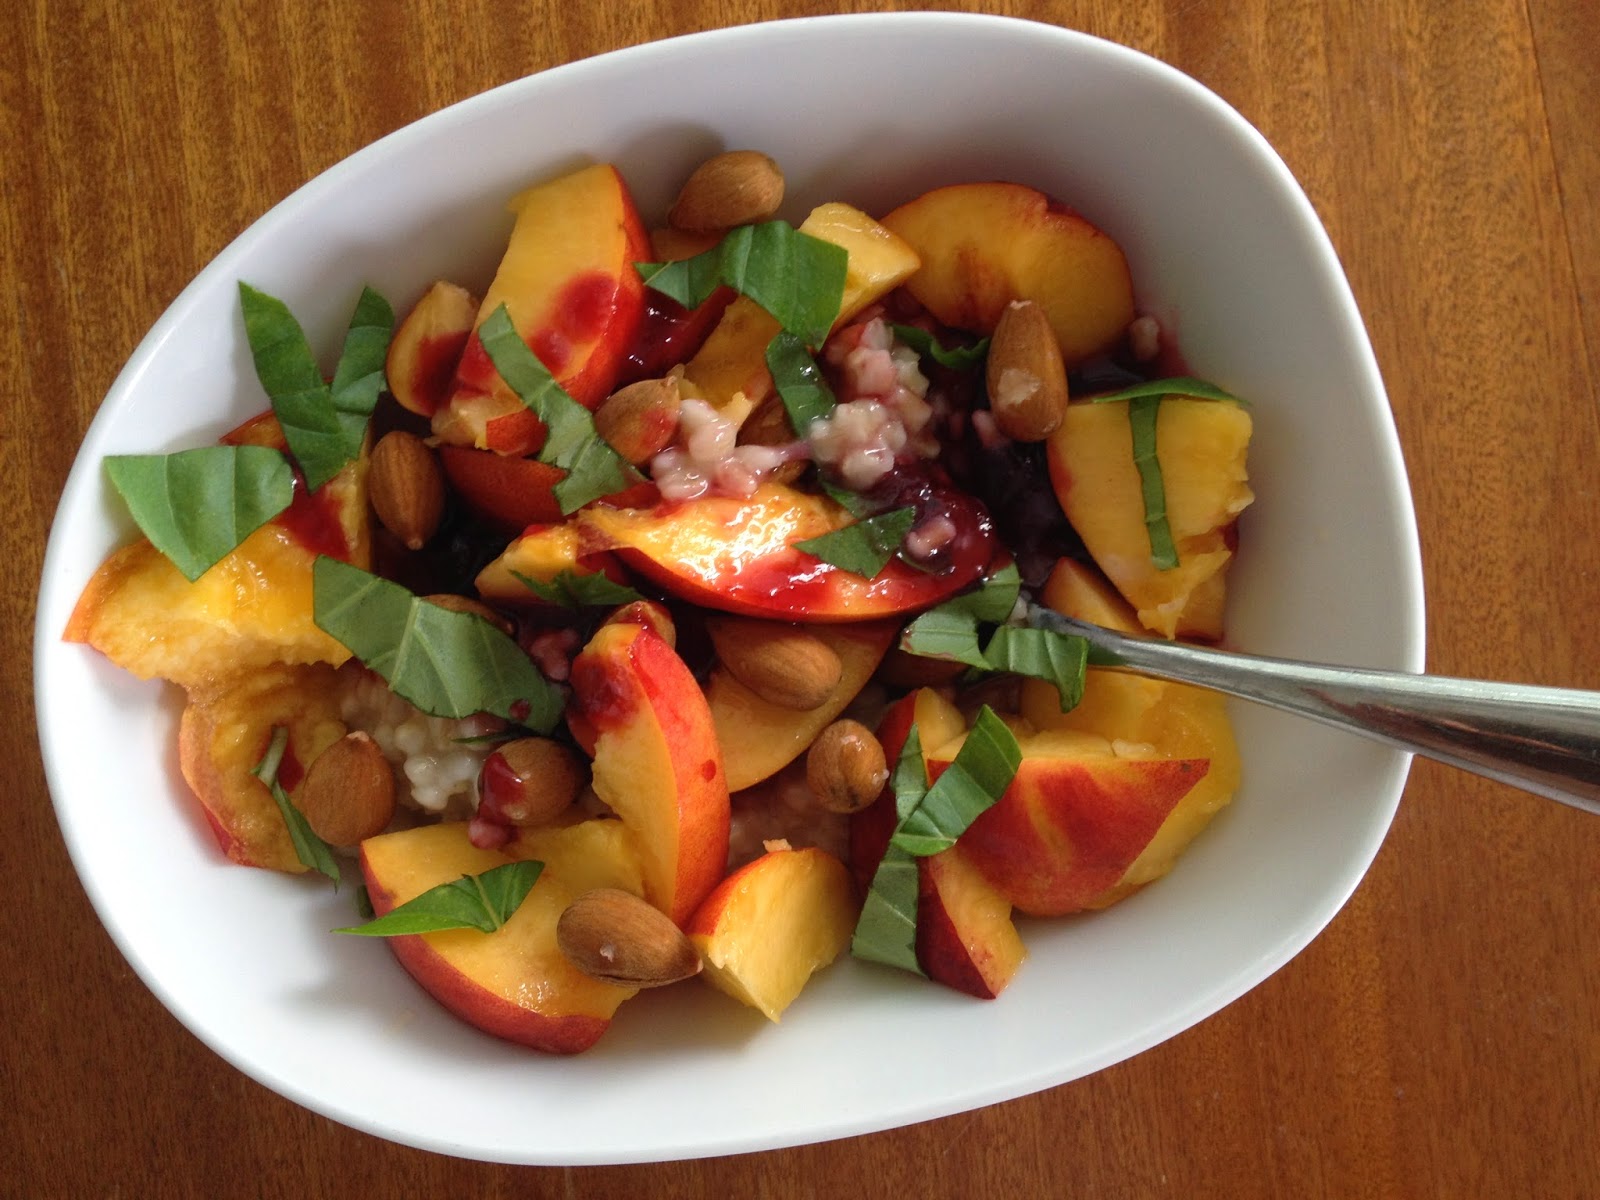
Fresh Nectarines over oatmeal with Plum Licorice Jam, Basil and Sprouted Almonds

So try this:  Next time you buy a batch of rock-hard nectarines, let them hang out undisturbed in your warm kitchen for 2 or 3 days.  They’ll be perfect.  Eat a few.  Cut some over your oatmeal.  Layer them beautiful over the top of a vanilla or lemon tart.  And then, make jam.

I paired this jam with mint and it worked beautifully.  Usually when working with peaches and apricots, I’ve used rosemary, but somehow, with a garden full of mint and some perfectly ripe nectarines, this combination felt right.  The mint adds just the right, bright note against what would otherwise be a very sweet jam.

This jam is good on everything I’ve tried so far, including as the sweetener for a salad dressing in replacement of honey.  It’s especially good on toast spread with ricotta and topped with this jam.

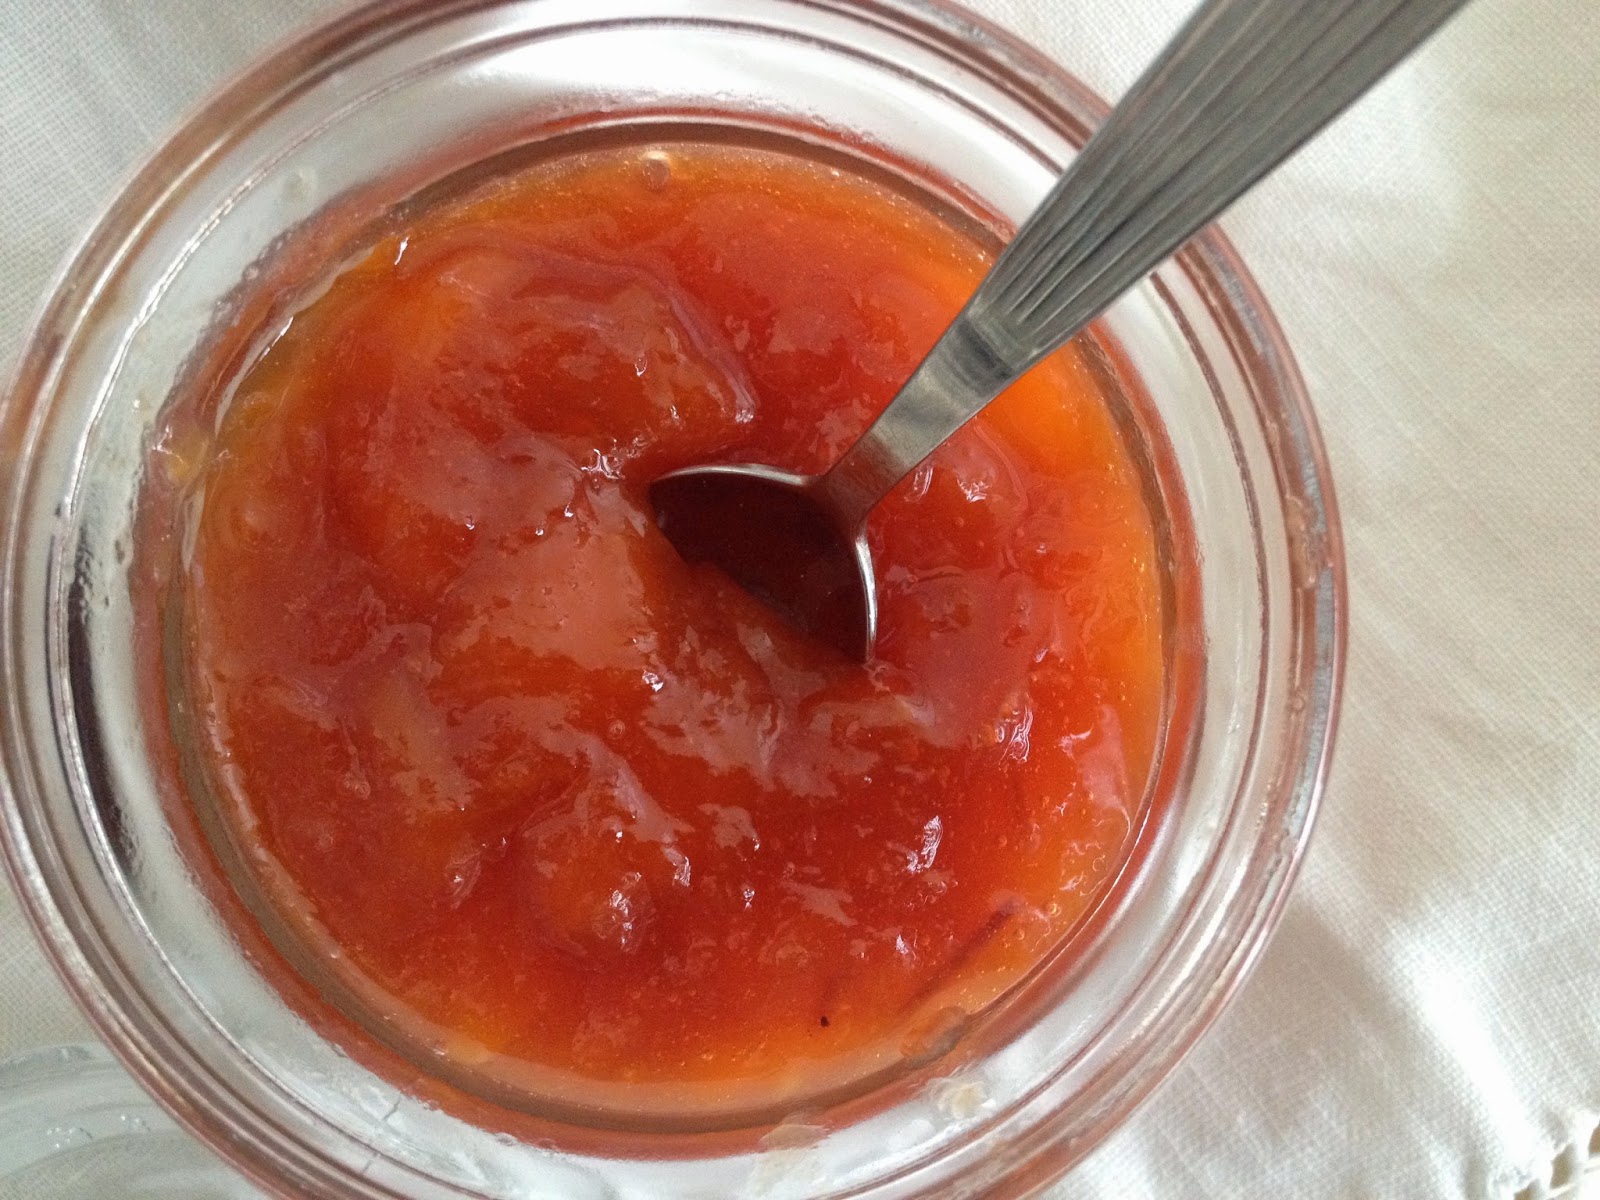
The jam is nearly ready…

Nectarine Mint Jam

2 kg / 4,5 pounds of nectarines, pit removed and fruit cut into 1/2″ / 1.5 cm chunks
660 g / 3 cups of granulated sugar
2 tablespoons fresh lemon juice
2 large mint stems (10-15 leaves per stem, leaves left attached – use peppermint or another strong mint)

In a large stockpot, combine the plums, sugar, lemon juice.  Stir well to combine; cover; and allow the fruit to macerate for 1 hour.

Set the pot over high heat and bring to a rolling boil.  Reduce the temperature to medium-high, stir; and set the timer for 15 minutes, allowing the fruit to bubble undisturbed.  Meanwhile, place five teaspoons on a plate in the freezer.  You’ll use these later for testing whether or not the jam is ready.

While the jam cooks, prepare your jars:  Wash in hot, soapy water and then fill with hot water and set aside.  Fill a small pot with water and bring to a boil.  Add your one piece lid, or the cap part (with rubber seal) of your two piece lid and boil for 5 minutes.  Turn off heat and leave the lids in the hot water until you are ready to use them.  This sterilizes the lid and softens the rubber which helps the seal.

After 15 minutes, add the mint to the jam.  Continue to cook the jam, stirring regularly, for another 15 minutes.  At this point, turn off the heat, remove the mint, and discard.  Take one of the spoons you have in the freezer.  Fill it with jam and return it to the freezer for five minutes.  If the jam wrinkles slightly when you push it with your finger, it is ready.  If not, cook it for an additional 5 minutes and test again; repeating as necessary.

Once the jam has gelled to your liking, remove from heat.

Using a wide mouth funnel placed in the jar and a ladle, spoon the jam into the jars, leaving a 1/2″ / 1.5 cm space at the top.  Repeat until all of the jars are full.  Using a damp paper towel, wipe the rim of the jar so there is no jam residue left.  Place the hot lid on the jar, and, using a towel to hold the hot jar so you don’t burn your hand, tighten the lid finger-tight (don’t over tighten; the best way to ensure that you don’t is to use your thumb and first to fingers to tighten the lid, which means you won’t have enough finger strength to push it too far.)

Wash the big jam pot.  Put a dish towel in the bottom and place the jars on top.  Fill with water to cover the jar by at least 1″/ 2,5 cm.  Put the lid on and bring the pot to a boil.  Once boiling, set the timer for 15 minutes.  When the timer stops, turn off the heat and let the jars rest for 5 minutes.  Remove the jars from hot water and set on a dish cloth on the countertop, right side up, to cool completely.  Check to make sure the lids have sealed:  the top dome of the lid should be pulled in tightly and shouldn’t move when you press it with your finger.  Sometimes you’ll hear a ping as the jars cool and the lid seals, but not always.  If the lids are sealed, label the jars and store them in a cool, dark place for up to one year.  If your jar doesn’t seal, put it in the fridge and use it within one month. 

Makes 1 liter / 1 quart of jam

Filed Under: Uncategorized

Stone fruit jam Part 1: Plum Licorice Jam

August 1, 2014 by aplough

Plum Licorice Jam
If you are looking for the best time of the year to buy stone fruit, the answer is:  right now.  Even way up here in the cold, dark north, we are having what feels like a glorious eternal summer, and farmer’s market stands and supermarkets alike are filled to the brim with stone fruits.  In Finland, nearly all of it is imported from somewhere south:  Spain, Italy, Hungary, but the quality and prices have been really good.  Last week I bought 8 kilos of plums and 9 kilos of nectarines.  I was still dreaming of the markets in Sicily where these beauties were selling for €0,65 per kilo, but then again, the local price at my neighborhood store of €0,99 wasn’t so bad either.  So I tracked down the fruits and veggies guy and asked him if I could buy a few boxes.  Apparently, this isn’t a very common request, because it took him a while of running around the store, amiably asking his colleagues how to make it happen, and then leaving the cashier with a long explanation of how to ring me up.
Beautiful plums at the Ballaro Market in Palermo, Sicily

We brought about half of these gems to the cabin to share with family over the weekend, and it was clear they weren’t used to seeing stone fruits in such large quantities either.  While Finns gather 8-liter pails of bilberries and lingonberries; and fill their containers with wild raspberries and homegrown currants, they don’t tend to use stone fruits for “putting up” as we say in the US.

It was one of those moments where I realized that I was operating on an autopilot response from old habits:  remembering the trips to Eastern Washington with my parents when we’d buy huge boxes of the fruits growing in the hills around Lake Chelan:  apricots, peaches, Bing Cherries, Rainier cherries, nectarines, pears, apples, I’d happily wandered home to my Helsinki apartment with heaping boxes of fruit, with no qualms whatsoever about the large quantity.  In fact, I was delighted with the opportunity.

I still love the whole process of gathering and canning fruit.  It’s one of my favorite things to do during the summer months, when nature’s bounty overflows it’s limits and tumbles in a colorful array onto my tables and countertops.  My creative juices really start to flow as soon as I cut into the first piece of fruit, and I had no problem thinking of way to effectively dispatch 17 kilos of fine-looking edibles.

sealed and labeled for storage

If you are canning anything, the first thing you need to do is make sure you have clean jars.  2 kilos / 4.5 pounds of fruit makes around 1 liter / 1 quart of jam, with a bit of overflow – meaning you may can the lion’s share for later, and have a bit in the fridge to enjoy immediately on toast or with your morning oatmeal.  You will want  four or five 2,5 dl jars / pint jars for each of these jams, plus lids.

In Finland, where finding the two piece lid is impossible, I typically by Quattro Stagioni jars with lids.  A lot of the local grocery stores:  K-markets, Prisma, etc carry these, along with spare lids, during the summer season.  You can also find them in Stockmann, but expect to pay a higher price.  In the US, the 2-piece lids and jars are available everywhere including grocery stores and hardware stores, so it’ll be no problem.  In Germany and the UK jars tend to be readily available in my experience; I’d love to hear how it is in the rest of the world!

White peaches, sweet and juicy, at Ballaro Market in Palermo, Sicily

Also, I don’t use pectin if I can help it as I think it tends to make jam a bit gluey, and because most fruits have sufficient pectin by themselves.  I also have reduced the amount of sugar typically used in jams, as I like the fruit flavor to be readily apparent with a slightly tart edge if possible.

This Plum Licorice Jam is really interesting:  the licorice flavor isn’t separately distinct from the plum; rather it deepens the flavor of the plum with a lingering licorice note in the background.  It’s excellent over oatmeal or with yogurt, and we enjoyed it over freshly fried lettus (Finnish crepes), make over the outdoor campfire and then slathered with a generous spoonful of this jam followed by a handful of blueberries.  Happy summer moments.

Plum-Licorice Jam & Nectarine Mint Jam


Plum-Licorice Jam

2 kg / 4,5 pounds of Italian plums, pit removed and quartered
660 g / 3 cups of granulated sugar
2 tablespoons fresh lemon juice
4 star anise / tähti anis
2 teaspoons licorice extract/essence (if you can’t find it, add 2 additional stare anise)

In a large stockpot, combine the plums, sugar, lemon juice, and star anise.  Stir well to combine; cover; and allow the fruit to macerate for 1 hour.

Set the pot over high heat and bring to a rolling boil.  Reduce the temperature to medium-high, stir; and set the timer for 15 minutes, allowing the fruit to bubble undisturbed.  Meanwhile, place five teaspoons on a plate in the freezer.  You’ll use these later for testing whether or not the jam is ready.

While the jam cooks, prepare your jars:  Wash in hot, soapy water and then fill with hot water and set aside.  Fill a small pot with water and bring to a boil.  Add your one piece lid, or the cap part (with rubber seal) of your two piece lid and boil for 5 minutes.  Turn off heat and leave the lids in the hot water until you are ready to use them.  This sterilizes the lid and softens the rubber which helps the seal.

After 15 minutes, remove the star anise from the jam.  Continue to cook the jam, stirring regularly, for another 10 minutes.  At this point, turn off the heat and take one of the spoons you have in the freezer.  Fill it with jam and return it to the freezer for five minutes.  If the jam wrinkles slightly when you push it with your finger, it is ready.  If not, cook it for an additional 5 minutes and test again; repeating as necessary.

Once the jam has gelled to your liking, turn on the heat again and add the licorice extract, bring the jam to a boil and stir for 30 sections.  Remove from heat.

Using a wide mouth funnel placed in the jar and a ladle, spoon the jam into the jars, leaving a 1/2″ / 1.5 cm space at the top.  Repeat until all of the jars are full.  Using a damp paper towel, wipe the rim of the jar so there is no jam residue left.  Place the hot lid on the jar, and, using a towel to hold the hot jar so you don’t burn your hand, tighten the lid finger-tight (don’t over tighten; the best way to ensure that you don’t is to use your thumb and first to fingers to tighten the lid, which means you won’t have enough finger strength to push it too far.)

Wash the big jam pot.  Put a dish towel in the bottom and place the jars on top.  Fill with water to cover the jar by at least 1″/ 2,5 cm.  Put the lid on and bring the pot to a boil.  Once boiling, set the timer for 15 minutes.  When the timer stops, turn off the heat and let the jars rest for 5 minutes.  Remove the jars from hot water and set on a dish cloth on the countertop, right side up, to cool completely.  Check to make sure the lids have sealed:  the top dome of the lid should be pulled in tightly and shouldn’t move when you press it with your finger.  Sometimes you’ll hear a ping as the jars cool and the lid seals, but not always.  If the lids are sealed, label the jars and store them in a cool, dark place for up to one year.  If your jar doesn’t seal, put it in the fridge and use it within one month.

Makes 1 liter / 1 quart of jam

Filed Under: Uncategorized

Ice Cream Cake

July 31, 2014 by aplough

Licorice Vanilla Biscotti Ice Cream Cake with Lingonberries 

You know people, it’s hot over here in Finland.  Really hot.  Hottest summer in 50 years, some Finns say.  It’s hard to get excited about turning the oven on when it’s already 30°C inside and out, so what’s a person to do when you want a sweet treat to beat the heat?  (Ok, I really wasn’t attempting to wax poetic there, but, well, heat does funny things to my head).

A berry garnish adds a nice, tart touch to a very sweet cake.

Not that I am complaining about it being hot, mind you. After one long cold February in 2010, I decided that I would embrace the heat whenever I can and not complain on the hot summer days, because I do plenty of grumping about the cold, long winters here.  In early July, with temperatures barely tipping above 12°C, I  headed south to Sicily looking for the sun and the deep, blue, warm sea…and as much great food as I could eat.  I was delighted to arrive in Palermo to clear, sunny skies and a searing 29°C+ temperatures, happy to escape the Spring that wouldn’t end. Two days later, we got a message from Finland “It’s 27°C here…”  And so it seems, summer arrived with a roar, and has stayed around for a nice long while.  I’m loving it.  But…back to the beginning…it’s hot.  The perfect excuse for a no-cook, easy-to-make, very pretty treat.

Ice cream cakes have a million variations depending on your taste preferences.  I made mine using cookies and berries as a layer and two kinds of ice cream, but you can use cake as a replacement to the cookie layer, or chopped nuts would be great as well.  I think chopped, smoked almonds would be great with a caramel cranberry ice cream, for example, and you could use stone fruit, or different berries, or a berry sauce, or a chocolate sauce between the layers…but now I am getting ahead of myself.  Back to the cake.

Packing it into a plastic container with a lid is the easiest way to store it – and transport it if needed.

I had made a big batch of biscotti in a crazy moment in the middle of a hot day as I was dreaming of the good life and pastries down in Sicily. I had created a gluten-free version, and, forgetting for a moment that gluten-free flours have very different behaviors than their glutenous friends, attempted to lift one warm biscotti log off the pan, only to have it crumble in my hands.  So I was left with two logs which I later sliced and rebaked for a lovely jar full of almond aniseed gluten-free biscotti; and a big bowl of biscotti crumbs.  At this point, I was hatching up ways to use the crumbs, when I remembered Ice Cream Cake.  Here is the version I made, but keep in mind, you don’t need to wait until you have a pile of cookie crumbs on your hands.  Make crumbs of any cookie in your cupboard, or chop up some nuts and use those.  Here is a rough recipe to get you started.  It’s the easiest thing to make in a short time, and looks and tastes fantastic.

Dolce!  

Ice Cream Cake

1 1/2 cups / 3 dl cookie crumbs
2 quarts / liters of your favorite ice cream(s) – I used licorice and vanilla
Berries, optional; I used frozen lingonberries because that is what I had

Use a square plastic container with a lid; or alternatively a square baking pan.  Cover the bottom with cookie crumbs.  If using berries, sprinkle some across the cookie layer.  Cut the ice cream into slices that are about the thickness of your thumb and layer this tightly across the cookie crumbs.  Repeat the layers again:  Cookie, Fruit, Ice Cream, until your container is full, ending with a generous sprinkling of cookie crumbs.  Cover the container tightly with a lid or cover tightly with foil and freeze for as long as you can stand to wait, but preferably at least one hour. Remove from the freezer and let it sit out for 5 to 10 minutes so it softens slightly (not necessary, but nice). Cut into squares and serve, garnishing with more berries if you have them.

Serves 12 – 16.

Filed Under: Uncategorized

  • « Previous Page
  • 1
  • …
  • 44
  • 45
  • 46
  • 47
  • 48
  • …
  • 79
  • Next Page »

Find me on social media

  • Bloglovin
  • Facebook
  • Instagram
  • Pinterest
  • Twitter

Looking for something?

Eat Simply, Eat Well 's gallery on Punk Domestics
  • Bloglovin
  • Facebook
  • Instagram
  • Pinterest
  • Twitter

Copyright © 2025 · Foodie Pro Theme by Shay Bocks · Built on the Genesis Framework · Powered by WordPress